ChevyParts
My Garage
My Account
Cart
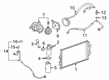
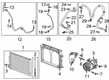
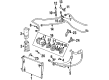
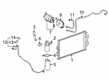
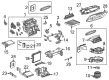
OEM GMC Savana 2500 A/C Compressor Cut-Out Switches
HVAC Cut-Out Switch- Select Vehicle by Model
- Select Vehicle by VIN
Select Vehicle by Model
orMake
Model
Year
Select Vehicle by VIN
For the most accurate results, select vehicle by your VIN (Vehicle Identification Number).
6 A/C Compressor Cut-Out Switches found


GMC Savana 2500 A/C Switch Part Number: 15144494
$38.05 MSRP: $78.17You Save: $40.12 (52%)Ships in 1-2 Business Days


GMC Savana 2500 Pressure Relief Valve, Green Line Part Number: 13587668
$49.45 MSRP: $101.61You Save: $52.16 (52%)Ships in 1-3 Business Days


GMC Savana 2500 High Pressure Cut-Off Switch Part Number: 89019183
$48.11 MSRP: $98.86You Save: $50.75 (52%)Ships in 1 Business Day
GMC Savana 2500 A/C Switch Part Number: 15035084
$46.28 MSRP: $86.92You Save: $40.64 (47%)Ships in 1-2 Business Days

GMC Savana 2500 Pressure Cycling Switch Part Number: 52473139
$27.39 MSRP: $51.44You Save: $24.05 (47%)Ships in 1 Business Day
GMC Savana 2500 Multi-Purpose Pressure Sensor Part Number: 13511536
$7.86 MSRP: $14.76You Save: $6.90 (47%)Ships in 1-2 Business Days
GMC Savana 2500 A/C Compressor Cut-Out Switches
Want to cut long-term maintenance and repair costs? Choose OEM A/C Compressor Cut-Out Switches. Those parts deliver top durability you can trust. On our site, you'll find a huge catalog of genuine GMC Savana 2500 parts. Prices are unbeatable, so you can keep more in your pocket. Every OEM GMC Savana 2500 A/C Compressor Cut-Out Switches includes a manufacturer's warranty. You can also get an easy return policy that keeps buying risk free. Fast delivery, get your car on the road quickly. It's simple to search, compare, and order. Stop guessing about quality or fit. Order today and save with parts that last.
GMC Savana 2500 A/C Compressor Cut-Out Switches Parts Questions & Experts Answers
- Q: How to Replace A/C Compressor Cut-Out Switches for High Pressure Switch on GMC Savana 2500?A:The process to replace the a/c high pressure switch begins with recovering refrigerant from the system while you clean the switch area followed by snap ring removal. Remove the snap ring of the a/c high pressure switch by disconnecting its electrical connector and using j 5403 (Snap Ring Pliers). The first step involves using the j 9553-01 (O-Ring Remover) to detach the old o-ring seal from the switch cavity after taking out the a/c high pressure switch from the compressor. Check the switch cavity along with the o-ring groove for foreign material then clean them. A new o-ring needs lubrication using refrigerant oil with 525 viscosity before insertion into the switch cavity groove. Apply oil to both the control switch housing and the same oil onto the cavity before placing the switch inside until it reaches the bottom end. Use the j 5403 (Snap Ring Pliers) to reinstall the snap ring while placing the high point of its curved sides next to the switch housing and ensuring proper insertion into the retaining groove. The j 39400-a (Halogen Leak Detector) should be used for conducting a system leak test after a/c system evacuation and recharge.

Related GMC Savana 2500 Parts
 GMC Savana 2500 A/C Clutch
 GMC Savana 2500 A/C Condenser
 GMC Savana 2500 A/C Hose
 GMC Savana 2500 A/C Idler Pulley
 GMC Savana 2500 A/C Orifice Tube
 GMC Savana 2500 A/C System Valve Core
 GMC Savana 2500 Air Temperature Sensor
 GMC Savana 2500 Ambient Temperature Sensor
 GMC Savana 2500 Blend Door Actuator
 GMC Savana 2500 Blower Motor
 GMC Savana 2500 Blower Motor Resistor
 GMC Savana 2500 Cabin Air Filter