Popular OEM Chevrolet Silverado 3500 Classic Parts
- Body & Hardware Parts View More >
- Steering Parts View More >
- Electrical Parts View More >
- Air & Fuel Delivery Parts View More >
- Charging & Starting Parts View More >
- Engine Parts View More >
- Belts & Cooling Parts View More >
- Suspension Parts View More >
- Driveline & Axles Parts View More >
- Emission Control & Exhaust Parts View More >
- Transmission Parts View More >
- Brakes Parts View More >
Why Buy Genuine Chevrolet Silverado 3500 Classic Parts From ChevyPartsGiant.com
Looking for real Chevrolet Silverado 3500 Classic parts? ChevyPartsGiant.com may be a better choice to find genuine parts at wallet-friendly prices. We sell only OEM Chevrolet Silverado 3500 Classic parts, ensuring perfect fit, reliability, and long-term performance. With our website, you can easily get access to the same parts found at local Chevrolet stores. All components are produced by Chevrolet and are exclusively fitted on Chevrolet Silverado 3500 Classic automobiles. By shopping at our store, you can enjoy the quality of the Chevrolet factory without the high prices of brick-and-mortar facilities. We achieve this because we are an online store operating at lower costs, which we pass on to you. We also have a user-friendly platform where you can find and order genuine Chevrolet Silverado 3500 Classic parts swiftly. We are here to make your process of restoring a Chevrolet Silverado 3500 Classic or dealing with simple repairs quick and inexpensive. We also make it easy to obtain Chevrolet Silverado 3500 Classic parts at competitive shipping prices and a team of knowledgeable staff ready to take your order. Choose ChevyPartsGiant.com to save time and money, as well as keep your Chevrolet Silverado 3500 Classic in the good condition.
GM launched the Chevrolet Silverado 3500 Classic under the GMT800 series designation with advanced design and performance features since the initial production run. Launched in 2007 the Chevrolet Silverado 3500 Classic came with a Duramax V8 engine that developed 365 horsepower from its 6.6L turbocharged system suitable for intense work settings. A powerful automatic transmission from the Chevrolet Silverado 3500 Classic offers seamless power transmission while maintaining driving efficiency in two-wheel or four-wheel configurations. Although not redesigned, the Chevrolet Silverado 3500 Classic retained the durable GMT800 body and chassis design, known for its rugged utility and proven aerodynamics. The model provides multiple cabin setup options which extend from two-door standard to four-door extended and crew cab to serve different customer preferences. Inside the vehicle passengers can enjoy comfortable features that include premium features including soft leather upholstery and Bose sound system and automatic climate control. Safety features such as StabiliTrak stability control and side-impact airbags were available on select trims. Genuine OEM parts specifically intended for the Chevrolet Silverado 3500 Classic remain available in the market to ensure quality and superior compatibility because they meet the same manufacturing standards of original components. The Chevrolet Silverado 3500 Classic's dedication to quality production leads to reliable performance which makes it reliable for heavy-duty uses.
Chevrolet Silverado 3500 Classic issues group into fuel delivery and cold start, transmission control, and transfer case integrity. On the Chevrolet Silverado 3500 Classic, a worn fuel pump cuts pressure and power. Check rail pressure, pump relay command check voltage drop. Replace the fuel pump module and inspect lines for restriction. Failure of glow plugs during cold start could happen on the Chevrolet Silverado 3500 Classic. Silverado 3500 Classic issues with transmission involve slipping and delayed engagement. Service fluid and adaptives, repair the transmission control module and solenoids as needed. In the driveline, the Chevrolet Silverado 3500 Classic can suffer transfer case pump rub. An internal pump wears the magnesium case and leaks ATF. Install case saver or repack rear housing, refill, and reseal. Verify shifter and encoder operation on the Silverado 3500 Classic after repair. These systems support power delivery, cold starting, and four wheel drive continuity. Fueling first, electrical starts, transmission, and transfer case service in that order.
Chevrolet Silverado 3500 Classic Parts Questions & Answers
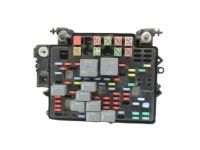
- Q: How to replace the underhood fuse box on Chevrolet Silverado 3500 Classic?A:Starting the replacement of underhood electrical center or junction block involves disconnecting the negative Battery Cable while removing the left fender upper brace. Clear the tabs by lifting upwards the electrical center brace cover assembly and after removal of all fuses and relays proceed with the electrical center replacement. Perform these steps to rotate the electrical center on the studs located at while pushing on the tab and unfastening the bolt for all the connectors. Pushing the tabs lets you raise the electrical center beyond the housing as you disconnect all electrical connectors from the electrical center block. The replacement of the engine electrical center bracket requires bolt removal from four points to extract the assembly from the fender area. The front fender requires attachment of the engine electrical center bracket assembly followed by securing the 4 retaining bolts to 9 n.m (80 lb in). Insert the electrical center block stubs into their designated slots before securing them by the tabs and attach the wire connectors to the lower part of the electrical center block using bolts which need tightening to 9 n.m (80 lb in). The electrical center block should be placed into position until the tabs engage for lock. Install the lower part of the cover after which you must replace all fuses and relays with the cover removed according to the Fuse location information before installing the cover. Affix the fender upper brace to its position while torquing the 4 bolts to 25 n.m (18 lb ft). After reconnecting the negative cable begin the engine and check all system functionality.
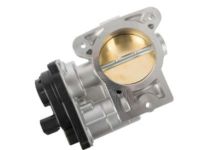
- Q: How to replace the intake manifold on Chevrolet Silverado 3500 Classic?A:If to replace the Intake Manifold, one must remove the Throttle Body and fuel injectors. The electrical connectors of the manifold absolute pressure (MAP) sensor and Knock Sensor should be disconnected, and then the Knock Sensor harness connector removed from the Intake Manifold and laid back. If the vehicle has vacuum assisted brakes, unbolt the vacuum brake booster hose from the back of the Intake Manifold and the positive crankcase ventilation (PCV) hose. Next, do an extraction of the MAP Sensor and the evaporative emission (EVAP) purge solenoid vent tube which is taken off the solenoid and vapor pipe. Remove the evap purge solenoid bolt, solenoid, and isolator from the Intake Manifold, and then loosen and remove the Intake Manifold with the gaskets. The old gaskets should be discarded. If necessary, clean and check the Intake Manifold. For installation, install new Intake Manifold gaskets on the Intake Manifold, then install the manifold. While on the head, apply a 5 mm thick band of threadlocker to the bolt threads of the Intake Manifold bolts and tighten in the same sequence to 5 nm (44 inch lbs.) for the first and a final pass to 10 nm (89 inch lbs.). Mount the evap purge solenoid , isolator as well as bolt the isolator to the Intake Manifold using a bolt tightened to 10nm (89 inch lbs). Replace the evap purge solenoid vent tube attached back to the solenoid and vapor pipe. Lightly oil the MAP Sensor seal with clean engine oil before mounting the MAP Sensor onto Intake Manifold. Install the pcv hose back onto the rear of the Intake Manifold, as well as the vacuum brake booster hose if necessary. Route the electrical harness to its desired location over the engine and place the Knock Sensor harness electrical connector to the Intake Manifold, map sensor and Knock Sensor connectors. Last, we install the fuel injectors and Throttle Body.
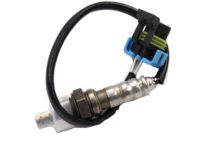
- Q: How to replace the Heated Oxygen Sensor (HO2S) for Bank 2 Sensor 2 on Chevrolet Silverado 3500 Classic?A:The first step to replace the heated oxygen sensor (HO2S) for Bank 2 Sensor 2 consists of raising and supporting the vehicle correctly. Separate the connector position assurance (CPA) retainer while taking off the HO2S connector clip from the frame. Vehicle owners must disconnect the HO2S electrical connector of 4.8L and 5.3L engines or of 6.0L engines separately. Remove the HO2S. The installation of new or reused heated oxygen sensors requires anti-seize compound GM P/N 12377953 on threads to help sensor removal with its liquid graphite and glass beads composition. Tighten the HO2S with 31 lb ft (42 N.m). The electrical connection for HO2S should be connected to all engines but first to the 6.0L engine followed by the 4.8L and 5.3L engines. The frame procedure requires reattaching the HO2S connector clip and disconnecting the CPA retainer along with vehicle lowering.
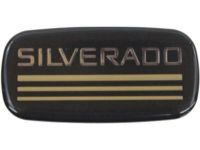
- Q: How to replace the pickup cab emblem/nameplate on Chevrolet Silverado 3500 Classic?A:Set the job by combining a Heat Gun (J 25070) and 3M(TM) scotch brite molding adhesive remover disk (3M(TM) P/N 07501). Put tape down before starting to shield and position the emblem spot. Press the Heat Gun (J 25070) 152 mm (6 in) from the surface while moving the tool in circles to warm up the emblem/nameplate for 30 seconds. Use a plastic tool to pull off the emblem/nameplate carefully and cleanse both its pickup cab panel surface and back with 3M(TM) adhesive remover disk (3M(TM) P/N 07501). VMP naptha should be used to clean the pickup cab surface. Mark the emblem/nameplate position on the surface and put tape based on these measured areas. Heat the pickup cab again using the gun to reach 21°C (70°F) without coming into contact with the emblem/adhesive side. Put the front end of the emblem/nameplate without backing onto the pickup cab panel before taking the backing off continuously. Use your hands to roll the emblem/nameplate over its surface then check if it sticks properly before removing the tape from the surrounding area.


