Popular OEM Chevrolet Silverado 3500 Parts
- Body & Hardware Parts View More >
- Steering Parts View More >
- Electrical Parts View More >
- Air & Fuel Delivery Parts View More >
- Charging & Starting Parts View More >
- Engine Parts View More >
- Belts & Cooling Parts View More >
- Suspension Parts View More >
- Driveline & Axles Parts View More >
- Emission Control & Exhaust Parts View More >
- Transmission Parts View More >
- Brakes Parts View More >
Why Buy Genuine Chevrolet Silverado 3500 Parts From ChevyPartsGiant.com
Looking for real Chevrolet Silverado 3500 parts? ChevyPartsGiant.com may be a better choice to find genuine parts at wallet-friendly prices. We sell only OEM Chevrolet Silverado 3500 parts, ensuring perfect fit, reliability, and long-term performance. With our website, you can easily get access to the same parts found at local Chevrolet stores. All components are produced by Chevrolet and are exclusively fitted on Chevrolet Silverado 3500 automobiles. By shopping at our store, you can enjoy the quality of the Chevrolet factory without the high prices of brick-and-mortar facilities. We achieve this because we are an online store operating at lower costs, which we pass on to you. We also have a user-friendly platform where you can find and order genuine Chevrolet Silverado 3500 parts swiftly. We are here to make your process of restoring a Chevrolet Silverado 3500 or dealing with simple repairs quick and inexpensive. We also make it easy to obtain Chevrolet Silverado 3500 parts at competitive shipping prices and a team of knowledgeable staff ready to take your order. Choose ChevyPartsGiant.com to save time and money, as well as keep your Chevrolet Silverado 3500 in the good condition.
The Chevrolet Silverado 3500 has experienced substantial modifications since its introduction to stay competitive in the heavy-duty truck market. The history of Chevrolet Silverado 3500 commencement started in its inaugural generation through a hydroformed chassis that provided both durability and weight efficiency for heavy-duty applications such as towing and heavy transport operations. Three engine variants produced for the Chevrolet Silverado 3500 included the 6.0L Vortec V8 with 300 hp along with the 8.1L gasoline V8 and 6.6L Duramax engine which escalated to 360 hp by 2006. When the 2007 Chevrolet Silverado 3500 appeared on production lines the base V8 engine delivered 353 hp whereas the optional Duramax engine reached 365 hp with 660 lb-ft torque ratings. In the 2011 Chevrolet Silverado model there was a diesel engine update that produced 397 horsepower with 765 lb-ft of torque. The Silverado 3500 equipped with the Duramax engine uses the Allison 1000 automatic transmission to support a maximum towing capacity of up to 16,700 lb based on specific configuration choices. The third generation launch in 2015 incorporated enhanced power systems although it added better interior room and comfort choices to the platform. A vehicle that uses original equipment manufacturer (OEM) Chevrolet Silverado 3500 parts guarantees both reliable performance and safety consistency through the years.
Chevrolet Silverado 3500 classifies problems according to braking, fuel measurement, and EVAP sealing. The Silverado 3500 can roll on a grade or lose holding on braking. The parking brake shoes in the rear rotors with worn shoe increase bite and cable power. Install parking brake shoes, swab hardware, and set the clearances, and make sure that the cable tensions on both cables are equal. Parking brake cables are freely movable ensure good pedal feel and appropriate functioning of parking brakes in Silverado 3500. In fuel gauge reading, the Silverado 3500 can have a roving gauge and a low range. A defective fueling level sensor in the module provides inaccurate readings, particularly in high mileage trucks. Install a new fuel pump module, seal connectors, and verify readings following a drive cycle. The Silverado 3500 has the potential to alarm after the refueling process in the EVAP sealing. A loose or worn gas cap permits vapor leaks and turns the light on. Change the gas cap, clear codes, and perform monitors to completion. Read Chevrolet test charts, scan data, pressure checks, and torque values. Check outcomes in Chevrolet records and have regular inspections. The following measures make the Chevrolet Silverado 3500 controllable, stable, and secure every day.
Chevrolet Silverado 3500 Parts and Q&A
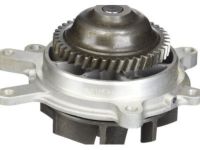
- Q: How to replace the water pump on 4.8L, 5.3L, and 6.0L engines on Chevrolet Silverado 3500?A:To change the radiator, collect the required set of tools and take away the air cleaner assembly and the coolant recovery reservoir. Unscrew fan shroud bolts, take off cooler lines, detach radiator inlet and outlet heater hoses. Check and change parts where necessary. Install new radiator, connect hoses and reconnect all components.
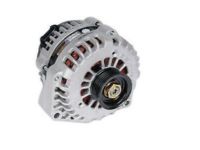
- Q: How to replace the alternator on Chevrolet Silverado 3500?A:In order to change the generator, detach the negative battery cable and take out the accessory drive belt. Disconnect the electric connector of the generator and detach the generator cable. Unscrew the bolts of the generator and strip out the generator. Installation Re-install the generator, fasten the cables and re-connect the battery cable.
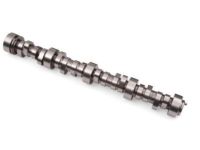
- Q: How to replace the camshaft on Chevrolet Silverado 3500?A:To replace the camshaft, open the bonnet and take off the hinge bolts. Then remove the radiator support, front cover, valve lifters and cam sensor. Adjust timing marks then take out camshaft sprocket bolts. Carefully remove the camshaft, clean if required and lubricate before re-installing. Tighten all bolts as specified and reinstall parts.


