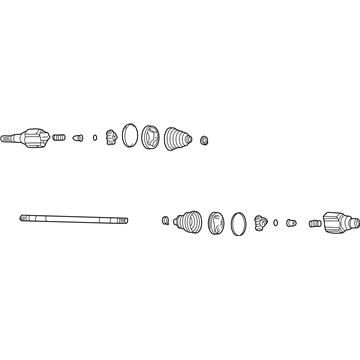
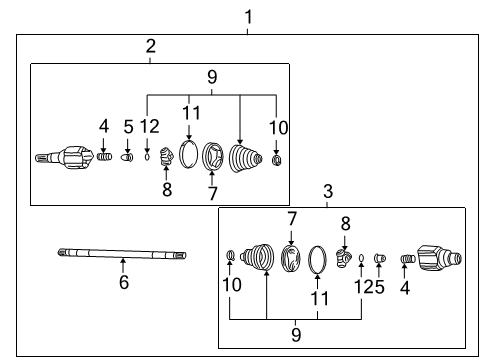
Make sure this part fits

GM 88967242
Axle Assembly

2001-2008 GM

Customer Questions & Expert Answers (23)
GM 88967242 Axle Assembly
  • Part Description
    Shaft Kit, Rear Axle Drive; CV Axle Assembly; Axle Shaft; CV Joint; CV Axle
  • Position
    Rear
  • Replaces
    10424907, 88891077
  • Manufacturer
    General Motors
  • Manufacturer's Notes
    This part is discontinued.
Make sure this part fits
  • Related Parts
  • Product Specifications
  • Vehicle Fitment
  • Customer Questions & Expert Answers
  • Product Specifications

    BrandGenuine GM
    Manufacturer Part Number88967242
    Part DescriptionShaft Kit, Rear Axle Drive; CV Axle Assembly; Axle Shaft; CV Joint; CV Axle
    Other NamesInner CV Joint; Outer CV Joint; Joint Kit, Rear Axle Universal Joint.
    Item Dimensions35.0 x 6.5 x 6.0 inches
    Item Weight16.50 Pounds
    PositionRear
    ConditionNew
    Fitment TypeDirect Replacement
    Replaces10424907, 88891077
    ManufacturerGeneral Motors
    SKU88967242
    WarrantyThis genuine GM part is guaranteed by GM's factory warranty.
    Shipping & ReturnShipping Policy Return Policy
    Warning: California's Proposition 65
  • Vehicle Fitment

    Year Make Model Trim Engine
    2002-2006 Buick RendezvousCX, CX Plus, CXL, CXL Plus, Ultra6 Cyl 3.4 L GAS, 6 Cyl 3.5 L GAS, 6 Cyl 3.6 L GAS
    2005-2007 Buick TerrazaCX, CXL6 Cyl 3.5 L GAS, 6 Cyl 3.9 L FLEX, 6 Cyl 3.9 L GAS
    2005-2008 Chevrolet UplanderBase, LS, LT6 Cyl 3.5 L GAS, 6 Cyl 3.9 L FLEX, 6 Cyl 3.9 L GAS
    2002-2005 Chevrolet VentureBase, LS, LT, Plus, Value, Warner Bros.6 Cyl 3.4 L GAS
    2002-2004 Oldsmobile SilhouetteGL, GLS, Premiere6 Cyl 3.4 L GAS
    2001-2005 Pontiac AztekBase, GT, Rally6 Cyl 3.4 L GAS
    2002-2006 Pontiac MontanaBase, SV66 Cyl 3.4 L GAS, 6 Cyl 3.5 L GAS, 6 Cyl 3.9 L GAS
    2005-2007 Saturn Relay1, 2, 36 Cyl 3.5 L GAS, 6 Cyl 3.9 L FLEX, 6 Cyl 3.9 L GAS
  • Customer Questions & Expert Answers

    Q:
    Is 88967242 compatible with my car? Posted by ChevyPartsGiant Specialist
    A:
    Please Select Your Vehicle model to see if part number 88967242 is suitable before ordering.
    Posted by ChevyPartsGiant Specialist
    Q:
    What tools are required to service and repair the CV Joint Boot for the front wheel drive shaft outer joint and seal replacement (3.5L LX9) on Buick Rendezvous? Posted by Customer
    A:
    In order to service and repair constant velocity joint boot i.e. Front wheel drive shaft outer joint and seal replacement (3.5L LX9), one shall require the following tools, among others, for the repair: j 41048 drive axle swage ring clamp, j 8059 snap ring pliers as well as j 35910 drive axle seal clamp pliers. Start by cutting off the large seal retaining clamp from the CV Joint with the help of a side cutter and throwing it away. Cut down this swage ring for removal using a hand grinder. Divide the halfshaft outboard seal from the CV Joint outer and slide it out to the halfshaft bar. Clean the CV Joint inner race and spread the ears on the race retaining ring with j 8059 before taking off CV Joint assembly from the halfshaft bar. Do away with the old outboard seal, then employ a brass drift to carefully knock and turn the CV Joint cage to get rid of the chrome alloy balls, until all six are out. Thoroughly clean the inner & outer race assemblies, CV Joint cage and the chrome alloy balls using clean extra solvent that will remove the old grease and contaminants, after which all parts are dried and carefully examined for signs of unusual wear, cracks or damage, having replaced any bad parts. Clean halfshaft bar using a wire brush at rust inside seal mounting. For assembly, install the new swage ring on the neck of the outboard seal but don't swage and slide the outboard seal on to the halfshaft bar with the seal groove and position it in the seal groove. Swage the ring with j 41048 by aligning and securing up the assembly, do not cut through the wheel drive shaft inboard seal. Insert and tighten the bolts, interspersing until it is snug, and inspect the swaged ring for deformities and re-swage as needed. Spread a light grease from the service kit on the ball grooves in the inner and outer races without failing to place the cage into the inner race, aligning it with the outer race. Put in the chrome balls, packing the CV Joint with grease, and adjusting the outboard seal into the proper shape. Lastly, slide the large diameter of the outboard seal over the CV Joint outer race with the large seal retaining clamp in place and adjust the gap dimension on the clamp ear with the use of j 35910 to the required measurement by crimping clamp using j35910 to the specified torque.
    Posted by ChevyPartsGiant Specialist
    Q:
    How to replace the rear wheel axle shaft on Buick Rendezvous? Posted by Customer
    A:
    The process of replacing a rear wheel drive shaft begins by activating the parking brake and then elevating and supporting the motor vehicle. The tire assembly needs replacement while discarding the wheel drive shaft nut as you must use a new shaft nut. First deactivate the parking brake and then take off the Brake Caliper Bracket. Proceed to remove the nut holding the park brake cable routing bracket and the bolt that retains the rear Tie Rod End from the rear suspension knuckle yet keep the Tie Rod End jam nut tight. Separate the suspension knuckle bolts which fasten the park brake cable bracket and cut the wheel speed sensor electrical connector free. Mount the Wheel Hub remover (J 42129) to the Wheel Hub while fastening it with wheel nuts before starting to disconnect the wheel drive shaft yet retaining the Wheel Hub and bearing. Start by dismantling the upper Control Arm bolt and nut which attaches to the suspension knuckle before proceeding with total wheel drive shaft disintegration. Place the suspension knuckle behind the vehicle while you remove the Wheel Hub remover (J 42129). First support the wheel drive shaft before completing its removal. Then install together Axle Shaft puller (J 33008-A), Axle Shaft remover extension (J 29794), and slide hammer (J 2619-O1). It is necessary to install the Axle Shaft puller (J 33008-A) onto the rear beveled surface of the wheel drive shaft inner joint housing followed by using the assembled tools to disengage the wheel drive shaft from the rear axle Differential before wheel drive shaft removal from the vehicle. When changing the rear wheel drive shaft it becomes necessary to replace the Differential output shaft oil seal because this part cannot be reused during this process. Support the wheel drive shaft until installation completion before you guide it onto the Differential output shaft while using light force for installation. The wheel drive shaft requires full seating position on the Differential output shaft retaining ring. After positioning the suspension knuckle near the wheel drive shaft establish proper alignment to the hub and bearing but keep it from reaching full seating before aligning it with the upper Control Arm. Tighten the bolt between upper Control Arm/suspension knuckle assembly which reaches 85 nm (63 ft. Lbs. Torque). After establishing the park brake cable bracket in its position the technician should attach the rear Tie Rod to the rear suspension knuckle before tightening the Tie Rod-to-knuckle bolt to 85 nm (63 ft. Lbs.). Install the Brake Caliper Bracket first before connecting the wheel speed sensor electrical connector and installing the park brake cable routing bracket and its nut and tightening it to 10 nm (89 inch lbs.). Set the park brake and install the new wheel drive shaft Spindle Nut slowly until it draws the wheel drive shaft spindle inside the Wheel Hub and bearing then fully tighten to 260 nm (192 ft. Lbs.). The tire and wheel assembly should be reinstalled then the vehicle needs to be lowered before releasing the park brake.
    Posted by ChevyPartsGiant Specialist
    Q:
    How to replace the front CV Joint outer joint and seal on Buick Terraza? Posted by Customer
    A:
    The tools required for front wheel drive shaft outer joint and seal replacement include drive axle swage ring clamp (J 41048), snap ring pliers (J 8059) and drive axle seal clamp pliers (J 35910). When replacing the front wheel drive shaft outer joint and seal use the following tools: drive axle swage ring clamp (J 41048), snap ring pliers (J 8059), and drive axle seal clamp pliers (J 35910). Start the repair by cutting the large seal retaining clamp from the CV Joint with a side cutter before getting rid of that piece. Cut through the swage ring using a hand grinder to accomplish removal. Pull the outer race away from the halfshaft bar by sliding the outboard seal separate from the CV Joint. Use snap ring pliers to open the race retaining ring's ears before cleaning grease off the CV Joint inner race. Separate the CV Joint assembly from the halfshaft bar and throw away its old outboard seal due to damage. A brass drift combined with a hammer allows you to angle the CV Joint cage while extracting each chrome alloy ball until all six are removed. Use cleaning solvent to eliminate all old grease and contaminants from inner and outer race assemblies, CV Joint cage, chrome alloy balls and then dry all components before inspecting for abnormal wear, cracks or damage and replacing defective items. A wire brush removes rust from the area where the seal mounts on the halfshaft bar. When assembling the unit position the outboard seal onto the halfshaft bar with its groove facing forward and install a new swage ring without deforming it on the seal's neck. After aligning the drive axle swage ring clamp position securely until the wheel drive shaft inboard seal remains intact. After bolt tightening alternate between them until bolts reach snugness then inspect the swaged ring for deformities while making additional swages if needed. After greasing the ball grooves of the races apply a thin layer before placing the inner race into the cage and setting it next to the outer race. Place the chrome balls into position while adding grease through the CV Joint area until the outboard seal maintains its correct profile. To finish the process you need to correct the clamp ear gap dimension with the drive axle seal clamp pliers matched against specified torque values.
    Posted by ChevyPartsGiant Specialist
    Q:
    How to replace the outer CV Boot and CV Joint on Chevrolet Uplander? Posted by Customer
    A:
    Begin wheel drive shaft outer joint and boot replacement by cutting the seal retaining clamp off the cv joint with a side cutter then discard. Cutting through the wheel drive shaft inboard boot will create damage to the sealing surface so avoid this practice. A hand grinder should cut the swage ring to allow its removal. Start by taking apart the outboard seal from the cv joint's outer race at its larger diameter then move the seal away from the joint following the halfshaft bar direction. Clean grease from the cv joint inner race face before opening the race retaining ring ears with j 8059 snap ring pliers (J 8059). Extract the halfshaft barcv joint assembly which leads to disposal of the existing outboard seal. To separate the cv joint balls place the brass drift tool against the cage and carefully move it to remove each chrome alloy component individually six times. Turn the cv joint cage and inner race at a 90-degree angle before lifting them out from the outer race. Use gravity to rotate the cage's inner race upward before cleaning all pieces fully with a cleaning solvent to eliminate all previous grease and debris. Examine the cv joint assembly for any signs of unusual wear followed by damage inspection. Replace any components with definite damage. Dry all parts first. A wire brush should be used to clean rust off the halfshaft bar near the seal mounting area. The rail should sit in a vise equipped with a protective towel during assembly. Use a new small eared clamp to fasten the outboard seal at its neck without collapsing it before placing the seal onto the halfshaft bar until it rests in its designated groove. Use a j 35910 drive axle seal clamp plier (J 35910) to tighten the small eared clamp while holding the torque wrench at 136 n.m (100 lb ft) and checking gap dimensions during tightening. Add light grease in the ball grooves of the inner and outer races from the service kit before placing the inner race into the cage with correct orientation. Position the cage and inner race inside the outer race and carefully add the chrome balls one by one until you reach six balls in place. Use grease to pack the cv joint then press it onto the halfshaft bar until the retaining ring properly settles. Examine the outboard seal to check for crumpling or elongation then adjust it manually if needed. Fit the outer race of the cv joint by sliding its large diameter along with the large seal retaining clamp until the seal lip rests in the groove properly. After sealing the clamp with a j 35910 torque of 174 n.m (130 lb ft) check the gap width on the ear before final tightening to reach 1.9 mm (5/64 in).
    Posted by ChevyPartsGiant Specialist
    Q:
    What are the final steps after replacing the front wheel drive shaft for the 2004 Buick Rendezvous? Posted by Customer
    A:
    Reinstall the stabilizer shaft link, connect the wheel speed sensor electrical connector, install the engine splash shield, the tire and wheel assembly, lower the vehicle, and inspect the transaxle fluid level.
    Posted by ChevyPartsGiant Specialist
    See expert answers on similar Axle Shaft
    Q:
    How should the large new seal retaining clamp be positioned for the 2005 Buick Terraza? Posted by Customer
    A:
    Position it on the inboard seal and slide the housing over the tripot joint spider assembly.
    Posted by ChevyPartsGiant Specialist
    See expert answers on similar CV Joint
    Q:
    What should you do after removing the large seal clamp for the 2004 Buick Rendezvous? Posted by Customer
    A:
    Separate the wheel drive shaft inboard seal from the tri-lobal tripot bushing and slide the seal away from the joint along the wheel drive shaft bar.
    Posted by ChevyPartsGiant Specialist
    See expert answers on similar CV Joint
    Q:
    What tools are needed to replace the wheel drive shaft outer joint and seal for the 2002 Buick Rendezvous? Posted by Customer
    A:
    Drive Shaft Seal Clamp Pliers (J 42572) and a shop towel.
    Posted by ChevyPartsGiant Specialist
    See expert answers on similar CV Joint
    Q:
    What tool is needed to replace the front wheel drive shaft outer joint and seal for the 2006 Buick Rendezvous? Posted by Customer
    A:
    The J 42572 Drive Shaft Seal Clamp Pliers.
    Posted by ChevyPartsGiant Specialist
    See expert answers on similar CV Joint
    Q:
    How should the wheel drive shaft be secured for the replacement process for the 2003 Buick Rendezvous? Posted by Customer
    A:
    Wrap a shop towel around the axle shaft and secure the wheel drive shaft horizontally in a bench vise.
    Posted by ChevyPartsGiant Specialist
    See expert answers on similar CV Joint
    Q:
    What should be done after installing the new barrel retaining ring for the 2005 Buick Rendezvous? Posted by Customer
    A:
    Align the reference mark on the tripot spider with the wheel drive shaft bar and ensure the beveled edge of the tripot spider faces the bar during reassembly.
    Posted by ChevyPartsGiant Specialist
    See expert answers on similar CV Joint
    Q:
    What is the process for swage ring installation for the 2006 Buick Terraza? Posted by Customer
    A:
    Mount Drive Axle Swage Ring Clamp (J 41048) in a vise, position the inboard end of the halfshaft assembly in the tool, align the seal neck, and tighten the bolts until snug.
    Posted by ChevyPartsGiant Specialist
    See expert answers on similar CV Joint
    Q:
    How do you remove the chrome alloy balls from the CV joint cage for the 2007 Buick Terraza? Posted by Customer
    A:
    Use a brass drift to gently tap and tilt the CV joint cage, repeating until all six balls are removed.
    Posted by ChevyPartsGiant Specialist
    See expert answers on similar CV Joint
    Q:
    What components should be installed to the tripot housing for the 2002 Chevrolet Venture? Posted by Customer
    A:
    Install the spring and guide, retaining them with grease.
    Posted by ChevyPartsGiant Specialist
    See expert answers on similar CV Joint
    Q:
    What should be done with the larger new seal retaining clamp for the 2005 Chevrolet Uplander? Posted by Customer
    A:
    Position the larger new seal retaining clamp on the halfshaft inboard seal, slide the housing over the tripot joint spider assembly, and ensure the halfshaft inboard seal is correctly shaped.
    Posted by ChevyPartsGiant Specialist
    See expert answers on similar CV Joint
    Q:
    What should be done to the CV joint inner race for the 2003 Chevrolet Venture? Posted by Customer
    A:
    Wipe grease from the face of the CV joint inner race and spread the ears on the race retaining ring with the Snap Ring Pliers.
    Posted by ChevyPartsGiant Specialist
    See expert answers on similar CV Joint
    Q:
    How do you install the spacer ring for the 2005 Chevrolet Venture? Posted by Customer
    A:
    Install the spacer ring into the groove of the halfshaft bar using the Snap Ring Pliers-Parallel Jaw (J 8059), slide the tripot joint spider assembly toward the spacer ring, and install another spacer ring into the groove.
    Posted by ChevyPartsGiant Specialist
    See expert answers on similar CV Joint
    Q:
    What are the final steps after tightening the spindle nut for the 2004 Chevrolet Venture? Posted by Customer
    A:
    Connect the outer tie rod end to the steering knuckle, install the engine splash shield, install the tire and wheel assembly, and finally lower the vehicle.
    Posted by ChevyPartsGiant Specialist
    See expert answers on similar Axle Shaft
    Q:
    What should be checked after cleaning the components for the 2006 Chevrolet Uplander? Posted by Customer
    A:
    Check for unusual wear, cracks, or damage, and replace any damaged components.
    Posted by ChevyPartsGiant Specialist
    See expert answers on similar CV Joint
    Q:
    What should be done to ensure the tri-lobal tripot bushing is properly positioned for the 2004 Chevrolet Venture? Posted by Customer
    A:
    Ensure it is flush with the face of the housing.
    Posted by ChevyPartsGiant Specialist
    See expert answers on similar CV Joint
    Q:
    What should be done after securing the upper control arm for the 2005 Chevrolet Venture? Posted by Customer
    A:
    Secure the park brake cable bracket and install the rear tie rod to the rear suspension knuckle, tightening the tie rod-to-knuckle bolt to 85 Nm (63 ft. lbs.).
    Posted by ChevyPartsGiant Specialist
    See expert answers on similar Axle Shaft
    Q:
    How should the CV joint components be cleaned for the 2004 Chevrolet Venture? Posted by Customer
    A:
    Clean the inner and outer race assemblies, CV joint cage, and chrome alloy balls thoroughly with cleaning solvent, ensuring all old grease and contaminants are removed, then dry all parts and check for unusual wear, cracks, or damage, replacing any damaged parts.
    Posted by ChevyPartsGiant Specialist
    See expert answers on similar CV Joint
    If you have any questions about this product, please don't hesitate to ask us. We will be happy to help you!

OEM GM 88967242, Excellent Performance and Perfect Fitment

To ensure reliability, purchase GM part # 88967242 Axle Assembly. It is sometimes referred to as GM Axle Shaft, GM CV Joint. Choosing OEM parts is the optimal decision for guaranteeing superior quality and perfect performance. These components undergo stringent quality checks and are carefully constructed to comply with GM's factory specifications, ensuring a smooth installation process.

ChevyPartsGiant.com is a leading supplier of genuine GM parts such as GM 88967242 Axle Assembly. Our website boasts an extensive inventory of OEM GM parts, available at highly competitive prices in the market. Should you require any new genuine GM parts, rest assured we will deliver them swiftly and efficiently to your doorstep. Furthermore, all our parts come with the assurance of a manufacturer's warranty. For detailed Chevy parts information, click here.
Choose ChevyPartsGiant for discounted prices, exceptional service and fast delivery