Make sure this part fits

GM 25678194
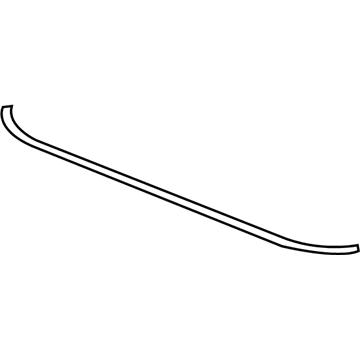
Sealing Strip

1997-2005 GM

Customer Questions & Expert Answers (29)
GM 25678194 Sealing Strip
  • Part Description
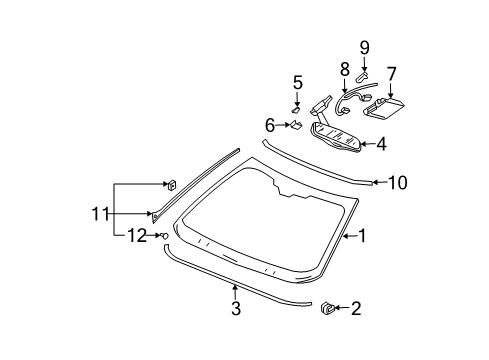
    Sealing Strip, Windshield; Weatherstrip
  • Manufacturer
    General Motors
Make sure this part fits
$13.11
1
ADD TO CART
  • Vehicle Fitment

    Year Make Model Trim Engine
    2000-2005 Buick LeSabreCustom, Limited6 Cyl 3.8 L GAS
    1997-2005 Buick Park AvenueBase, Ultra6 Cyl 3.8 L GAS
    2000-2005 Cadillac DeVilleBase, DHS, DTS, Protection Series8 Cyl 4.6 L GAS
    1998-2004 Cadillac SevilleSLS, STS8 Cyl 4.6 L GAS
    2001-2003 Oldsmobile AuroraBase6 Cyl 3.5 L GAS, 8 Cyl 4.0 L GAS
    2000-2005 Pontiac BonnevilleGXP, SE, SLE, SSEi6 Cyl 3.8 L GAS, 8 Cyl 4.6 L GAS
    Warning: California's Proposition 65
  • Customer Questions & Expert Answers

    Q:
    Can you help me check if this 25678194 is the right part for my car? Posted by ChevyPartsGiant Specialist
    A:
    Please Select Your Vehicle model to see if part number 25678194 is suitable before ordering.
    Posted by ChevyPartsGiant Specialist
    Q:
    What is the first step to replace the rear side door window weatherstrip for the 2000 Buick LeSabre? Posted by Customer
    A:
    Move the window to the full down position.
    Posted by ChevyPartsGiant Specialist
    See expert answers on similar Weather Strip
    Q:
    What should be removed after the door trim panel for the 2001 Buick Park Avenue? Posted by Customer
    A:
    Remove the door module and the water deflector.
    Posted by ChevyPartsGiant Specialist
    See expert answers on similar Weather Strip
    Q:
    What should be done after removing the windows for the 2001 Buick Park Avenue? Posted by Customer
    A:
    Remove the rear door upper auxiliary weatherstrip fasteners (1-7) and carefully peel the auxiliary weatherstrip away from the door header.
    Posted by ChevyPartsGiant Specialist
    See expert answers on similar Weather Strip
    Q:
    How do you prepare the window weatherstrip for reuse for the 2004 Buick LeSabre? Posted by Customer
    A:
    Pinch the flange mounting area together to counteract the splaying effect, using a thumb and index finger to pinch the carrier from one end to the other.
    Posted by ChevyPartsGiant Specialist
    See expert answers on similar Weather Strip
    Q:
    How much adhesive should be applied to the window channel for the 2002 Buick Park Avenue? Posted by Customer
    A:
    Apply a 152 mm (6 in) strip of adhesive to the side of the window channel.
    Posted by ChevyPartsGiant Specialist
    See expert answers on similar Weather Strip
    Q:
    How can you ensure the weatherstrip is properly seated for the 2002 Buick LeSabre? Posted by Customer
    A:
    Use the palm of your hand or a rubber mallet to ensure the weatherstrip is seated on the entire door opening flange.
    Posted by ChevyPartsGiant Specialist
    See expert answers on similar Weather Strip
    Q:
    What should be done after removing the windows for the 2000 Buick Park Avenue? Posted by Customer
    A:
    Remove the rear door upper auxiliary weatherstrip fasteners (1-7) and carefully peel the auxiliary weatherstrip away from the door header.
    Posted by ChevyPartsGiant Specialist
    See expert answers on similar Weather Strip
    Q:
    What is the first step to replace the rear side door upper auxiliary weatherstrip for the 2001 Buick LeSabre? Posted by Customer
    A:
    Begin by removing the door trim panel, door module, water deflector, energy absorber pad, window inner belt seal, window outer belt seal, door window, and rear door stationary window.
    Posted by ChevyPartsGiant Specialist
    See expert answers on similar Weather Strip
    Q:
    What is the torque specification for the auxiliary weatherstrip fasteners for the 2005 Buick LeSabre? Posted by Customer
    A:
    Tighten the fasteners starting with the front fastener to 2 N.m (18 lb in).
    Posted by ChevyPartsGiant Specialist
    See expert answers on similar Weather Strip
    Q:
    What is the final step after installing the weatherstrip for the 2004 Buick LeSabre? Posted by Customer
    A:
    Finally, reinstall the sill plate.
    Posted by ChevyPartsGiant Specialist
    See expert answers on similar Weather Strip
    Q:
    What should be done after installing the stationary window and weatherstrip for the 2002 Buick LeSabre? Posted by Customer
    A:
    Install the division post fastener and tighten it to 9 N.m (80 lb in).
    Posted by ChevyPartsGiant Specialist
    See expert answers on similar Weather Strip
    Q:
    What is the final step after installing the weatherstrip for the 2003 Buick LeSabre? Posted by Customer
    A:
    Finally, reinstall the rear compartment sill plate.
    Posted by ChevyPartsGiant Specialist
    See expert answers on similar Weather Strip
    Q:
    How do you continue installing the weatherstrip after the center pillar for the 2001 Cadillac DeVille? Posted by Customer
    A:
    From the center pillar, work forward to install the weatherstrip along the roof rail and the front body hinge pillar flange, again ensuring the carrier is fully seated in the corners.
    Posted by ChevyPartsGiant Specialist
    See expert answers on similar Weather Strip
    Q:
    What is the first step to replace the front door upper auxiliary weatherstrip for the 2004 Buick Park Avenue? Posted by Customer
    A:
    Begin by removing the door trim panel.
    Posted by ChevyPartsGiant Specialist
    See expert answers on similar Weather Strip
    Q:
    What tool is needed for the center trim panel removal for the 2005 Buick Park Avenue? Posted by Customer
    A:
    Trim Panel Removal Tool.
    Posted by ChevyPartsGiant Specialist
    See expert answers on similar Weather Strip
    Q:
    What is the order of reinstallation after installing the window weatherstrip for the 2003 Buick Park Avenue? Posted by Customer
    A:
    Reinstall the door window, followed by the window outer belt sealing strip, the outside rearview mirror, and the window inner belt sealing strip.
    Posted by ChevyPartsGiant Specialist
    See expert answers on similar Weather Strip
    Q:
    How do you continue installing the weatherstrip after the center pillar corner for the 2005 Cadillac DeVille? Posted by Customer
    A:
    Work rearward to install the weatherstrip along the roof rail and body lock pillar flange, again ensuring the carrier is fully seated in the corners.
    Posted by ChevyPartsGiant Specialist
    See expert answers on similar Weather Strip
    Q:
    Where should you position the paint dot for installation for the 2001 Cadillac DeVille? Posted by Customer
    A:
    Position the paint dot in the upper corner of the center pillar.
    Posted by ChevyPartsGiant Specialist
    See expert answers on similar Weather Strip
    Q:
    How can you identify the starting point for the RH and LH weatherstrips for the 2000 Cadillac DeVille? Posted by Customer
    A:
    1 paint dot on the weatherstrip indicates the starting point for the RH weatherstrip, while 2 paint dots indicate the starting point for the LH weatherstrip.
    Posted by ChevyPartsGiant Specialist
    See expert answers on similar Weather Strip
    Q:
    How do you complete the installation of the weatherstrip for the 2001 Cadillac Seville? Posted by Customer
    A:
    From the top rear corner of the door frame working downward, install the weatherstrip using the same procedure as previously described.
    Posted by ChevyPartsGiant Specialist
    See expert answers on similar Weather Strip
    Q:
    What should you do after pressing the weatherstrip into place for the 2004 Cadillac DeVille? Posted by Customer
    A:
    Reinstall the rear compartment sill plate before closing the rear compartment lid.
    Posted by ChevyPartsGiant Specialist
    See expert answers on similar Weather Strip
    Q:
    Where should you position the paint dot when installing the weatherstrip for the 2002 Cadillac DeVille? Posted by Customer
    A:
    Position the paint dot in the upper corner of the center pillar.
    Posted by ChevyPartsGiant Specialist
    See expert answers on similar Weather Strip
    Q:
    What is the final step in the installation process for the 2003 Cadillac DeVille? Posted by Customer
    A:
    Install the 2 retainers and the remaining retainers to the rear door latch pillar.
    Posted by ChevyPartsGiant Specialist
    See expert answers on similar Weather Strip
    Q:
    What is the first step in the installation of the new weatherstrip for the 2004 Cadillac Seville? Posted by Customer
    A:
    Insert the locating pin into the upper, rear corner of the door frame near the center pillar.
    Posted by ChevyPartsGiant Specialist
    See expert answers on similar Weather Strip
    Q:
    How do you identify the starting point for the RH and LH weatherstrips for the 2002 Cadillac Seville? Posted by Customer
    A:
    One paint dot on the weatherstrip indicates the starting point for the RH weatherstrip, while two paint dots indicate the starting point for the LH weatherstrip.
    Posted by ChevyPartsGiant Specialist
    See expert answers on similar Weather Strip
    Q:
    What tool can be used to ensure the weatherstrip is seated properly for the 2003 Cadillac Seville? Posted by Customer
    A:
    Use a rubber mallet to ensure the weatherstrip is seated on the entire door opening flange.
    Posted by ChevyPartsGiant Specialist
    See expert answers on similar Weather Strip
    Q:
    How do you remove the weatherstrip from the door opening for the 2000 Cadillac Seville? Posted by Customer
    A:
    Begin at the joint at the bottom of the door opening and pull the weatherstrip away from the door opening flange, continuing around the door opening until it is completely removed.
    Posted by ChevyPartsGiant Specialist
    See expert answers on similar Weather Strip
    Q:
    How can you identify the starting point for the RH and LH weatherstrip during installation for the 2001 Cadillac Seville? Posted by Customer
    A:
    One paint dot on the weatherstrip indicates the starting point for the RH weatherstrip, while two paint dots indicate the starting point for the LH weatherstrip.
    Posted by ChevyPartsGiant Specialist
    See expert answers on similar Weather Strip
    If you have any questions about this product, please don't hesitate to ask us. We will be happy to help you!

OEM GM Sealing Strip 25678194 Designed for Proper Fit and Performance

Original OEM GM parts deliver superior quality and meet all performance standards needed for optimal automotive operation. The authentic part identified by 25678194 Sealing Strip is available in the market under the name GM Weather Strip. This genuine product has a full warranty coverage from the manufacturer available at all authorized GM dealers throughout the United States. This part 25678194 Sealing Strip fits certain Cadillac DeVille, Seville models, as well as Buick LeSabre, Park Avenue. Additionally, it is compatible with Pontiac Bonneville and Oldsmobile Aurora models.
The original GM component designated by manufacturer part number 25678194 maintains top performance when functioning as the Sealing Strip, Windshield; Weatherstrip unit. The component 25678194 is constructed from durable material and its dimensions span 12.4 x 12.5 x 3.2 inches while weighing 0.40 Pounds. The Direct Replacement component is ready in New condition to ensure full compatibility with your vehicle system. This component receives the designation of Windshield Seal Strip; Windshield Spacer. The part 25678194 has available replacement options. GM manufacturer provides a warranty that ensures reliable operation of this product. The Shipping Policy and Return Policy pages outline complete details regarding shipping procedures and return processes.
If you want to save money in the long run on maintenance and repairs, you should choose OEM products because they're of the top level of durability. Are you on the quest of finding GM parts, our site is worth a visit. We stock an endless selection of high-quality GM components including things like ignition coils all the way through to fan shrouds and all at prices that can not be matched. You have nothing to worry about because all our OEM parts are covered with a manufacturer warranty, which guarantees superior quality and value.