
Popular OEM Cadillac Seville Parts
- Body & Hardware Parts View More >
- Steering Parts View More >
- Electrical Parts View More >
- Air & Fuel Delivery Parts View More >
- Charging & Starting Parts View More >
- Engine Parts View More >
- Belts & Cooling Parts View More >
- Suspension Parts View More >
- Emission Control & Exhaust Parts View More >
- Transmission Parts View More >
- Brakes Parts View More >
- Headlights & Lighting Parts View More >


Why Buy Genuine Cadillac Seville Parts From ChevyPartsGiant.com
Looking for real Cadillac Seville parts? ChevyPartsGiant.com may be a better choice to find genuine parts at wallet-friendly prices. We sell only OEM Cadillac Seville parts, ensuring perfect fit, reliability, and long-term performance. With our website, you can easily get access to the same parts found at local Cadillac stores. All components are produced by Cadillac and are exclusively fitted on Cadillac Seville automobiles. By shopping at our store, you can enjoy the quality of the Cadillac factory without the high prices of brick-and-mortar facilities. We achieve this because we are an online store operating at lower costs, which we pass on to you. We also have a user-friendly platform where you can find and order genuine Cadillac Seville parts swiftly. We are here to make your process of restoring a Cadillac Seville or dealing with simple repairs quick and inexpensive. We also make it easy to obtain Cadillac Seville parts at competitive shipping prices and a team of knowledgeable staff ready to take your order. Choose ChevyPartsGiant.com to save time and money, as well as keep your Cadillac Seville in the good condition.
During the 1976 Frankfurt International Auto Show the Cadillac Seville introduced its advanced engineering and sophisticated design to the public to move Cadillac forward. The Cadillac Seville began production on the GM rear-wheel-drive K-body platform from 1976 to 1985 and then moved to the front-wheel-drive C-body platform starting in 1986 for better efficiency and expanded interior space. A 5.7 liter Oldsmobile V8 engine with 350 cubic inches enabled the original Cadillac Seville model to deliver outstanding performance. Throughout its development stages the Seville introduced various engines which boosted power output while enhancing fuel efficiency. The first Cadillac Seville model operated with a three-speed Turbo-Hydramatic 400 automatic transmission while subsequent models received an upgraded four-speed automatic to enhance efficiency and acceleration smoothness. The Cadillac Seville produced outstanding interior space with its 114.3-inch wheelbase and 204.0-inch length that allowed it to keep a streamlined profile. The model offered two distinct version configurations between the SLS and STS Sedans to meet the demands of several customer groups. Seville vehicles benefited from continuous updates to authentic parts which Cadillac provided to ensure dependable performance quality. The Cadillac Seville stands as a standard for luxury sedans because of its sophisticated engineering and superior materials which result in a polished driving experience.
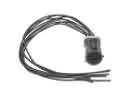
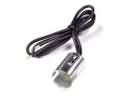
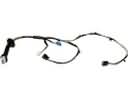
Cadillac Seville clusters into engine sealing, cooling, and starting security for clear diagnosis. In the engine group, the Seville can leak oil at the lower crankcase. Loss appears around the oil pan gasket, leaving spots and low level warnings. Confirm the source with UV dye, then reseal after engine removal if required. Check PCV function, excessive crankcase pressure worsens external leaks and gasket weep. Cooling faults affect powertrain durability on the Cadillac Seville and raise overheat risk. Inspect the water pump for seepage and wobble, and examine the radiator side tanks. Pressure test, replace the water pump or radiator, and bleed air carefully. Recheck for continued loss, a blown head gasket remains possible on this Seville. Starting complaints originate in the anti theft system on the Cadillac Seville. Broken wires to the ignition lock cylinder prevent key validation and starter engagement. Replace the ignition lock cylinder and key, then relearn security and confirm crank. Scan for theft deterrent codes and log live security data. Across repairs, document findings on the Seville and verify temperature and oil stability. Clear codes, road test, and confirm steady idle for trusted Cadillac operation.
Cadillac Seville Parts and Q&A
- Q: How to replace the air filter on Cadillac Seville?A:In order to change the air filter, loosen the screw that is holding the resonator to PCM housing. Unscrew the latches of the air filter cover, and take out the resonator and filter cover. Dislodge the MAF/IAT sensor, take away the air filter and sweep out the rubbish. Install and reconnect sensor and reassemble new filter.
- Q: How to replace the water pump on Cadillac Seville?A:The cooling system has to be drained and several parts taken away to replace the water pump. Install the new pump with the seal by using the Water Pump Remover and then the Water Pump Installer to remove the old pump and clean the sealing surfaces, and then fit the new pump. Install all the parts and fill the cooling system.
- Q: How to service and repair the thermostat on Cadillac Seville?A:To service thermostat partially drain the cooling system and take out the air cleaner assembly. Loosen outlet radiator hose with Hose Clamp Pliers, remove the thermostat housing bolts. Install the new gasket and thermostat, use the radiator hose again and reconnect it, then reconnect the housing and next is to reconnect the air cleaner assembly.


