ChevyParts
My Garage
My Account
Cart
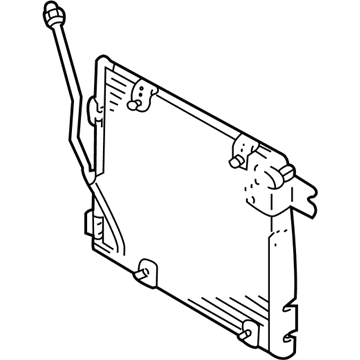
OEM 2000 Chevrolet Tracker A/C Condenser
Air Conditioning Condenser- Select Vehicle by Model
- Select Vehicle by VIN
Select Vehicle by Model
orMake
Model
Year
Select Vehicle by VIN
For the most accurate results, select vehicle by your VIN (Vehicle Identification Number).
1 A/C Condenser found
2000 Chevrolet Tracker Condenser Part Number: 91176896
Product Specifications- Other Name: Condenser (On Esn); A/C Condenser; Condenser, A/C Condenser
- Replaces: 91175044
- Item Weight: 10.20 Pounds
- Item Dimensions: 37.1 x 20.5 x 11.4 inches
- Condition: New
- Fitment Type: Direct Replacement
- SKU: 91176896
- Warranty: This genuine part is guaranteed by GM's factory warranty.
2000 Chevrolet Tracker A/C Condenser
With a comprehensive array of OEM 2000 Chevrolet Tracker A/C Condenser, from fuel pumps to door handles, our website is a one-stop-shop for your needs. All our genuine 2000 Chevrolet Tracker A/C Condenser are backed by the manufacturer's warranty and are offered at competitive prices in the market. Rest assured, you can shop with complete confidence.
2000 Chevrolet Tracker A/C Condenser Parts and Q&A
- Q: How to install a new A/C Condenser in a refrigeration system on 2000 Chevrolet Tracker?A: For new condenser installation add 20-30 ml (0.7-1.0 ft oz) of refrigerant oil to your refrigeration system. Start the process by recovering then discharging the refrigerant from the system. Start by removing the front grille and front bumper fascia followed by disassembling the bracket attaching the bolts and bumper fascia brace. Factory-made caps should be used to protect refrigerant openings from moisture and dirt entry. Starting with the condenser, disconnect the single retaining bolt followed by removing the condenser inlet tube then proceed to remove the condenser outlet tube. The installation requires disconnecting both the condenser fan electrical connector and the refrigerant pressure sensor's electrical connector. Remove the four condenser mounting bolts to pull the condenser and fan assembly with the condenser through the top of the vehicle. Unscrew the 4 nuts before removing the condenser fan from the system. During application, attach the condenser fan to the condenser before tightening the 4 nuts for security. To install the condenser and fan combination on the vehicle use four mounting bolts which need to be tightened to 20 n.m (15 lb ft). New o-rings treated with mineral base 525 viscosity refrigerant oil need installation to condenser fittings before connecting the condenser outlet tube. The fitting should be tightened to 35 n.m (26 lb ft). Secure the condenser inlet tube using the supplied bolt to a torque of 25 n.m (19 lb ft). Attach the electrical connector for the condenser fan together with the refrigerant pressure sensor electrical connector to the system. The bumper fascia brace requires installation followed by 2 bolt security before reinstalling the front bumper fascia and front grille. The process ends by evacuating the air conditioning system followed by recharging it for testing refrigerant leak conditions.


