ChevyParts
My Garage
My Account
Cart
OEM 2003 Buick Century ABS Control Module
Anti Lock Brake Control Module- Select Vehicle by Model
- Select Vehicle by VIN
Select Vehicle by Model
orMake
Model
Year
Select Vehicle by VIN
For the most accurate results, select vehicle by your VIN (Vehicle Identification Number).
1 ABS Control Module found

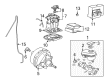
2003 Buick Century Control Module Part Number: 12225452
Product Specifications- Other Name: Module Kit, Electronic Brake Control; ABS Control Module
- Replaced by: 18078133
- Item Weight: 1.30 Pounds
- Item Dimensions: 6.1 x 6.1 x 5.1 inches
- Condition: New
- SKU: 12225452
- Warranty: This genuine part is guaranteed by GM's factory warranty.
2003 Buick Century ABS Control Module
With a comprehensive array of OEM 2003 Buick Century ABS Control Module, from fuel pumps to door handles, our website is a one-stop-shop for your needs. All our genuine 2003 Buick Century ABS Control Module are backed by the manufacturer's warranty and are offered at competitive prices in the market. Rest assured, you can shop with complete confidence.
2003 Buick Century ABS Control Module Parts Questions & Experts Answers
- Q: How should the ABS Control Module be replaced to ensure safety and proper installation on 2003 Buick Century?A: The brake pressure modulator valve (BPMV) replacement requires the usage of complete system components instead of attempting repairs because any ebcm/ebtcm screw tightening or loosening poses a risk of leaks and personal injuries. The project starts by ending the ignition with the off position followed by removing all bolts from the Cruise Control Module before placing it out of the way. Users should unlock the red locking tab from the connector and press down on the lock tab before sliding the connector cover open to disconnect the ebcm harness connector. Mark down the exact positions of the brake pipes before disconnecting them from the bpmv unit. Then suspend the pipes away from the opening areas with protective covers to avoid piping contamination. .disconnect master cylinder brake pipes from bpmv while keeping master cylinder attached before swinging them away with covered open ends differentiate the bpmv mounting bracket nuts and bolt before disconnecting the ground strap between the ebcm assembly and chassis. Next, remove the bpmv mounting bracket and ebcm assembly from the vehicle by protecting the external brake fluid areas from leakage. Bolt removal between the bpmv bracket and mount is the first step of assembly followed by ebcm removal when replacing both parts. After attachment of the ebcm to the bpmv (if needed) proceed with installing the bpmv and ebcm ensemble to the mounting bracket while securing bolt torques at 10 nm (89 inch lbs.). Attach the bpmv bracket to the strut tower through one bolt combined with three nuts then tighten the lower two nuts and bolt to 10 nm (89 inch lbs.) and the top nut to 3 nm (27 inch lbs.). Inspect the brake pipe attachment points to prevent wheel lockup because wheel lockup can be detected through a scan tool process or an antilock stop test. After removing shipping plugs, install the master cylinder brake pipes first and secure at 24 nm (18 ft. Lbs.) and then proceed to install the Wheel Cylinder brake pipes also at 24 nm (18 ft. Lbs.). Reconnect the ground strap along with the ebcm harness connector then lock the red tab in place. You need to replace the Cruise Control Module after which you must execute the automated abs bleed process.
Related 2003 Buick Century Parts
 2003 Buick Century Brake Backing Plate
 2003 Buick Century Brake Booster
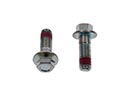 2003 Buick Century Brake Caliper Bolt
 2003 Buick Century Brake Caliper Bracket
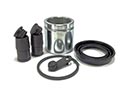 2003 Buick Century Brake Caliper Repair Kit
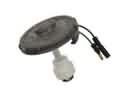 2003 Buick Century Brake Fluid Level Sensor
 2003 Buick Century Brake Line
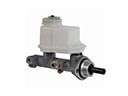 2003 Buick Century Brake Master Cylinder
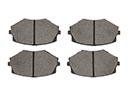 2003 Buick Century Brake Pad
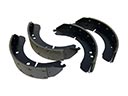 2003 Buick Century Brake Shoe
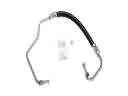 2003 Buick Century Hydraulic Hose
 2003 Buick Century Parking Brake Shoe