ChevyParts
My Garage
My Account
Cart
OEM 2004 Chevrolet Silverado 1500 Intake Manifold
Engine Intake Manifold- Select Vehicle by Model
- Select Vehicle by VIN
Select Vehicle by Model
orMake
Model
Year
Select Vehicle by VIN
For the most accurate results, select vehicle by your VIN (Vehicle Identification Number).
3 Intake Manifolds found

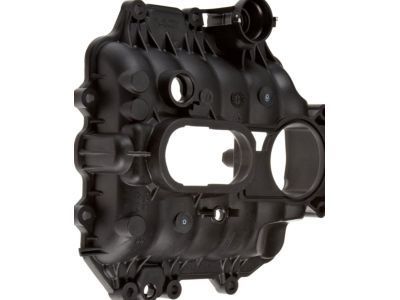
2004 Chevrolet Silverado 1500 Intake Manifold Part Number: 17113542
Product Specifications- Other Name: Manifold Kit, Engine Fuel Intake Manifold; Manifold
- Position: Upper
- Replaces: 17113213
- Item Weight: 3.30 Pounds
- Item Dimensions: 7.4 x 13.5 x 12.5 inches
- Condition: New
- Fitment Type: Direct Replacement
- SKU: 17113542
- Warranty: This genuine part is guaranteed by GM's factory warranty.
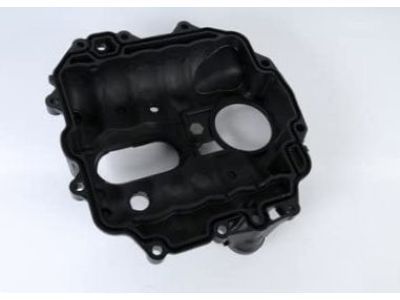
2004 Chevrolet Silverado 1500 Intake Manifold Part Number: 89017365
Product Specifications- Other Name: Manifold, Engine Fuel Intake Manifold; Manifold
- Replaced by: 19418185
- Item Weight: 9.70 Pounds
- Item Dimensions: 25.1 x 18.7 x 19.7 inches
- Condition: New
- SKU: 89017365
- Warranty: This genuine part is guaranteed by GM's factory warranty.
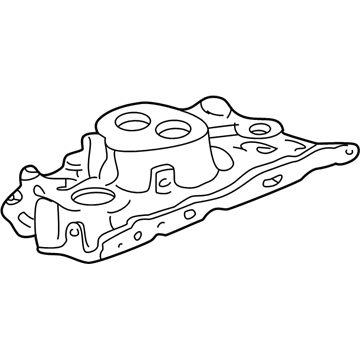
- Product Specifications
- Other Name: Manifold Kit, Lower Intake; Manifold; Manifold Kit, Engine Fuel Intake Manifold
- Position: Lower
- Item Weight: 19.50 Pounds
- Item Dimensions: 21.7 x 17.8 x 15.2 inches
- Condition: New
- Fitment Type: Direct Replacement
- SKU: 88894294
- Warranty: This genuine part is guaranteed by GM's factory warranty.
2004 Chevrolet Silverado 1500 Intake Manifold
With a comprehensive array of OEM 2004 Chevrolet Silverado 1500 Intake Manifold, from fuel pumps to door handles, our website is a one-stop-shop for your needs. All our genuine 2004 Chevrolet Silverado 1500 Intake Manifold are backed by the manufacturer's warranty and are offered at competitive prices in the market. Rest assured, you can shop with complete confidence.
2004 Chevrolet Silverado 1500 Intake Manifold Parts Questions & Experts Answers
- Q: How to replace the upper intake manifold on 2004 Chevrolet Silverado 1500?A: To replace the upper Intake Manifold, you have to take out the fuel pipes/hoses, then take off the cruise control cable from the throttle lever though the accelerator control cable bracket, the accelerator cable from Throttle Body lever and accelerator control cable bracket. Take your electrical connectors for the a/c compressor clutch and a/c pressure switch off, pull the engine wiring harness clip back from the accelerator control cable bracket and the brackets nuts. Remove the accelerator control cable bracket that includes cable attached to the Throttle Body and secure the bracket out of the way. Next, share the throttle position (tp), idle air control (iac) motor, and control port injector module, and engine wiring harness clip bolt. Remove the evaporative emission (EVAP) canister purge solenoid valve and manifold absolute pressure (MAP) sensor connectors, and remove the evap canister harness from the purge solenoid valve. There is a removal of engine wiring harness bracket and ground wire from the rear of the right Cylinder Head, then removal of the rear bracket nut at the evap canister purge solenoid valve and the stud retaining the engine wiring harness bracket. Now move the harness to one side, remove the PCV Valve Hose, power Brake Booster Vacuum Hose, accelerator cable bracket nuts, and the accelerator cable bracket. Unbolt the upper Intake Manifold studs, the front two Throttle Body studs, and the upper Intake Manifold itself while disposing of the gasket and the o-ring seal as appropriate. If needed, pull off power brake booster vacuum fitting, throttle body, MAP Sensor, discarding its seals. Check and clean the upper Intake Manifold prior to assembling. If necessary, install the purge solenoid valve and the studs with threadlock gm p/n 12345382 (Canadian P/N 10953489) by tighten it to 10 nm (89 inch lbs.). Replace the Throttle Body, a new Throttle Body Gasket, the MAP Sensor, and a new MAP Sensor seal with a drop of clean engine oil. If reusing the rear Throttle Body stud, apply threadlock and torque to 9nm 80 inch lbs. Fit a new o-ring seal for the pcv cover and the power brake booster vacuum fitting, and then fit a new upper Intake Manifold gasket and a new o-ring seal to the fuel meter body. Fasten the upper Intake Manifold, front two Throttle Body studs, and upper Intake Manifold studs to 9 nm (80 inch lbs.)/tight). Reinstall the accelerator cable bracket & nuts torqued to 12 nm (106 in. Lbs.) then reconnect power brake hose and PCV Valve Hose. Mount the engine wiring harness and bracket, and install the rear bracket stud and tighten to 25 nm (18 ft. Lbs.) while installing the rear bracket nut and the evap canister purge solenoid valve to 9 nm (80 inch lbs.) and the ground nut and wire to 16 nm (12 ft. Lbs.). Install the engine wiring harness bracket and nuts with 12 nm (106 in lbf) and make the connections on the evap canister harness to the purge solenoid valve and the electrical connectors on the evap canister purge solenoid valve , MAP Sensor , tp sensor , iac motor , and control port injector module . Mount the engine wiring harness clip bolt and tighten it to 9 nm (80 inch lbs), and mount bracket and cables to put them in start by installing the accelerator control cable bracket twining it by the Throttle Body and tighten the engage to 9 nm (80 inch lbs). Lastly connect the a/c compressor clutch and a/c pressure switch if fitted and install the engine wiring harness clip to the accelator control cable bracket before connecting the acoustic cable which was disconnedted from the bracket to the Throttle Body lever then a/c pressure switch if fit, the engine wiring harness clip to the accelator control cable bracket the cruise control cable if installed before ending up with the fuel pipes/hoses.


