ChevyParts
My Garage
My Account
Cart
OEM Buick Rainier Brake Master Cylinder
- Select Vehicle by Model
- Select Vehicle by VIN
Select Vehicle by Model
orMake
Model
Year
Select Vehicle by VIN
For the most accurate results, select vehicle by your VIN (Vehicle Identification Number).
2 Brake Master Cylinders found


Buick Rainier Master Cylinder Part Number: 15142479
$53.25 MSRP: $100.00You Save: $46.75 (47%)Ships in 1-3 Business Days


Buick Rainier Master Cylinder Part Number: 19209266
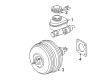
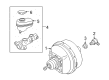
Buick Rainier Brake Master Cylinder
Want to cut long-term maintenance and repair costs? Choose OEM Brake Master Cylinder. Those parts deliver top durability you can trust. On our site, you'll find a huge catalog of genuine Buick Rainier parts. Prices are unbeatable, so you can keep more in your pocket. Every OEM Buick Rainier Brake Master Cylinder includes a manufacturer's warranty. You can also get an easy return policy that keeps buying risk free. Fast delivery, get your car on the road quickly. It's simple to search, compare, and order. Stop guessing about quality or fit. Order today and save with parts that last.
The Buick Rainier Brake Master Cylinder is among the critical systems of the Buick Rainier cars acknowledged for their sound construct, and operational warranty. This essential part translates the applied foot-force to hydraulic pressure and enables the control of slave cylinders in order to achieve proper braking. The Buick Rainier normally comes with a dual circuit Brake Master Cylinder that makes certain the car continues to brake even if one of the circuits is out of order. This design is very important to eliminate any likely risks that can lead to accidents, making Buick Rainier safe car to drive. Maintenance of the Brake Master Cylinder should be kept on a regular basis in order to prevent problems like leakages and internal constrains that hinders the basic operation of the Brake Master Cylinder. The models of Buick Rainier from the years 2004 to 2007 can accommodate various trims so one can be sure that Brake Master Cylinder is compatible with one another, is of top-notch quality. Marijuana enters the consumer's body system through the respiratory system and spreads to other parts of the body With a powerful Small-block V8 engine of 5.3L and efficient brake, Buick Rainier provides satisfying power and great driving experience. Hence certain characteristics as the management of hydraulic force and the distribution of pressure on the Brake Master Cylinder make it prominently distinctive from the other competitors in the automotive industry. In conclusion, the Buick Rainier Brake Master Cylinder is an important cog in the Buick Rainier wheel which has been previously described as a safe and efficient mid-size luxury SUV.
Buick Rainier Brake Master Cylinder Parts and Q&A
- Q: How to overhaul the brake master cylinder on Buick Rainier?A:Before performing Brake Master Cylinder overhaul workers should remove the component from the vehicle and put the mounting flange in a bench vise so they can access the rear of the primary Piston. Inspect the master cylinder reservoir cap and diaphragm for damage after cleaning their external surfaces before component replacement. Check for all visible defects such as cuts, cracks, nicks or deformation. The process starts by removing the master cylinder reservoir followed by using a smooth tool to push down on the primary Piston while removing the Piston retainer before extracting the primary Piston assembly from the cylinder bore. Use low pressure clean filtered non-lubricated air to blow the secondary Piston along with its primary and secondary seals and return spring while plugging the cylinder inlet ports and rear outlet port. Throw out the primary Piston assembly, Piston retainer, and seals. Thoroughly clean interior and exterior surfaces of the master cylinder and secondary Piston and return spring with denatured alcohol while keeping away from abrasive materials. Checks for damage like cracks, scoring, pitting, and corrosion require replacement of the master cylinder if present. All components need non-lubricated filtered air drying before you apply delco supreme 11 brake fluid p/n 12377967 (Canadian P/N 992667) or equivalent dot-3 grade fluid from a clean sealed fluid container to the master cylinder bore along with the secondary Piston and return spring and all overhaul parts. Accomplish assembly of the new primary seal combined with its retainer and secondary seal onto the secondary Piston before you put in the return spring and secondary Piston assembly in the cylinder bore and continue with the primary Piston assembly installation. Depress the primary Piston with a smooth tool through its primary Piston hole to install the new Piston retainer. Reinstall the master cylinder reservoir and its cap and diaphragm then secure the master cylinder assembly back into the vehicle.
- Q: How to replace the brake master cylinder on Buick Rainier?A:Start by engaging the parking brake then disconnect the sensors on top of the Brake Master Cylinder. After that remove the brake pipes at their connections with the master cylinder. It is necessary to put rubber plugs on the open ends of brake hoses to stop brake fluid from leaking and keeping the system clean. Unscrew the mounting hardware from the master cylinder and withdraw the unit while draining its fluid into a container. Only then perform bench bleeding on the master cylinder prior to its new installation. Hand-tighten the master cylinder mounting nuts but also apply 36 n.m (27 lb ft) torque to them. Attach brake pipes to the lines and tighten their fittings to 32 n.m (24 lb ft) while removing rubber plugs. End by connecting the master cylinder fluid level sensor while going through a brake system bleed process.


Related Buick Rainier Parts
 Buick Rainier ABS Control Module
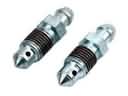 Buick Rainier Brake Bleeder Screw
 Buick Rainier Brake Booster
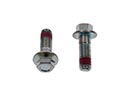 Buick Rainier Brake Caliper Bolt
 Buick Rainier Brake Caliper Bracket
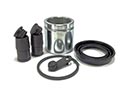 Buick Rainier Brake Caliper Repair Kit
 Buick Rainier Brake Line
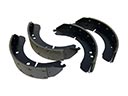 Buick Rainier Brake Shoe
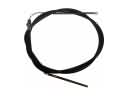 Buick Rainier Parking Brake Cable
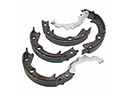 Buick Rainier Parking Brake Shoe
 Buick Rainier Wheel Hub Bolt
 Buick Rainier Wheel Speed Sensor