ChevyParts
My Garage
My Account
Cart
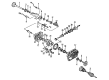
OEM Buick Rainier Universal Joint
U-Joint- Select Vehicle by Model
- Select Vehicle by VIN
Select Vehicle by Model
orMake
Model
Year
Select Vehicle by VIN
For the most accurate results, select vehicle by your VIN (Vehicle Identification Number).
1 Universal Joint found


Buick Rainier Universal Joints Part Number: 23104840
$36.45 MSRP: $88.98You Save: $52.53 (60%)
Buick Rainier Universal Joint
Want to cut long-term maintenance and repair costs? Choose OEM Universal Joint. Those parts deliver top durability you can trust. On our site, you'll find a huge catalog of genuine Buick Rainier parts. Prices are unbeatable, so you can keep more in your pocket. Every OEM Buick Rainier Universal Joint includes a manufacturer's warranty. You can also get an easy return policy that keeps buying risk free. Fast delivery, get your car on the road quickly. It's simple to search, compare, and order. Stop guessing about quality or fit. Order today and save with parts that last.
One of the essential interior components that signify the aspects of dependability and power in the Rainier line of Buick cars is the Buick Rainier Universal Joint that was used in the series between 2004 and 2007. This known as the Universal Joint and its main function is to link the driveshaft and the transmission as well as the differential, which are extremely significant for the Rainier's powerful movement and strong power trains. This vehicle component Buick Rainier Universal Joint is intended for receiving power and accommodating the changing the angles between them during passing through various road conditions, hard wearing needle bearings enclosed in steel cups. Satisfaction for the CXL and CXL Plus trims of Buick Rainier means this Universal Joint satisfies the many types of consumers. When it comes to the Buick Rainier Universal Joint, it is much than a simple tool that that helps in the running of the vehicle; rather is has a much larger and important role to play in the safety and efficiency of the vehicle. Louder noises or vibrations during its operations are signs that should prompt the owner to have it replaced to avoid drastically reducing or complete failure of the whole system. Further, the Buick Rainier Universal Joint listed above is distinguished in automotive market by its pre-lubricated construction that also requires the minimal maintenance along with tremendous abrasion opposition. The union of the engineering advancement and the utilization of high quality materials as captured in the Buick Rainier Universal Joint attests to Buick's fidelity in the pursuit of the synthesis of superior performance and safety in vehicles.
Buick Rainier Universal Joint Parts Questions & Experts Answers
- Q: How to replace the universal joint with a nylon injected ring on Buick Rainier?A:You need two equipment to change the Universal Joint: u joint bearing separator part j9522-3 and u joint bearing spacer remover j9522-5. Place the propeller shaft horizontally on a press device but never lock the tubing in a vise since it could harm the parts. Mark on the propeller shaft to show its two ends: transmission side and rear axle location. Set the Universal Joint onto the socket with one bearing cup resting on the socket edge that measures 30 mm (1 1/8 inch). Practically use the u joint bearing separator j9522-3 to cut the plastic bearing cup retaining ring and drive out the lower bearing cup from the yoke ear. Since the bearing cup will not emerge fully from the seal, place the u joint bearing spacer remover between the seal and cup first before continuing to push the cup out. As you rotate the shaft you push one bearing cup out and mark how the Slip Yoke fits to the tube for reinstalling. Check the bearing cup bores and retaining ring grooves of the cross for damage after its removal. Inspect both the entering and exiting bearing cups carefully for any imperfections. Sweep sheared plastic from the grooves since it blocks the new bearing cups from sitting properly. Place a bearing cup into one end of the yoke and turn down the yoke ear then put together the cross so the trunnion moves easily. Push the bearing cup into one yoke side until it reaches the surface then perform the same action for the other cup while adjusting trunnion position when necessary. Press until the bearing retainer groove touches the yoke then put the retainer in place before completing the press operation. Use a dead blow hammer to barely push the yoke back before placing retainers when they resist seating. Chassis grease will help the snap rings slide into position.


