ChevyParts
My Garage
My Account
Cart
OEM Cadillac CTS Neutral Safety Switch
Transmission Neutral Safety Switch- Select Vehicle by Model
- Select Vehicle by VIN
Select Vehicle by Model
orMake
Model
Year
Select Vehicle by VIN
For the most accurate results, select vehicle by your VIN (Vehicle Identification Number).
8 Neutral Safety Switches found


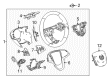
Cadillac CTS Paddle Switch, Passenger Side Part Number: 23133990
$102.86 MSRP: $161.00You Save: $58.14 (37%)

Cadillac CTS Paddle Switch, Driver Side Part Number: 23133991
$105.17 MSRP: $158.67You Save: $53.50 (34%)Ships in 1-2 Business Days
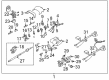
Cadillac CTS Back-Up Switch Part Number: 24044779
$92.14 MSRP: $150.84You Save: $58.70 (39%)Ships in 1-2 Business Days
Cadillac CTS Range Sensor Part Number: 24042167
$92.17 MSRP: $156.93You Save: $64.76 (42%)
Cadillac CTS Range Sensor Part Number: 24270012
$152.63 MSRP: $276.26You Save: $123.63 (45%)Ships in 1-2 Business Days


Cadillac CTS Neutral Safety Switch Part Number: 96042540


Cadillac CTS Paddle Switch, Black, Passenger Side Part Number: 20892780
$23.77 MSRP: $35.37You Save: $11.60 (33%)

Cadillac CTS Paddle Switch, Black, Driver Side Part Number: 20916648
$24.32 MSRP: $36.19You Save: $11.87 (33%)
Cadillac CTS Neutral Safety Switch
Want to cut long-term maintenance and repair costs? Choose OEM Neutral Safety Switch. Those parts deliver top durability you can trust. On our site, you'll find a huge catalog of genuine Cadillac CTS parts. Prices are unbeatable, so you can keep more in your pocket. Every OEM Cadillac CTS Neutral Safety Switch includes a manufacturer's warranty. You can also get an easy return policy that keeps buying risk free. Fast delivery, get your car on the road quickly. It's simple to search, compare, and order. Stop guessing about quality or fit. Order today and save with parts that last.
The Cadillac CTS Neutral Safety Switch stands as the key safety element in the brand's dedication to performance and reliability. The safety switch enables engine start only when either neutral or park positions are selected on the transmission thus preventing unintended operations while boosting driver and passenger safety measures. Various versions of the Neutral Safety Switch have been integrated by Cadillac throughout different CTS model generations as the company adapted its design to modernize while upholding its core operational function. Since its production run from 2003 through 2019 the Cadillac CTS delivered the essential safety feature through three released generations which maintained consistency across its different versions. The Neutral Safety Switch creates a safe driving environment for the Cadillac CTS as it facilitates effortless gear changes between gears. In addition to serving the demanding requirements of daily car usage the Cadillac CTS Neutral Safety Switch strengthens its product image in automotive markets. This component demonstrates reliability because it continues working properly across different environmental situations in the brand vehicles. The car Neutral Safety Switch functions as an essential component that benefits both safety and performance in the automaker model vehicles thus providing drivers safe luxury driving experiences.
Cadillac CTS Neutral Safety Switch Parts and Q&A
- Q: How to identify issues with the Neutral Safety Switch on Cadillac CTS?A:To replace the transmission position switch/sensor, first lift and assume the position of the vehicle. Install a new shaft seal with j44767 seal installer where leaking, and remove manual transmission shift shaft nut. Detach the shift linkage from the transmission manual shift shaft and remove the exhaust system. Release the coupler of the propeller shaft by pushing the front propeller shaft toward the rear of the vehicle from the transmission flange, disconnecting the propeller shaft coupler. Cinch mechanics wire on the shift control lever to the front propeller shaft. Eliminate and dispose of the shaft seal and cup plug in case of leaking. Transmissions do not need to be removed for the shift shaft position switch replacement except for manual shift shaft change. Disconnect the manual shift shaft position switch electrical connector and remove the retaining pin with the use of a suitably sized pin punch. Remove the manual shift shaft detent spring and bolts then place a suitable transmission jack under the support and also remove the support from the body. Lower the rear of the transmission just enough to allow the manual shift shaft to clear the vehicle floor pan, then extract the manual shift shaft from the transmission case to remove the manual shift shaft position switch, the manual shift shaft detent lever, the manual shift shaif assembly spacer, and the park pawl actuator as an assembly. For installation, put into the manual shift shaft position switch , detent lever , assembly spacer and park pawl actuator as one assembly, with the park pawl pushed up if necessary. Fully insert the manual shift shaft into the transmission case, lift up the transmission to its usual location and then install the transmission support. Take out the transmission jack, put in deftness syringe of manual shift shaft spring, and secure it, using control valve body bolts without tightening. Ensure that manual shift shaft detent lever locating pin fits in manual valve link and manual shift shaft switch with detent spring roller . (04.05). Employ a proper pin punch for the purpose of installing the manual shift shaft position switch retaining pin and join the related electrical connector with the switch. Place a 0.8 mm spacer between the manual shaft detent lever and the detent spring, and then tighten the detent spring bolts to 11 nm (97 inch lbs). Put aside the spacer, substitute the transmission fluid pan, and filter, and if taken out previously, apply a new shaft seal utilizing the j44767 seal installer. Mount the seal on the j44767 and then insert it into the transmission case to make sure it is seated properly. If previously removed, install a new cup plug lubricated with transmission fluid up flush with the transmission case. Undo the mechanics oiler securing the front propeller shaft to the shift control lever, insert the propeller shaft coupler (to the transmission flange) and reinstall the tyre system. Connect the shift linkage to the transmission manual shift shaft and install the manual shift shaft nut with securing it to the extent of 15 nm (11 ft. Lbs.). Last, modify shift control linkage and bring down the vehicle.
- Q: How to replace the Neutral Safety Switch on Cadillac CTS?A:Start by lifting and supporting the vehicle in order to replace the manual shift shaft position switch. With the help of a small screwdriver, take out the transmission manual shaft nut, and unbolt the shift link from the transmission manual shaft. Remove the system exhaust and disconnect the propeller shaft coupler from the transmission flange by pushing the front of the propeller shaft to the rear end of the vehicle. Secure the front propeller shaft to the shift control lever with a piece of mechanic's wire. If leaking, replace the shaft seal with the help of J 44767 seal installer to fit a new seal after removing the old one. Also, in case of leakage, remove the cup plug and discard it using a small screwdriver. It is not necessary to disassemble the transmission from the car unless the manual shift shaft needs replacement. Pull out the transmission fluid pan and filter, disconnect the electrical connector from the manual shift shaft position switch, and remove the manual shift shaft position switch retaining pins. Take down the manual shift shaft detent spring and bolts, position a suitable transmission jack under the transmission support, and unscrew the trans support from the body. Lower the rear of the transmission just enough so that the manual shift shaft can be cleared by the vehicle floor pan, then extract the manual shift shaft from the transmission case to get the manual shift shaft position switch, the manual shift shaft detent lever, the manual shift shaft assembly spacer, and the park pawl actuator as an assembly. In terms of installation, fit the manual shift shaft position switch, the manual shift shaft detent lever, the manual shift shaft assembly spacer, and the park pawl actuator assembled together and make sure that the park pawl is pushed up if required. Carefully place the manual shift shaft completely into the transmission case, lift the transmission to its original position, and install the transmission support. Take out the transmission jack, put in the manual shift shaft detent spring, and put in the control valve body bolts without tightening. Ensure there is correct engagement of the manual shift shaft detent lever locating pin with the manual valve link and the detent spring roller with the manual shift shaft switch. Use an appropriate pin punch to install the manual shift shaft position switch retaining pin and bolt the electrical connector to the manual shift shaft position switch. Insert a 0.8 mm spacer between the manual shaft detent lever and the manual shaft detent spring, then tighten the detent spring bolts to 11 Nm (97 lb in), and then remove the spacer. Install the transmission fluid pan and filter, and if taken out, put a new shaft seal on with the J 44767 seal installer by placing the seal on the tool and then into the transmission case. If previously taken off, lubricate and reinsert to flush with the transmission case a new cup plug. Remove the mechanic wire that fastens the front propeller shaft to the shift control lever, install the prop shaft coupler to the transmission, and of course, the windshield system should also be installed. Attach the shift linkage to the transmission manual shift shaft and tighten the parts, which comprise the transmission manual shift shaft nut to the level of 15 Nm (11 lb ft). Adjust the shift control linkage and lower the vehicle and reset the transmission adaptive pressures (TAP) using a scan tool, since this will delete all the learned values, and you will need to make the ECM, PCM, or TCM relearn the TAP values.

Related Cadillac CTS Parts
 Cadillac CTS Body Control Module
 Cadillac CTS Brake Light Switch
 Cadillac CTS Mass Air Flow Sensor
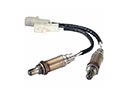 Cadillac CTS Oxygen Sensor
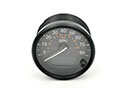 Cadillac CTS Speedometer
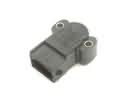 Cadillac CTS Throttle Position Sensor
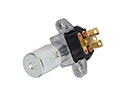 Cadillac CTS Dimmer Switch
 Cadillac CTS Engine Control Module
 Cadillac CTS Ignition Lock Assembly
 Cadillac CTS Ignition Lock Cylinder
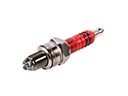 Cadillac CTS Spark Plug
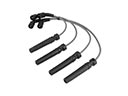 Cadillac CTS Spark Plug Wires