ChevyParts
My Garage
My Account
Cart
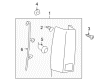
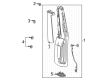
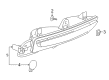
OEM Cadillac Tail Light
Tail Lamp- Select Vehicle by Model
- Select Vehicle by VIN
Select Vehicle by Model
orMake
Model
Year
Select Vehicle by VIN
For the most accurate results, select vehicle by your VIN (Vehicle Identification Number).
196 Tail Lights found


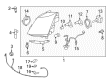
Cadillac Tail Lamp Assembly, Passenger Side Part Number: 15096924
$210.12 MSRP: $314.15You Save: $104.03 (34%)Ships in 1-3 Business DaysProduct Specifications- Other Name: Lamp Assembly-Tail; Back Up Light; Tail Light; Lamp, Tail Lamp
- Position: Passenger Side


Cadillac Combination Lamp Assy, Passenger Side Part Number: 22884388
$453.90 MSRP: $643.96You Save: $190.06 (30%)Ships in 1-3 Business DaysProduct Specifications- Other Name: Lamp Assembly-Tail; Back Up Light; Tail Light; Lamp, Tail Lamp
- Position: Passenger Side
- Replaces: 15890423, 22837840, 25895483


Cadillac Backup Lamp, Driver Side Part Number: 16518169
$32.66 MSRP: $40.92You Save: $8.26 (21%)Ships in 1-2 Business DaysProduct Specifications- Other Name: Lamp, Back Up Lamp
- Position: Driver Side

Cadillac Backup Lamp Assembly, Silver Part Number: 25713860
$250.54 MSRP: $374.57You Save: $124.03 (34%)Ships in 1-2 Business DaysProduct Specifications- Other Name: Lamp, Back Up Lamp
- Position: Rear Passenger Side

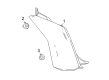
Cadillac Tail Lamp, Gray, Rear Passenger Side Part Number: 85133321
$548.39 MSRP: $822.00You Save: $273.61 (34%)Ships in 1-3 Business DaysProduct Specifications- Other Name: Lamp Assembly-Rear Body Structure Stop; Lamp, Tail Lamp
- Position: Rear Passenger Side

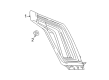
Cadillac Tail Lamp, Rear Driver Side Part Number: 84853177
$1077.32 MSRP: $1616.34You Save: $539.02 (34%)Ships in 1-3 Business DaysProduct Specifications- Other Name: Lamp, Rear Stop; Lamp, Tail Lamp
- Position: Rear Driver Side
- Replaced by: 87866702

Cadillac Tail Lamp, Rear Driver Side Part Number: 84315575
$535.25 MSRP: $802.26You Save: $267.01 (34%)Ships in 1-3 Business DaysProduct Specifications- Other Name: Lamp, Rear Stop; Lamp, Tail Lamp
- Position: Rear Driver Side
- Replaces: 23262479, 23399695, 23310255, 23472841, 84296846

Cadillac Tail Lamp, Rear Driver Side Part Number: 84059868
$645.42 MSRP: $967.71You Save: $322.29 (34%)Ships in 1-3 Business DaysProduct Specifications- Other Name: Lamp, Rear Stop; Lamp, Tail Lamp
- Position: Rear Driver Side
- Replaces: 23418925

Cadillac Tail Lamp, Red, Rear Driver Side Part Number: 84514976
$523.65 MSRP: $782.47You Save: $258.82 (34%)Ships in 1-3 Business DaysProduct Specifications- Other Name: Lamp, Rear Stop; Lamp, Tail Lamp
- Position: Rear Driver Side
- Replaced by: 85008944
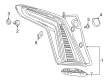
Cadillac Tail Lamp, Rear Passenger Side Part Number: 23310256
$611.54 MSRP: $916.83You Save: $305.29 (34%)Ships in 1-3 Business DaysProduct Specifications- Other Name: Lamp, Rear Stop
- Position: Rear Passenger Side

Cadillac Tail Lamp Assembly, Driver Side Part Number: 22806053
$463.33 MSRP: $695.82You Save: $232.49 (34%)Ships in 1-3 Business DaysProduct Specifications- Other Name: Lamp Assembly-Tail; Tail Light Assembly; Back Up Light; Tail Lamps; Tail Light; Car Bulbs; Taillamp Bulb; Lamp, Tail Lamp
- Position: Driver Side
- Replaces: 20878393, 25902143, 25875175, 22752223
Cadillac Tail Lamp, Rear Passenger Side Part Number: 84309759
$563.92 MSRP: $845.32You Save: $281.40 (34%)Ships in 1-3 Business DaysProduct Specifications- Other Name: Lamp, Rear Stop
- Position: Rear Passenger Side
- Replaced by: 84244999

Cadillac Tail Lamp, Rear Driver Side Part Number: 84864833
$527.33 MSRP: $790.37You Save: $263.04 (34%)Ships in 1-3 Business DaysProduct Specifications- Other Name: Lamp, Rear Stop; Lamp, Tail Lamp
- Position: Rear Driver Side
- Replaces: 84629093, 84522856

Cadillac Signal Lamp, Rear Part Number: 86809150
$187.62 MSRP: $280.51You Save: $92.89 (34%)Ships in 1-3 Business DaysProduct Specifications- Other Name: Lamp Assembly-Rear Closure Auxiliary Signal; Lamp, Tail Lamp
- Position: Rear
- Replaced by: 85638684

Cadillac Tail Lamp, Rear Driver Side Part Number: 85000454
$405.78 MSRP: $606.67You Save: $200.89 (34%)Product Specifications- Other Name: Lamp Assembly-Rear Body Structure Stop; Lamp, Tail Lamp
- Position: Rear Driver Side
- Replaces: 84774499, 84716494

Cadillac Backup Lamp, Rear Part Number: 20847473
$140.91 MSRP: $210.68You Save: $69.77 (34%)Ships in 1-3 Business DaysProduct Specifications- Other Name: Lamp Assembly-Back Up & Rear Fog; Back Up Light; Lamp, Back Up Lamp; Lamp, Tail Lamp
- Position: Rear
- Replaced by: 84429057
Cadillac Backup Lamp Assembly Part Number: 25774257
$383.35 MSRP: $573.13You Save: $189.78 (34%)Product Specifications- Other Name: Lamp, Back Up Lamp
- Position: Rear
- Replaces: 25713875
Cadillac Backup Lamp Assembly Part Number: 25713885
Product Specifications- Other Name: Lamp; Lamp, Back Up Lamp
Cadillac Backup Lamp, Passenger Side Part Number: 16518170
$27.50 MSRP: $40.92You Save: $13.42 (33%)Product Specifications- Other Name: Lamp, Back Up Lamp
- Position: Passenger Side
Cadillac Backup Lamp Assembly, White Part Number: 25722885
Product Specifications- Other Name: Lamp, Back Up Lamp
- Position: Rear
- Replaces: 25713870
| Page 1 of 10 |Next >
1-20 of 196 Results
Cadillac Tail Light
Want to cut long-term maintenance and repair costs? Choose OEM Tail Light. Those parts deliver top durability you can trust. On our site, you'll find a huge catalog of genuine Cadillac parts. Prices are unbeatable, so you can keep more in your pocket. Every OEM Cadillac Tail Light includes a manufacturer's warranty. You can also get an easy return policy that keeps buying risk free. Fast delivery, get your car on the road quickly. It's simple to search, compare, and order. Stop guessing about quality or fit. Order today and save with parts that last.
Cadillac Tail Light Parts Questions & Experts Answers
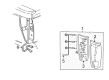
- Q: How to efficiently change the Tail Light on a Cadillac SRX?A:First access the tail lamp by opening the liftgate followed by removal of the body side rear trim panel. Clear the rear speaker from the right side. You can access the tail lamp nuts on the left side through this procedure: remove fasteners, tilt the auxiliary Blower Motor outward to reach these nuts. Users should move the liftgate close actuator motor control module to an improved access position for replacement tasks. After removing the rear seat belt retractor, unscrew the nuts that secure the tail lamp to the body then disconnect its electrical connector before you remove the tail lamp. Start by mounting the tail lamp assembly then connect the tail lamp electrical connector to finish installation. Screw in the tail lamp nuts to the body framework at 6 nm (53 lb in) torque. Put back the rear seat belt retractor before you begin installing the rear speaker for the right hand side of the vehicle. The left side installation includes the auxiliary Blower Motor and liftgate close actuator motor control module. The body side rear trim panel installation should be followed by closing the liftgate.
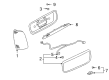
- Q: How to replace the Tail Light on Cadillac CTS?A:For the replacement of the tail lamp, start by opening the rear compartment, also remove rear compartment sill plate. Next pull rear compartment trim panel away and disconnect the tail lamp connector from the body main harness connector . Unscrew the fasteners that hold the tail lamp onto the body and pull the tail lamp assembly to unhook the clips (1, 2) holding the assembly in place. Pull the tail lamp harness in order to detach the tail lamp harness grommet from the body and pull out the tail lamp assembly. For installation, position the tail lamp to the body and insert the tail lamp harness into the body, pushing the tail lamp harness grommet until it is fully seated. Mount the tail lamp locators into the body until the tail lamp retainers (1, 2) are fully established, then fasten the tail lamp to the body with the fasteners, torquing to 6 n.m (53 lb in). Make the connection between the tail lamp harness connector with the body main harness connector, move the rear compartment trim panel, install the rear compartment sill plate and finally close the rear compartment.
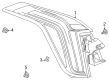
- Q: How to replace the Tail Light/Turn Signal Lamp on Cadillac XLR?A:Commence tail/turn signal lamp replacement by opening the rear compartment then remove its Light Emitting Diode (LED) based illumination system which functions as a single serviceable unit. Start by removing caps from the tail/turn lamp screws then unscrew the tail/turn lamp mounting screws on the rear quarter panel. The rearward pull on the tail/turn lamp will detach it from its quarter panel mounting while removing the electrical connector from the tail/turn lamp prior to lamp removal. Connect the electrical connector to the tail/turn lamp before placing the lamp in position on the quarter panel. Begin by installing the motorized tail/turn lamp screws then ensure they achieve a torque value of 2 N.m (18 lb in). Finally fasten the tail/turn lamp screw caps . After inspecting the tail/turn lamp check for proper operation then finish by closing the rear compartment.


Related Cadillac Parts
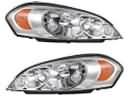 Cadillac Headlight
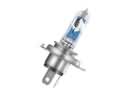 Cadillac Headlight Bulb
 Cadillac Back Up Light
 Cadillac Fog Light
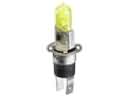 Cadillac Fog Light Bulb
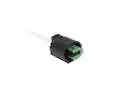 Cadillac Forward Light Harness Connector
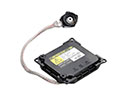 Cadillac Hid Bulb Ballast
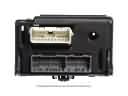 Cadillac Light Control Module
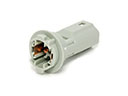 Cadillac Light Socket
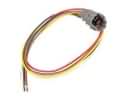 Cadillac Rear Light Harness Connector
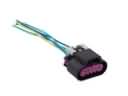 Cadillac Tail Light Connector
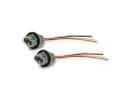 Cadillac Turn Signal Light Connector