ChevyParts
My Garage
My Account
Cart
OEM Cadillac Headlight Bulb
Headlamp Bulb- Select Vehicle by Model
- Select Vehicle by VIN
Select Vehicle by Model
orMake
Model
Year
Select Vehicle by VIN
For the most accurate results, select vehicle by your VIN (Vehicle Identification Number).
35 Headlight Bulbs found


Cadillac Headlamp Bulb Part Number: 13500813
$13.52 MSRP: $24.17You Save: $10.65 (45%)Ships in 1-3 Business DaysProduct Specifications- Other Name: Bulb, Headlamp *Trade W21/5Wull; Daytime Running Light Bulb; Fog Light Bulbs; Headlight Bulbs; Car Bulbs; Exterior Bulbs; Fog Lamp Bulb; Lower Beam Bulb; Run Lamp Bulb; Bulb; Bulb, Capsule/Headlamp/Fog Lamp; Bulb, Bulb


Cadillac Exterior Bulbs, Passenger Side Part Number: 22783822
$169.00 MSRP: $330.88You Save: $161.88 (49%)Ships in 1-2 Business DaysProduct Specifications- Other Name: Bulb-Daytime Running Lamp; Daytime Running Light Bulb; Car Bulbs; Run Lamp Bulb; Bulb, Capsule/Headlamp/Fog Lamp
- Position: Passenger Side


Cadillac Bulb & Socket Part Number: 19257054
$14.11 MSRP: $25.22You Save: $11.11 (45%)Ships in 1-2 Business DaysProduct Specifications- Other Name: Bulb Assembly, Headlamp (Low Beam); Fog Light Bulbs; Headlight Bulbs; Car Bulbs; Headlight; Headlamp Bulb; Composite Assembly; Fog Lamp Bulb; Lower Beam Bulb; Bulb; Bulb, Capsule/Headlamp/Fog Lamp
- Replaces: 09441733, 12450177, 01999366, 9441733, 01999357, 1999366, 1999357


Cadillac Turn Signal Bulb Part Number: 13579204
$24.77 MSRP: $44.24You Save: $19.47 (45%)Ships in 1-2 Business DaysProduct Specifications- Other Name: Bulb, Capsule/Headlamp/Fog Lamp; Turn Signal Bulbs; Headlight Bulbs; Car Bulbs; Headlamp Bulb; High Beam Bulb; Lower Beam Bulb
- Replaces: 20894761


Cadillac Hid Bulb Part Number: 25911883
$133.31 MSRP: $239.11You Save: $105.80 (45%)Ships in 1-3 Business DaysProduct Specifications- Other Name: Bulb; Headlight Bulbs; Car Bulbs; Headlamp Bulb; Igniter
- Replaced by: 19369522


Cadillac Headlamp Bulb, Green Line Part Number: 13586977
$14.63 MSRP: $27.48You Save: $12.85 (47%)Ships in 1-2 Business DaysProduct Specifications- Other Name: Bulb, Capsule/Headlamp/Fog Lamp; Fog Light Bulbs; Headlight Bulbs; Car Bulbs; High Beam Bulb; Parking Lamp Bulb; Fog Lamp Bulb; Lower Beam Bulb; Bulb
- Replaced by: 13503417


Cadillac Turn Signal Bulb, Amber Part Number: 13596817
$9.98 MSRP: $17.82You Save: $7.84 (44%)Ships in 1-3 Business DaysProduct Specifications- Other Name: Bulb, Turn Signal *Amber; Daytime Running Light Bulb; Turn Signal Bulbs; Headlight Bulbs; Car Bulbs; Tail, Signal, Marker, Stop Lamp Bulbs; Exterior, Park/Turn, Cornering, Capsule/Headlamp/Fog Bulbs.
- Replaces: 13503357


Cadillac Turn Signal Bulb Part Number: 13502321
$9.98 MSRP: $17.82You Save: $7.84 (44%)Ships in 1-2 Business DaysProduct Specifications- Other Name: Bulb, Capsule/Headlamp/Fog Lamp; Daytime Running Light Bulb; Turn Signal Bulbs; Car Bulbs; Signal Lamp Bulb; Parking Lamp; Turn Signal, Cornering, Daytime, Marker, Hazard, Opera Flasher
- Position: Front
- Replaces: 10319394, 15233607


Cadillac Turn Signal Bulb Part Number: 13579188
$7.22 MSRP: $13.56You Save: $6.34 (47%)Ships in 1-3 Business DaysProduct Specifications- Other Name: Bulb-Parking & Turn Signal Lamp; Turn Signal Bulbs; Car Bulbs; Tail Lamp Bulb; Side Marker; Signal; Parking; Exterior; Stoplamp; Turn Signal; Standard Parts.
- Replaces: 13500817, 13579187, 13579189


Cadillac Bulb & Socket, Green Line Part Number: 9441732
$13.16 MSRP: $23.52You Save: $10.36 (45%)Ships in 1-3 Business DaysProduct Specifications- Other Name: Bulb, Headlamp (High Beam); Headlight Bulbs; Car Bulbs; Headlight; Headlamp Bulb; High Beam; Composite Assembly; Fog Lamp/Turn Signal; Capsule Bulb
Cadillac Exterior Bulbs, Driver Side Part Number: 22783823
$184.47 MSRP: $330.86You Save: $146.39 (45%)Ships in 1-2 Business DaysProduct Specifications- Other Name: Bulb-Daytime Running Lamp; Daytime Running Light Bulb; Car Bulbs; Run Lamp Bulb; Bulb, Capsule/Headlamp/Fog Lamp
- Position: Driver Side

Cadillac Bulb & Socket Part Number: 19257055
$5.80 MSRP: $10.39You Save: $4.59 (45%)Ships in 1-3 Business DaysProduct Specifications- Other Name: Bulb Assembly, Headlamp; Headlight Bulbs; Car Bulbs; Headlight; Headlamp Bulb; Composite Headlamp; Composite Assembly; Bulb; Bulb, Capsule/Headlamp/Fog Lamp
- Replaces: 09441731, 9441731

Cadillac Turn Signal Bulb Part Number: 20998089
$5.08 MSRP: $9.10You Save: $4.02 (45%)Ships in 1-2 Business DaysProduct Specifications- Other Name: Bulb-Stop & Tail & Turn Signal Lamp; Daytime Running Light; Back Up Light; Parking Light; Turn Signal; Tail Light Bulbs.; Tail Lamp Bulb; Backup, Stop, Signal, and Run Lamp Bulbs; Standard Parts.
- Replaces: 13502322


Cadillac Sealed Beam Part Number: 16532129
Product Specifications- Other Name: Bulb, Headlamp; Headlight; Headlamps; Seal Beam, Capsule/Headlamp/Fog Lamp; Bulb, Capsule/Headlamp/Fog Lamp
- Replaces: 05966200, 5966200

Cadillac Hid Bulb Part Number: 13501591
Product Specifications- Other Name: Bulb; Headlight Bulbs; Car Bulbs; Headlamp Bulb

Cadillac Lower Beam Bulb Part Number: 19371171
Product Specifications- Other Name: Bulb, Capsule/Headlamp/Fog Lamp
- Replaces: 19352170

Cadillac Hid Bulb Part Number: 25735604
Product Specifications- Other Name: Bulb; Headlight Bulbs; Car Bulbs; Headlamp Bulb; Lower Beam Bulb
- Replaces: 12335923, 25735603

Cadillac Headlamp Bulb Part Number: 88979814
Product Specifications- Other Name: Bulb; Headlight Bulbs; Car Bulbs; Lower Beam Bulb

Cadillac Sealed Beam Part Number: 5930567
Product Specifications- Other Name: Bulb, Headlamp (High Beam); Headlight; Headlamps; Seal Beam, Capsule/Headlamp/Fog Lamp; Bulb, Sealed Beam.
Cadillac Headlamp Bulb Part Number: 19244673
Product Specifications- Other Name: Bulb Assembly, Headlamp (Low Beam); Headlight; Sealed Beam; Headlamps; Seal Beam, Capsule/Headlamp/Fog Lamp; Bulb, Capsule/Headlamp/Fog Lamp
- Replaces: 16502327
| Page 1 of 2 |Next >
1-20 of 35 Results
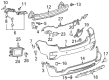
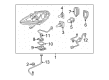
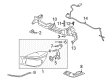
Cadillac Headlight Bulb
Want to cut long-term maintenance and repair costs? Choose OEM Headlight Bulb. Those parts deliver top durability you can trust. On our site, you'll find a huge catalog of genuine Cadillac parts. Prices are unbeatable, so you can keep more in your pocket. Every OEM Cadillac Headlight Bulb includes a manufacturer's warranty. You can also get an easy return policy that keeps buying risk free. Fast delivery, get your car on the road quickly. It's simple to search, compare, and order. Stop guessing about quality or fit. Order today and save with parts that last.
Cadillac Headlight Bulb Parts Questions & Experts Answers
- Q: How to replace the 9005 High Beam Headlight Bulb on Cadillac Eldorado?A:Starting the 9005 High Beam headlamp bulb replacement process requires a turned-off lamp switch and cool bulbs. Protection for your eyes must always be worn while handling bulbs by their base section and never touch the glass surface or let moisture reach or touch the bulb. Discard the used bulb correctly and store halogen bulbs where children cannot access them. Start by removing the upper filler panel before turning the inner headlamp bulb counter-clockwise 45 degrees to remove it from behind the headlamp panel housing. Remove the inoperative bulb by first disconnecting the electrical connector that belongs to the bulb. Connect the electrical connector to the new headlamp bulb before positioning the bulb into the headlamp capsule. Then twist it clockwise an angle of 45 degrees for installation. Reattach the upper filler panel as a last step. Keep the new bulb free of both contact and moisture contact since both oil and moisture can lead the bulb to explode upon use. Use alcohol or an appropriate degreasing agent to clean the bulb before drying it.
- Q: How to service the front headlight bulb on Cadillac DeVille?A:Service of the headlamp bulb requires you to start by taking out the headlamp. Begin the headlamp bulb service by pressing on the top lever tab of the cover which will slide down so inspect the halogen bulb caution. Move past the headlamp to take out both the socket along with the bulb before you detach the bulb from its socket. Installation should start by inserting the bulb into the socket after which you need to place the socket-and-bulb assembly into the headlamp. The installation process ends with headlamp cover locking while ensuring the lever tab remains correctly connected before returning the assembly to its place.
- Q: How to Replace the Headlight Bulb on Cadillac CTS?A:The process of changing the headlamp bulb starts with properly elevating the vehicle for work access. Access to the fascia extension retainers becomes possible after removing the push-pin retainers installed on the air deflector. Then unlock the hood. Use a pair of pliers to remove all push-pin retainers that join the grille and fascia to the top tie bar but keep the first retainer past the center flexible. Disassemble the front fascia extension by first removing bolt which holds the front fascia to the fender and secondly loosening bolt securing the front fascia to the fender. Guide the front fascia to position its studs at the enlarged hole section inside the fender key slot before pulling it downward to separate it from the fender. Unfasten the three headlamp bolts then unplug the headlamp washer hose (if present) before straight pulling the headlamp forward to release the fender socket from the ball stud. The operator should disconnect the front lamp electrical connector while pulling the grille assembly slightly forward to pull out the lamp assembly from its position. First remove the headlamp bulb cover together with the bulb from the assembly while following strict halogen bulb safety guidelines. You should first install the new bulb inside the assembly then reinstall the cover. Install the assembly by reconnecting its electrical connectors which are located behind. Push the headlamp assembly toward the fender until the front ball stud creates a connection with the socket then fasten it by tightening bolts to 6 n.m (53 lb in). Push the fascia to insert its studs into fender key slots followed by pulling it toward the rental to attach it while using bolts (1, 2) that need tightening to 9 n.m (80 lb in). Fasten the front fascia extension in place before putting push-pin retainers on the upper front fascia and grille to the upper tie bar. Then shut the hood and lower the car. Finish the installation by placing the air deflector properly then fasten it with push-pin retainers before setting the vehicle to ground level.


Related Cadillac Parts
 Cadillac Tail Light
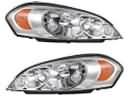 Cadillac Headlight
 Cadillac Back Up Light
 Cadillac Fog Light
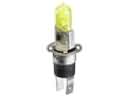 Cadillac Fog Light Bulb
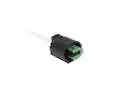 Cadillac Forward Light Harness Connector
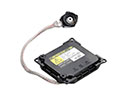 Cadillac Hid Bulb Ballast
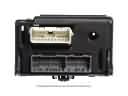 Cadillac Light Control Module
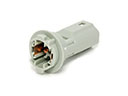 Cadillac Light Socket
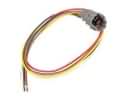 Cadillac Rear Light Harness Connector
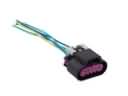 Cadillac Tail Light Connector
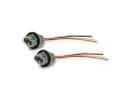 Cadillac Turn Signal Light Connector