ChevyParts
My Garage
My Account
Cart
OEM Chevrolet Classic Battery Cable
Car Battery Cable- Select Vehicle by Model
- Select Vehicle by VIN
Select Vehicle by Model
orMake
Model
Year
Select Vehicle by VIN
For the most accurate results, select vehicle by your VIN (Vehicle Identification Number).
2 Battery Cables found

Chevrolet Classic Positive Cable Part Number: 15371998

Chevrolet Classic Negative Cable Part Number: 15371997
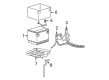
Chevrolet Classic Battery Cable
Want to cut long-term maintenance and repair costs? Choose OEM Battery Cable. Those parts deliver top durability you can trust. On our site, you'll find a huge catalog of genuine Chevrolet Classic parts. Prices are unbeatable, so you can keep more in your pocket. Every OEM Chevrolet Classic Battery Cable includes a manufacturer's warranty. You can also get an easy return policy that keeps buying risk free. Fast delivery, get your car on the road quickly. It's simple to search, compare, and order. Stop guessing about quality or fit. Order today and save with parts that last.
Chevrolet Classic Battery Cable Parts Questions & Experts Answers
- Q: How to replace the negative battery cable on Chevrolet Classic?A:The procedure for battery negative cable replacement begins by disconnecting the negative Battery Cable then removing its bolt retaining the core support. Begin by removing first and foremost the tape used to fasten the positive cable and ground strap to the negative cable afterward extracting the negative cable from its retainers. Start by lifting up the vehicle until it's reachable. Then remove the lower closeout panel along with the front transmission mount. First detach the bellhousing stud retaining the ground cable and next remove the ground cable itself from the stud. The first step of installation involves securing the ground cable to the bellhousing stud with its installed nut. After you reinstall both components, you can begin lowering the vehicle. The installation sequence ends when you secure the negative cable within the retainers followed by taping the positive cable together with the ground strap onto the negative cable. You can then bolt in place the ground cable on the core support before linking the negative ground cable.

Related Chevrolet Classic Parts
 Chevrolet Classic Air Bag Clockspring
 Chevrolet Classic Alternator
 Chevrolet Classic Engine Control Module
 Chevrolet Classic Headlight Relay
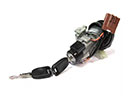 Chevrolet Classic Igniter
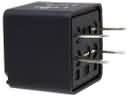 Chevrolet Classic Relay
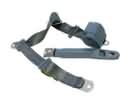 Chevrolet Classic Seat Belt
 Chevrolet Classic Spark Plug
 Chevrolet Classic Starter
 Chevrolet Classic Turn Signal Switch
 Chevrolet Classic Washer Pump
 Chevrolet Classic Wiper Pivot