
Popular OEM Chevrolet Classic Parts
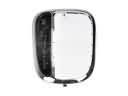
- Body & Hardware Parts View More >
- Steering Parts View More >
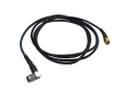
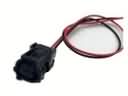
- Electrical Parts View More >
- Air & Fuel Delivery Parts View More >
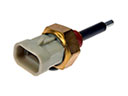
- Engine Parts View More >
- Belts & Cooling Parts View More >
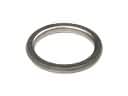
- Suspension Parts View More >
- Emission Control & Exhaust Parts View More >
- Transmission Parts View More >
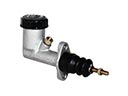
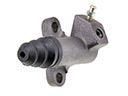
- Brakes Parts View More >
- Headlights & Lighting Parts View More >
- A/C & Heating Parts View More >


Why Buy Genuine Chevrolet Classic Parts From ChevyPartsGiant.com
Looking for real Chevrolet Classic parts? ChevyPartsGiant.com may be a better choice to find genuine parts at wallet-friendly prices. We sell only OEM Chevrolet Classic parts, ensuring perfect fit, reliability, and long-term performance. With our website, you can easily get access to the same parts found at local Chevrolet stores. All components are produced by Chevrolet and are exclusively fitted on Chevrolet Classic automobiles. By shopping at our store, you can enjoy the quality of the Chevrolet factory without the high prices of brick-and-mortar facilities. We achieve this because we are an online store operating at lower costs, which we pass on to you. We also have a user-friendly platform where you can find and order genuine Chevrolet Classic parts swiftly. We are here to make your process of restoring a Chevrolet Classic or dealing with simple repairs quick and inexpensive. We also make it easy to obtain Chevrolet Classic parts at competitive shipping prices and a team of knowledgeable staff ready to take your order. Choose ChevyPartsGiant.com to save time and money, as well as keep your Chevrolet Classic in the good condition.
The Chevrolet Classic emerged onto the market in 1997 through rebranding the Cavalier model. TheEHICLE underwent an architectural transition from its initial design of rear-wheel-drive (RWD) to a modern front-wheel-drive (FWD) construction. Manufacturers at Chevrolet continuously upgraded the Classic model from 1965 through time by adding new grilles and exhaust systems but kept the 1964 body design intact. The 1997 reintroduced Chevrolet Classic received extensive design modifications that incorporated novel external looks and enhanced interior elements. When production reached the 1968 year Chevrolet started making two-door turbocharged utilities while adding an instrument panel that resembled the Camaro. For the 1969 Chevrolet Classic manufacturer implemented new hood and tailgate designs with front seat headrests as standard safety equipment. The Classic received a fresh grille update during 1971 while starting to use low-octane unleaded gasoline engines as GM implemented their approach to emission controls. Chevrolet Classic evolved through the 1973 redesign which brought various new models to its collection including the Classic SS. Throughout its historical journey the Chevrolet Classic upheld its core values in terms of performance and reliability through the use of genuine parts which follow Chevrolet manufacturing standards to guarantee operational excellence for all types of users.
Chevrolet Classic groups these issues into engine sealing, front hub dynamics, and fuel delivery. In engine sealing, the Classic may lose coolant, idle roughly, and leave external seepage trails. Composite gaskets shrink at coolant ports and pull away under heat cycling. Reseal the intake manifold gasket using the updated design and the correct Chevrolet torque pattern. Bleed the cooling system, verify thermostat operation, pressure test cap and hoses, and check for residual hydrocarbon contamination. For wheel end dynamics, the Classic can growl up front and flash the ABS light. Pitted bearings loosen within the front hub and disturb wheel speed signals. Replace the front hub assembly, on the Classic, then confirm smooth rotation and accurate sensor readings. In fuel delivery, the Classic may crank long, stumble on hills, or stall during passes. An aging in tank fuel pump loses pressure and allows drain back through a weak check valve. Install a new fuel pump module and strainer, then verify grounds and hot soak pressure per Chevrolet guidance. After repairs, the Chevrolet Classic should stop quietly, run cool, and restart cleanly in traffic.
Chevrolet Classic Parts Questions & Answers
- Q: How to replace the alternator on Chevrolet Classic?A:When replacing the Alternator, disconnect the negative cable from the battery, as well as remove the air cleaner resonator, first. Next take out the oil level indicator tube bolt and; then re-position the tube, then remove the Drive Belt. Before dropping the auto to retrieve the generator, disconnect the electrical connectors from the generator and remove the generator bolts. For installation, put the generator at the place and lift the vehicle. Attach the generator bolts and tighten them to 22 n.m (16 lb ft) then link generator electrical connectors and tighten them to 20 n.m (15 lb ft). Then reinstall the Drive Belt and the oil level indicator tube bolt, as well as the air cleaner resonator. Lastly, lower the vehicle and reattach the negative Battery Cable.
- Q: How to Replace a Rear Door Handle for Outside on Chevrolet Classic?A:Starting the replacement of the rear side door outside handle requires users to raise the window all the way before removing the rear door water deflector. Start by uninstalling the Door Handle bracket along with its nut from the inside. Rotate the handle toward the top to separate it from the door. The Door Handle rod needs to be detached from the Door Lock and Door Handle needs to be removed from both components before removing the Door Handle rod. You should initially attach the Door Handle rod to the Door Handle before placing the Door Handle inside the door. Screw the bracket onto the outside Door Handle then fasten the outside Door Handle nut until it reaches 10 n.m (89 lb in). To finish the installation process connect the Door Handle rod with the Door Lock Actuator before putting back the water deflector.
- Q: How to properly service and repair the Throttle Body on Chevrolet Classic?A:To replace the Throttle Body assembly, one wants to disconnect the air cleaner resonator, then disconnect the idle air control (IAC) valve harness connector, and the throttle position (TP) harness connector, then disconnect the vacuum hoses at the Throttle Body. Then strip off the accelerator control bracket and cables from the Throttle Body, then Throttle Body attaching bolts and studs , and then eject the Throttle Body from the Intake Manifold. For installation, check the Throttle Body Gasket and if required, change it after which you will install Throttle Body onto the Intake Manifold tightening it with Throttle Body attaching bolts and studs then tighten it to 10 n.m (89 lb in). Reuse the accelerator cable bracket and cables and the vacuum hoses to the Throttle Body, as well as connect up the tp sensor and iac valve harness connectors. Lastly, adjust the accelerator movement again by depressing and releasing the pedal completely.
- Q: How to replace the water pump in a car with an automatic transmission on Chevrolet Classic?A:Replacement begins with Exhaust Manifold removal when the vehicle runs on automatic transmission. Start by emptying the cooling system and then securely raise the vehicle for work. Take out the right front tire first with its wheel. Afterward handle the front fender liner displacemnt. You need to remove the cover that gives access to the Water Pump sprocket on the Timing Cover. Set the Water Pump holding tool part j 43651 to the Water Pump sprocket and position it on the engine front cover through the access plate bolts. Unfasten Water Pump sprocket bolts to extract them and afterwards detach the engines block to Water Pump bolt followed by the engine front cover to Water Pump bolt. Before removing the Water Pump disconnect both its connections: the Water Pump to Thermostat Housing feed pipe and two engine block bolts. Thread the stud through the Water Pump sprocket hub and pump to line them up before installing the Water Pump. Secure the Water Pump against the engine block through the 2 bolts and fasten them to 20 nm (15 ft. Lbs.). Install the feed pipe first before bolting on the engine front cover using both bones and tightening them to 20 nm (15 ft. Lbs.). Place the last bolt into the Water Pump sprocket before taking off the threaded stud and bolt the sprocket to the Water Pump at 10 nm (89 inch lbs.). Put the Water Pump holding tool j 43651 aside then clamp the access plate onto the Water Pump sprocket to the Timing Cover and secure it with bolts which need tightening to 10 nm (18 inch lbs.). After that reinstall the front fender liner, right front tire and wheel together with the Exhaust Manifold when needed before adding cooling liquid.


