ChevyParts
My Garage
My Account
Cart
OEM Chevrolet Classic Seat Motor
Car Seat Motor- Select Vehicle by Model
- Select Vehicle by VIN
Select Vehicle by Model
orMake
Model
Year
Select Vehicle by VIN
For the most accurate results, select vehicle by your VIN (Vehicle Identification Number).
1 Seat Motor found


Chevrolet Classic Motor & Bracket, Front Part Number: 16776529
Chevrolet Classic Seat Motor
Want to cut long-term maintenance and repair costs? Choose OEM Seat Motor. Those parts deliver top durability you can trust. On our site, you'll find a huge catalog of genuine Chevrolet Classic parts. Prices are unbeatable, so you can keep more in your pocket. Every OEM Chevrolet Classic Seat Motor includes a manufacturer's warranty. You can also get an easy return policy that keeps buying risk free. Fast delivery, get your car on the road quickly. It's simple to search, compare, and order. Stop guessing about quality or fit. Order today and save with parts that last.
Chevrolet Classic Seat Motor Parts Questions & Experts Answers
- Q: How to Replace a Front Seat Motor in a Power Seat on Chevrolet Classic?A:Start by positioning the front seat to its highest vertical level followed by seat removal before beginning the motor replacement process. Before extracting the vertical and horizontal drive cables from their respective actuators, users must apply force to the oblong connectors for cables (1,3) and disconnect motor electrical connectors (2,4,5). Start by removing the motor support bracket nut from the seat adjuster then use a tool to remove the retaining clip from the horizontal motor and finally remove the motor support bracket from the seat adjuster. Drill out the support bracket's rivets followed by motor removal (2,4,5) from this bracket. Starting with the grommet installation to the motor support bracket you can install the motor (2,4,5) with proper rivets into the grommet and bracket. Before completing the installation secure the motor support bracket nut on the seat adjuster until it reaches 8 N.m torque (70 lb in torque). Drop the retaining clip onto the horizontal motor before attaching drive cables (1,3) to vertical and horizontal actuators by connecting their connectors until you hear a loud audible snap. Purchase the electrical connectors before installing them to motors (1,2,3). Next install the front seat and return it to its original position.

Related Chevrolet Classic Parts
 Chevrolet Classic Automatic Transmission Shift Levers
 Chevrolet Classic Center Console
 Chevrolet Classic Door Lock
 Chevrolet Classic Door Striker
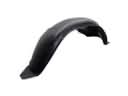 Chevrolet Classic Fender Splash Shield
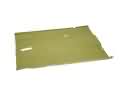 Chevrolet Classic Floor Pan
 Chevrolet Classic Lift Support
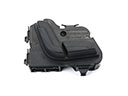 Chevrolet Classic Seat Switch
 Chevrolet Classic Tailgate Latch
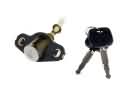 Chevrolet Classic Trunk Lock Cylinder
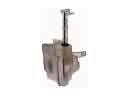 Chevrolet Classic Washer Reservoir
 Chevrolet Classic Weather Strip