ChevyParts
My Garage
My Account
Cart
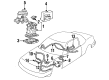
OEM Chevrolet Express 2500 Antenna
Radio Antenna- Select Vehicle by Model
- Select Vehicle by VIN
Select Vehicle by Model
orMake
Model
Year
Select Vehicle by VIN
For the most accurate results, select vehicle by your VIN (Vehicle Identification Number).
7 Antennas found


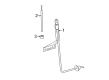
Chevrolet Express 2500 Antenna Mast Part Number: 10277375
$35.16 MSRP: $96.62You Save: $61.46 (64%)


Chevrolet Express 2500 Antenna Mast Part Number: 20842596
$31.44 MSRP: $59.00You Save: $27.56 (47%)Ships in 1-2 Business Days


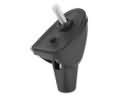
Chevrolet Express 2500 Antenna Assembly Part Number: 15938939
$35.56 MSRP: $66.80You Save: $31.24 (47%)Ships in 1-2 Business Days


Chevrolet Express 2500 Antenna Mast, Black Part Number: 15087886
$68.17 MSRP: $132.32You Save: $64.15 (49%)Ships in 1-3 Business Days
Chevrolet Express 2500 Antenna Assembly Part Number: 12450669
$31.66 MSRP: $122.94You Save: $91.28 (75%)Ships in 1-2 Business Days

Chevrolet Express 2500 Antenna Mast Part Number: 19117040

Chevrolet Express 2500 Antenna, Power Part Number: 15010395
Chevrolet Express 2500 Antenna
Want to cut long-term maintenance and repair costs? Choose OEM Antenna. Those parts deliver top durability you can trust. On our site, you'll find a huge catalog of genuine Chevrolet Express 2500 parts. Prices are unbeatable, so you can keep more in your pocket. Every OEM Chevrolet Express 2500 Antenna includes a manufacturer's warranty. You can also get an easy return policy that keeps buying risk free. Fast delivery, get your car on the road quickly. It's simple to search, compare, and order. Stop guessing about quality or fit. Order today and save with parts that last.
Chevrolet Express 2500 Antenna Parts Questions & Experts Answers
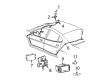
- Q: How to replace the navigation antenna on Chevrolet Express 2500?A:The first step to replace the navigation antenna is disconnecting the electrical connector during an OFF position ignition. You should move the antenna away from the headliner by maintaining its parallel position with the windshield to remove it from the bracket. After positioning the antenna onto its bracket slide it towards the headliner until complete seating of the antenna is achieved. Reinstall the electrical connector to the antenna as the final step.

Related Chevrolet Express 2500 Parts
 Chevrolet Express 2500 Antenna Base
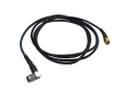 Chevrolet Express 2500 Antenna Cable
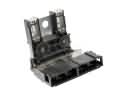 Chevrolet Express 2500 Battery Fuse
 Chevrolet Express 2500 Body Control Module
 Chevrolet Express 2500 Brake Light Switch
 Chevrolet Express 2500 Distributor Reluctor
 Chevrolet Express 2500 Fuse Box
 Chevrolet Express 2500 Ignition Switch
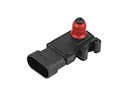 Chevrolet Express 2500 MAP Sensor
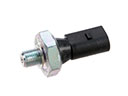 Chevrolet Express 2500 Oil Pressure Switch
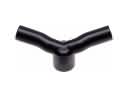 Chevrolet Express 2500 PCV Valve Hose
 Chevrolet Express 2500 Parking Assist Distance Sensor