ChevyParts
My Garage
My Account
Cart
OEM Chevrolet S10 Neutral Safety Switch
Transmission Neutral Safety Switch- Select Vehicle by Model
- Select Vehicle by VIN
Select Vehicle by Model
orMake
Model
Year
Select Vehicle by VIN
For the most accurate results, select vehicle by your VIN (Vehicle Identification Number).
7 Neutral Safety Switches found


Chevrolet S10 Back-Up Switch Part Number: 19152823
$14.18 MSRP: $34.18You Save: $20.00 (59%)

Chevrolet S10 Neutral Safety Switch Part Number: 24229422
$79.63 MSRP: $130.34You Save: $50.71 (39%)


Chevrolet S10 Neutral Safety Switch Part Number: 24221125
$86.84 MSRP: $147.85You Save: $61.01 (42%)Ships in 1-2 Business Days


Chevrolet S10 Neutral Safety Switch Part Number: 14094368
$14.91 MSRP: $24.54You Save: $9.63 (40%)Ships in 1-2 Business Days


Chevrolet S10 Clutch Switch Part Number: 15027967
$31.20 MSRP: $97.33You Save: $66.13 (68%)Ships in 1-2 Business Days


Chevrolet S10 Neutral Safety Switch Part Number: 15705308

Chevrolet S10 Neutral Safety Switch Part Number: 15569768
Chevrolet S10 Neutral Safety Switch
Want to cut long-term maintenance and repair costs? Choose OEM Neutral Safety Switch. Those parts deliver top durability you can trust. On our site, you'll find a huge catalog of genuine Chevrolet S10 parts. Prices are unbeatable, so you can keep more in your pocket. Every OEM Chevrolet S10 Neutral Safety Switch includes a manufacturer's warranty. You can also get an easy return policy that keeps buying risk free. Fast delivery, get your car on the road quickly. It's simple to search, compare, and order. Stop guessing about quality or fit. Order today and save with parts that last.
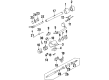
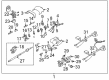
Neutral Safety Switch applied in Chevrolet S10 is quite important as it prevents the starting of the vehicle unless the gear shift is in the neutral or 'park' position; making it safe to operate. This switch plays the role of a security measure that will not allow the car to start unless the appropriate gear is engaged. For all these years, different Chevrolet S10 vehicles have incorporated different types of Neutral Safety Switches, which engage the proper gear before the car's engine is started. These above mentioned variations have thus assist in the enhancement of the safety and efficiency of the Chevrolet S10's Neutral Safety Switch.
Chevrolet S10 Neutral Safety Switch Parts and Q&A
- Q: How to replace the Neutral Safety Switch on Chevrolet S10?A:To replace the park/neutral position switch, start by using the parking break, and then move the car in neutral mode. Raise the vehicle and disengage the nut to fix the control transmission lever to the shaft of the manual and then remove the control transmission lever. Unplug the wires connected to the switch and take the bolts that secure the park/neutral position switch to the transmission and do not forget to take out the switch form the manual shaft. If the switch will not slide off easily, then remove the burrs on the outside edge of the manual shaft with a file. Align the switch hub flats with the manual shaft flats and slide the switch up on the manual shaft to the mounting bracket contacts the mounting bosses of the transmission. When a new switch is being installed, it will come with the positive assurance bracket, so the use of the neutral position adjustment tool (J41364-A) will be unnecessary in this case. Mount the switch to transmission using two bolts finger tight then place the neutral position adjustment tool (J41364-A) on the switch ensuring the slot is on the switch align with the lower tabs of the tool. Turn the tool until the upper locator pin is in the line of the slot on the top of the switch, then secure the bolts down to 25 nm (18 ft. Lbs.). Take out the neutral position adjustment tool (J41364-A) if necessary and the positive assurance bracket. Reconnect the electrical connectors to the swich, install the transmission control lever to the manual shaft with the nut, tighten the control lever nut to 25 nm (18 ft. Lbs.) essence. Finally, lower the vehicle and examine the switch for the correct working, assure the engine will only start when in a p (Park) or n (Neural) position; if it does not work properly, replace the switch.

Related Chevrolet S10 Parts
 Chevrolet S10 Ignition Switch
 Chevrolet S10 Instrument Cluster
 Chevrolet S10 Brake Light Switch
 Chevrolet S10 Headlight Switch
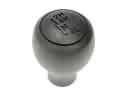 Chevrolet S10 Shift Knob
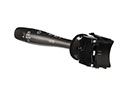 Chevrolet S10 Turn Signal Switch
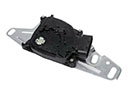 Chevrolet S10 Automatic Transmission Shift Position Sensor Switch
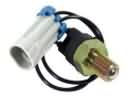 Chevrolet S10 Back Up Light Switch
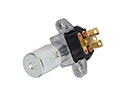 Chevrolet S10 Dimmer Switch
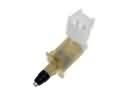 Chevrolet S10 Door Jamb Switch
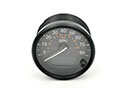 Chevrolet S10 Speedometer
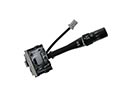 Chevrolet S10 Wiper Switch