ChevyParts
My Garage
My Account
Cart
OEM Chevrolet Silverado 1500 Classic Power Window Switch
Electric Window Switch- Select Vehicle by Model
- Select Vehicle by VIN
Select Vehicle by Model
orMake
Model
Year
Select Vehicle by VIN
For the most accurate results, select vehicle by your VIN (Vehicle Identification Number).
6 Power Window Switches found


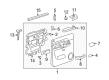
Chevrolet Silverado 1500 Classic Window Switch, Rear Passenger Side Part Number: 15206532
$82.06 MSRP: $133.88You Save: $51.82 (39%)


Chevrolet Silverado 1500 Classic Window Switch, Driver Side Part Number: 15883322
$177.81 MSRP: $274.15You Save: $96.34 (36%)
Chevrolet Silverado 1500 Classic Window Switch, Rear Driver Side Part Number: 15206533
$82.06 MSRP: $133.88You Save: $51.82 (39%)Ships in 1-2 Business Days


Chevrolet Silverado 1500 Classic Window Switch, Driver Side Part Number: 15883318
$152.16 MSRP: $227.45You Save: $75.29 (34%)
Chevrolet Silverado 1500 Classic Power Window Switch
Our website offers an extensive catalog of genuine Chevrolet Silverado 1500 Classic Power Window Switch at unbeatable prices. Every OEM Chevrolet Silverado 1500 Classic Power Window Switch comes with a manufacturer's warranty, an easy return policy, and rapid delivery service. Don't miss out on this great opportunity!
Chevrolet Silverado 1500 Classic Power Window Switch Parts Questions & Experts Answers
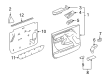
- Q: How to replace the Door Lock Switch and Power Window Switch on the driver side on Chevrolet Silverado 1500 Classic?A: The first step for replacing the driver side Door Lock and side window switch involves removing the front door trim panel before disconnecting electrical connectors. First dismantle the front door panel by removing the screw that maintains the switch panel bezel then separate the bezel carefully with a flat-bladed tool. The wide plastic flat-bladed tool should be used to disengage retaining clips along both door module sides before getting the door module out of the switch panel bezel. Position the door module inside the switch panel bezel so it will snap-lock before you connect the bezel with the module to its designated spot on the door panel. Secure the switch panel bezel retaining screw onto the front door panel while torquing it to 2 n.m (18 lb in). Join all electrical connections before you return the front door trim panel back into position. Proceed with programming the door module when the vehicle contains camper mirrors. You will find programming and setup data in corresponding documentation.

Related Chevrolet Silverado 1500 Classic Parts
 Chevrolet Silverado 1500 Classic Antenna
 Chevrolet Silverado 1500 Classic Automatic Transmission Shift Position Sensor Switch
 Chevrolet Silverado 1500 Classic Crankshaft Position Sensor
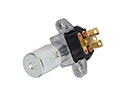 Chevrolet Silverado 1500 Classic Dimmer Switch
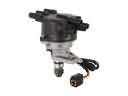 Chevrolet Silverado 1500 Classic Distributor
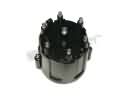 Chevrolet Silverado 1500 Classic Distributor Cap
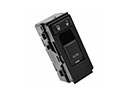 Chevrolet Silverado 1500 Classic Door Lock Switch
 Chevrolet Silverado 1500 Classic Fuse Box
 Chevrolet Silverado 1500 Classic Headlight Relay
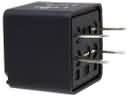 Chevrolet Silverado 1500 Classic Relay
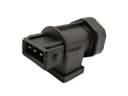 Chevrolet Silverado 1500 Classic Vehicle Speed Sensor
 Chevrolet Silverado 1500 Classic Washer Pump