ChevyParts
My Garage
My Account
Cart
OEM Chevrolet Silverado 2500 Oil Pan
Oil Drain Pan- Select Vehicle by Model
- Select Vehicle by VIN
Select Vehicle by Model
orMake
Model
Year
Select Vehicle by VIN
For the most accurate results, select vehicle by your VIN (Vehicle Identification Number).
1 Oil Pan found
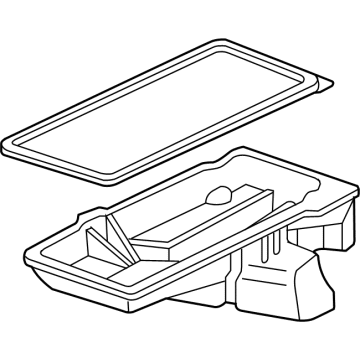
Chevrolet Silverado 2500 Oil Pan Part Number: 12579273
$313.43 MSRP: $538.29You Save: $224.86 (42%)Ships in 1-2 Business Days
Chevrolet Silverado 2500 Oil Pan
Want to cut long-term maintenance and repair costs? Choose OEM Oil Pan. Those parts deliver top durability you can trust. On our site, you'll find a huge catalog of genuine Chevrolet Silverado 2500 parts. Prices are unbeatable, so you can keep more in your pocket. Every OEM Chevrolet Silverado 2500 Oil Pan includes a manufacturer's warranty. You can also get an easy return policy that keeps buying risk free. Fast delivery, get your car on the road quickly. It's simple to search, compare, and order. Stop guessing about quality or fit. Order today and save with parts that last.
Chevrolet Silverado 2500 Oil Pan Parts Questions & Experts Answers
- Q: How to replace the oil pan on Chevrolet Silverado 2500?A:Starting the Oil Pan replacement requires draining both engine block and cooling system contents unless the vehicle features regular production option (RPO) hp2. The procedure for 4wd models requires removal of the inner axle housing nuts and washers from the bracket before placing a suitable jack under the front drive axle. Remove the differential carrier lower and upper mounting bolts and nuts to finish the procedure. You should start by lowering the front drive axle then remove the transmission cover bolt and disconnect the Oil Pan skid plate when present by removing its bolts. Start by removing transmission crossbar elements along with its bolts. Then unfasten the transmission cover bolt and remove the cover. Pull out engine oil from the compartment before taking out the engine Oil Filter but tighten the Drain Plug and Oil Filter correctly. When servicing 4l60-e automatic transmissions the operator must first disconnect the right side transmission bolt and stud and the left side bottom bolt. When working on 4l80-e automatic transmissions you must first remove all bolts securing the converter cover. When working with vehicles that have manual transmissions you should first remove both bottom bolts that secure the bellhousing. Pull out the channel pin from the Oil Pan tab after disconnecting the oil level sensor electrical connector and removing the battery cable channel bolt. After detaching the engine wiring harness clip and positive battery cable clip from the positive battery cable clip you can remove the engine oil cooler lines and positive battery cable clip bolt and clip. After removing the Oil Pan bolts please extract the Oil Pan from its position while taking precautions to block outside objects from entering the oil channels. Then drill and remove all Oil Pan Gasket retaining rivets, getting rid of both the gasket and rivets. When required you should inspect and clean the engine Oil Pan. The installation process requires sealant gm p/n 12378190 (or equivalent) applied as a 5 mm (0.20 inch) bead on the engine block tabs where the front and rear cover gaskets extend into the Oil Pan surface. Connect the engine block and Oil Pan oil gallery passages correctly and install the assembled gasket on the pan before its mounting to the engine block. Torque the Oil Pan bolts to their initial snugness without over-torque, then torque the two bottom bellhousing bolts just enough for manual transmissions and the transmission converter cover bolts just enough for 4l80-e automatic transmissions. When installing a 4l60-e automatic transmission you must start by securing the transmission bolt and stud on the right side before proceeding to install the bottom bolt on the left side. Torque the Oil Pan bolts to 25 nm (18 ft.lbs.) as well as the larger bolts holding the Oil Pan to the front cover at 25 nm. The rear Oil Pan bolts require 12 nm torque. Similarly, tighten the bellhousing and converter cover bolts and transmission bolts/stud to 50 nm. Following Oil Pan installation fix the positive battery cable clip and bolt with 9 nm (80 inch lbs.) tension then attach wiring harness and engine oil cooler lines to the positive battery cable clip. Secure the channel pin within the Oil Pan tab while you install the battery cable channel bolt before tightening it to 12 nm (106 inch lbs.). The oil level sensor electrical connector needs installation before fitting the transmission cover along with its bolt. Tighten this bolt to 12 nm (106 inch lbs.) before adding the crossbone and its bolts. You should tighten those bolts to 100 nm (74 ft. Lbs.). First install the transmission cover bolts while tightness should reach 12 nm (106 inch lbs.) then move on to tighten the Oil Pan skid plate bolts to 20 nm (15 ft. Lbs.). Install the differential carrier upper mounting bolt first while leaving it loose then add the lower mounting bolt and nut before torquing both to 100 nm (75 ft. Lbs.). For vehicles with 4wd systems, install the inner axle housing washers and nuts onto the bracket before tightening it to 100 nm (75 ft. Lbs.). Afterwards detach the jack from the front drive axle and put fresh engine oil and a new Oil Filter. Each vehicle with rpo hp2 requires cooling system refilling.


