ChevyParts
My Garage
My Account
Cart
OEM Chevrolet Tahoe Oil Cooler Hose
Oil Cooler Line- Select Vehicle by Model
- Select Vehicle by VIN
Select Vehicle by Model
orMake
Model
Year
Select Vehicle by VIN
For the most accurate results, select vehicle by your VIN (Vehicle Identification Number).
20 Oil Cooler Hoses found


Chevrolet Tahoe Inlet Pipe Part Number: 15809057
$31.52 MSRP: $51.93You Save: $20.41 (40%)Ships in 1 Business Day


Chevrolet Tahoe Inlet Pipe, Upper Part Number: 25999416
$27.96 MSRP: $46.05You Save: $18.09 (40%)Ships in 1-2 Business Days


Chevrolet Tahoe Outlet Pipe, Lower Part Number: 15773661
$35.11 MSRP: $57.85You Save: $22.74 (40%)Ships in 1-2 Business Days


Chevrolet Tahoe Outlet Hose Part Number: 12472282
$44.35 MSRP: $70.43You Save: $26.08 (38%)Ships in 1-2 Business Days

Chevrolet Tahoe Inlet Hose Part Number: 12472281
$38.49 MSRP: $65.52You Save: $27.03 (42%)Ships in 1-2 Business Days


Chevrolet Tahoe Inlet Pipe Part Number: 15809058
$26.78 MSRP: $44.12You Save: $17.34 (40%)Ships in 1 Business Day


Chevrolet Tahoe Auxiliary Fluid Cooler Inlet Line Part Number: 15779543
$25.49 MSRP: $41.98You Save: $16.49 (40%)Ships in 1-3 Business Days


Chevrolet Tahoe Inlet Pipe, Upper Part Number: 15809053
$39.59 MSRP: $67.98You Save: $28.39 (42%)Ships in 1-2 Business Days


Chevrolet Tahoe Tube Assembly Part Number: 23370657
$73.76 MSRP: $120.73You Save: $46.97 (39%)

Chevrolet Tahoe Tube Assembly Part Number: 23370658
$113.66 MSRP: $193.50You Save: $79.84 (42%)

Chevrolet Tahoe Inlet Pipe Part Number: 25999420
$114.03 MSRP: $195.84You Save: $81.81 (42%)Ships in 1-2 Business Days
Chevrolet Tahoe Tube Assembly Part Number: 84036743
$159.59 MSRP: $274.13You Save: $114.54 (42%)


Chevrolet Tahoe Outlet Hose Part Number: 12472314
$67.65 MSRP: $116.16You Save: $48.51 (42%)Ships in 1-2 Business Days
Chevrolet Tahoe Cooler Pipe Part Number: 85529071
$116.36 MSRP: $183.06You Save: $66.70 (37%)Ships in 1-3 Business Days
Chevrolet Tahoe Inlet Pipe, Upper Part Number: 25999417
$39.42 MSRP: $67.13You Save: $27.71 (42%)Ships in 1-2 Business Days
Chevrolet Tahoe Inlet Hose Part Number: 15104800
$163.36 MSRP: $280.53You Save: $117.17 (42%)Ships in 1-2 Business Days
Chevrolet Tahoe Cooler Pipe Part Number: 86818093
$180.54 MSRP: $284.00You Save: $103.46 (37%)Ships in 1-3 Business Days
Chevrolet Tahoe Oil Line Part Number: 85136335
$83.57 MSRP: $143.52You Save: $59.95 (42%)
Chevrolet Tahoe Tube Assembly Part Number: 84305556
$75.33 MSRP: $128.24You Save: $52.91 (42%)Ships in 1-2 Business DaysChevrolet Tahoe Tube Assembly Part Number: 85132191
$109.82 MSRP: $186.96You Save: $77.14 (42%)Ships in 1-3 Business Days
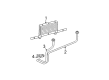
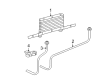
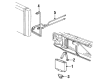
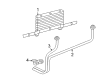
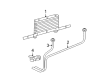
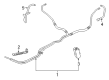
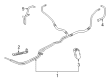
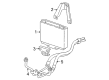
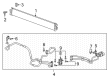
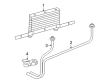
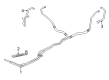
Chevrolet Tahoe Oil Cooler Hose
Want to cut long-term maintenance and repair costs? Choose OEM Oil Cooler Hose. Those parts deliver top durability you can trust. On our site, you'll find a huge catalog of genuine Chevrolet Tahoe parts. Prices are unbeatable, so you can keep more in your pocket. Every OEM Chevrolet Tahoe Oil Cooler Hose includes a manufacturer's warranty. You can also get an easy return policy that keeps buying risk free. Fast delivery, get your car on the road quickly. It's simple to search, compare, and order. Stop guessing about quality or fit. Order today and save with parts that last.
The Chevrolet Tahoe Oil Cooler Hose stands as a crucial element which delivers reliable performance alongside necessary engine oil temperature control for Chevrolet Tahoe. This Oil Cooler Hose maintains crucial functions in the oil-to-water cooler system so the Chevrolet Tahoe can reach its operating temperature rapidly and avoid overheating conditions causing engine damages. The Oil Cooler Hose can fit various Chevrolet Tahoe models with OEM specifications to achieve precise design and effective operational performance. The Chevrolet Tahoe uses two distinct Oil Cooler Hose types for its transmission oil cooler lines and engine oil cooler lines for their individual purpose. Transmission lines operate from the passenger area and are shorter than engine lines which position on the driver's side where red fluid moves in transmission lines and black or brown fluid moves in engine lines. The Chevrolet Tahoe Oil Cooler Hose makes its mark in the automotive industry by featuring strong materials that sustain pressure maintainingounces the vehicle functions at peak efficiency and safety levels. The Oil Cooler Hose provides reliable performance in the the automaker model since its temperature regulation and lubrication maintenance support both civilian and fleet vehicle needs. The car Oil Cooler Hose demonstrates durable performance alongside effectiveness so it stands as an essential purchase to keep the car operational.
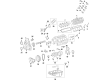
Chevrolet Tahoe Oil Cooler Hose Parts and Q&A
- Q: How to replace the ENGINE OIL COOLER HOSE/PIPE for 4WD on Chevrolet Tahoe?A:To replace the engine oil cooler like/pipes for 4wd vehicles, one should first remove the engine oil cooler quick connect fittings. For engines of 5.3l or 6.0l, use the screwdriver to remove the Oil Cooler Hose from the clip on the lower Fan Shroud and unlock the vehicle from the ground by lifting it with help. For 8.1l engines, remove the hoses from the clip and raise and support the vehicle with jack or utility stands at the rear, if equipped, remove the engine protection shield, and front differential carrier shield. Place an adjustable jack under the front differential carrier, remove inner axle housing nuts and washers and the differential carrier upper mounting bolt and nut. Pivot the differential carrier forward and down with the jack supporting it, secure it, and remove the lower mounting bolt and nut, and then the jack 4-6 inches. For 5.3 and 6.0l, remove the bolt on the Oil Cooler Hose bracket, the drill bolts on the Oil Cooler Hose adapter, and the Oil Cooler Hose assembly with the gasket, discard the gasket, and check the fittings, connectors, and hoses for defects. For 8.1l engines, first remove the Oil Cooler Hose bracket bolt, and then remove the quick connect fittings at the engine and the Oil Cooler Hose assembly, discarding the gasket and inspect for damages in the fittings, connectors, and hose assembly. If it is installed with an 8.1l engine, install the new Oil Cooler Hose assembly together with the gasket, the quick connect fittings at the engine must feel a distinct snap, install the Oil Cooler Hose bracket bolt that should be tightened up to 50 nm (37 ft. Lbs.). To install Oil Cooler Hose assembly for 5.3l or 6.0l engines, install the new gasket and than install the oil filter cooler hose adapter bolts with 12 nm (106 inch lbs.) and oil filter cooler hose bracket bolts with 25 nm (18ft-pounds). Lift the jack to place the differential carrier, install the lower mounting bolt and nut, swing the carrier up and back, install the nut and bolt of the upper mounting and do not tighten it yet. Install the inner axle housing washers and nuts, torquing them to 100 nm (75 ft. Lbs ), and the upper and lower differential carrier bolts to 100 nm (75 ft. Lbs). Take out the adjustable jack, reinstall the front differential carrier shield and engine protection shield if equipped and remove the jack or utility stand from the rear and lower it. For 8.1l engines install a plastic cap on end of oil cooler line connecting to quick connect fitting before install as well as to the oil cooler hoses to the clip. For 5.3l or 6.0l engines, attach the hoses to the hose clip on the Fan Shroud and clip it closed making sure that the oil cooler line has a plastic cap prior to installation and finish up by attaching the oil cooler lines to the Radiator.

Related Chevrolet Tahoe Parts
 Chevrolet Tahoe Thermostat
 Chevrolet Tahoe Automatic Transmission Oil Cooler Line
 Chevrolet Tahoe Belt Tensioner Bolt
 Chevrolet Tahoe Coolant Pipe
 Chevrolet Tahoe Cooling Fan Clutch
 Chevrolet Tahoe Cooling Hose
 Chevrolet Tahoe Fan Motor
 Chevrolet Tahoe Radiator Cap
 Chevrolet Tahoe Radiator Hose
 Chevrolet Tahoe Radiator fan
 Chevrolet Tahoe Transmission Oil Cooler
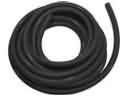 Chevrolet Tahoe Transmission Oil Cooler Hose