ChevyParts
My Garage
My Account
Cart
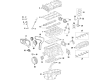
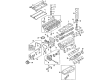
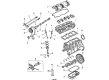
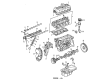
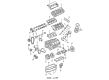
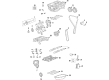
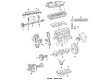
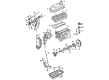
OEM Chevrolet Timing Belt
Engine Timing Belt- Select Vehicle by Model
- Select Vehicle by VIN
Select Vehicle by Model
orMake
Model
Year
Select Vehicle by VIN
For the most accurate results, select vehicle by your VIN (Vehicle Identification Number).
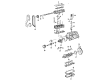
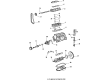
16 Timing Belts found


Chevrolet Timing Belt Part Number: 55580776
$60.89 MSRP: $103.65You Save: $42.76 (42%)Ships in 1-2 Business DaysProduct Specifications- Other Name: Belt, Engine Timing; Timing Belt Kit


Chevrolet Timing Belt Part Number: 24422964
$98.48 MSRP: $167.67You Save: $69.19 (42%)Ships in 1-3 Business DaysProduct Specifications- Other Name: Belt, Engine Timing; Engine Timing Belt; Timing Belt Kit
- Replaces: 24405968


Chevrolet Timing Belt Part Number: 96858745
$65.23 MSRP: $150.62You Save: $85.39 (57%)Ships in 1-2 Business DaysProduct Specifications- Other Name: Belt, Engine Timing; Timing Belt Kit
- Replaces: 96183352, 96814098, 96417177

Chevrolet Timing Belt Part Number: 94479523
$8.61 MSRP: $36.22You Save: $27.61 (77%)Ships in 1-2 Business DaysProduct Specifications- Other Name: Belt, Engine Timing; Timing Belt Kit

Chevrolet Timing Belt Part Number: 91177260
$21.20 MSRP: $80.90You Save: $59.70 (74%)Ships in 1-2 Business DaysProduct Specifications- Other Name: Belt, Engine Timing
- Replaces: 91173157
Chevrolet Timing Belt Part Number: 24503363
$52.49 MSRP: $105.40You Save: $52.91 (51%)Product Specifications- Other Name: Belt, Engine Timing; Timing Belt Kit
Chevrolet Timing Belt Part Number: 24502982
$54.65 MSRP: $110.68You Save: $56.03 (51%)Product Specifications- Other Name: Belt, Engine Timing; Timing Belt Kit

Chevrolet Timing Belt Part Number: 14001168
$24.27 MSRP: $48.72You Save: $24.45 (51%)Product Specifications- Other Name: Belt, Engine Timing; Timing Belt Kit


Chevrolet Timing Belt Part Number: 24591047
$59.94 MSRP: $102.05You Save: $42.11 (42%)Product Specifications- Other Name: Belt, Engine Timing; Timing Belt Kit
- Replaces: 12642668

Chevrolet Timing Belt Part Number: 55493234
$21.28 MSRP: $35.05You Save: $13.77 (40%)Ships in 1-3 Business DaysProduct Specifications- Other Name: Belt, Oil Pump; Timing Belt Kit; Belt; Belt, Engine Oil Pump
Chevrolet Timing Belt Part Number: 55489417
$46.33 MSRP: $72.58You Save: $26.25 (37%)Product Specifications- Other Name: Belt, Engine Timing; Timing Belt Kit
Chevrolet Timing Belt Part Number: 94840054
Product Specifications- Other Name: Belt; Timing Belt Kit

Chevrolet Timing Belt Part Number: 94220922
Product Specifications- Other Name: Belt, Engine Timing; Timing Belt Kit; Belt
Chevrolet Timing Belt Part Number: 91177261
Product Specifications- Other Name: Belt, Timing (On Esn); Engine Timing Belt; Timing Belt Kit; Belt, Engine Timing
- Replaces: 96068591

Chevrolet Timing Belt Part Number: 90234902
Product Specifications- Other Name: Belt, Engine Timing; Timing Belt Kit
Chevrolet Timing Belt Part Number: 10068553
Product Specifications- Other Name: Belt, Engine Timing; Timing Belt Kit
Chevrolet Timing Belt
Want to cut long-term maintenance and repair costs? Choose OEM Timing Belt. Those parts deliver top durability you can trust. On our site, you'll find a huge catalog of genuine Chevrolet parts. Prices are unbeatable, so you can keep more in your pocket. Every OEM Chevrolet Timing Belt includes a manufacturer's warranty. You can also get an easy return policy that keeps buying risk free. Fast delivery, get your car on the road quickly. It's simple to search, compare, and order. Stop guessing about quality or fit. Order today and save with parts that last.
Chevrolet Timing Belt Parts Questions & Experts Answers
- Q: How to replace the timing belt on Chevrolet Aveo?A:The first step in Timing Belt replacement should be to disconnect the negative cable from the battery. First remove the air cleaner assembly which enables installation of the engine support fixture (J 28647-B). Remove the accessory belt after you take out the accessory belt tensioner. The Crankshaft Pulley needs clockwise rotation to produce a pulley cover notch alignment. Before continuing install the flywheel locking device (KM-6625) as a crankshaft block then reinstall the transmission bolt. First remove the cylinder head cover and Engine Mount then proceed with the Crankshaft Pulley followed by Timing Belt upper cover and Engine Mount bracket together with the Timing Belt lower cover and Timing Belt center cover. The fixing rod (KM-6333) allows removal of the Timing Belt along with its tensioner and idler when operated while rotating the tensioner. To adjust the camshafts correctly install the locking tool (MK-6628) according to specifications after setting both sprocket faces level to each other. Place the right segment of locking tool (MK-6340) into the exhaust camshaft sprocket area and position the left section on the intake camshaft sprocket before necessary adjustments. First confirm the notched alignment between the crankshaft sprocket and cover, and then install the Timing Belt Tensioner along with its idler component before torquing them to specified values. The mechanic should install the Timing Belt before removing the fixing rod (KM-6333). The installation process requires the return of Timing Belt center cover, Timing Belt lower cover and Engine Mount bracket and Timing Belt upper cover. All installation torque specifications must be followed. Position the Crankshaft Pulley on its installation position with proper notches alignment before tightening all fasteners. Install the Engine Mount together with the cylinder head cover and proceed by putting on the accessory belt as well as accessory belt tensioner. The installation process ends with the removal of locking device km-6625 (KM-6625) followed by restoring of the transmission bolt then tightening before removing the engine support fixture j 28647-b (J 28647-B) to set the air cleaner assembly and complete the battery negative cable reattachment.
- Q: How to Ensure Proper Installation of the Timing Belt on Chevrolet Metro?A:The first step to replace a Timing Belt requires removal of the Crankshaft Pulley followed by the air cleaner assembly. Remove the Timing Belt cover through the removal of its 8 bolts and single nut. Apply a crankshaft turn to align the timing marks before taking out the Timing Belt. Start by having both upper timing marks (1, 2) correctly positioned before you release the tensioner bolt of the Timing Belt and its associated stud. Use your finger to completely push up the tensioner plate before taking the belt off its positions on the crankshaft and camshaft Timing Belt pulleys. Independent turning of the camshaft and crankshaft after belt removal poses serious risks for equipment damage. The procedure entails removing the tensioner along with its plate, the tensioner spring and spring damper then thoroughly inspect the Timing Belt for signs of wear and cracks before replacement while testing the tensioner's smooth rotation. Start installation by putting the tensioner plate lug into the Timing Belt Tensioner hole of the belt tensioner. Mount the tensioner and tensioner plate onto the cylinder block using a single bolt along with one stud while keeping the fasteners loose. The proper alignment between the tensioner plate movement and tensioner movement relies on a correct tensioner plate lug insertion into the Timing Belt Tensioner hole. Align the punch mark on the crankshaft Timing Belt pulley with the arrow mark on the oil pump case and set the mark from the camshaft Timing Belt pulley to the v on the Timing Belt cover . Install the Timing Belt by aligning its arrow mark with the rotating direction of the crankshaft while maintaining proper timing marks alignment. Install the Timing Belt and tensioner spring after pushing up the tensioner plate while preventing belt slack. Turn the crankshaft clockwise by two full rotations prior to hand-tightening the tensioner stud. The engine requires tightening the Timing Belt Tensioner stud to 11 nm (97 inch lbs.) with the tensioner bolt receiving 25 nm (18 ft. Lbs.) torque. You must check the timing marks alignment before installing the Timing Belt cover with its 8 bolts and 1 nut and applying torque of 11 nm (97 inch lbs.). Screw back the Crankshaft Pulley together with the air cleaner assembly into its original position.


Related Chevrolet Parts
 Chevrolet Fuel Filter
 Chevrolet Crankshaft
 Chevrolet Oil Drain Plug Gasket
 Chevrolet Oil Filler Cap
 Chevrolet Oil Pump Gasket
 Chevrolet Timing Cover
 Chevrolet Head Gasket
 Chevrolet Cam Gear
 Chevrolet Engine Mount Bracket
 Chevrolet Exhaust Valve
 Chevrolet Rocker Shaft Spring Kit
 Chevrolet Timing Belt Tensioner