Make sure this part fits

GM 22610297
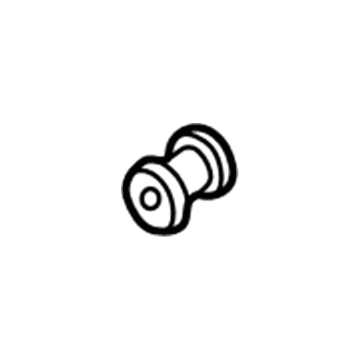
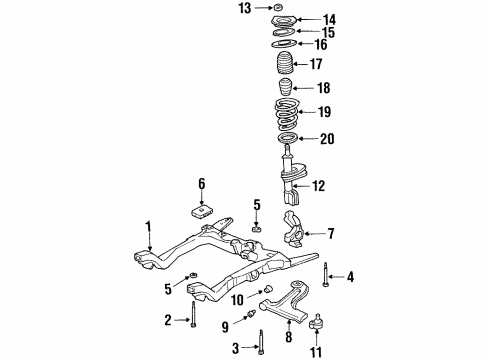
Lower Control Arm Bushing, Front

1995-2005 GM

Customer Questions & Expert Answers (11)
GM 22610297 Lower Control Arm Bushing, Front
  • Part Description
    Bushing, Front Lower Control Arm
  • Position
    Front Lower
  • Replaced By
    22710854
  • Manufacturer
    General Motors
Make sure this part fits
$3.05 MSRP: $4.83
You Save: $1.78 (37%)
Ships in 1-2 Business Days
1
ADD TO CART
  • Vehicle Fitment

    Year Make Model Trim Engine
    1995-2005 Chevrolet CavalierBase, LS, LS Sport, RS, Z244 Cyl 2.2 L BI-FUEL, 4 Cyl 2.2 L GAS, 4 Cyl 2.3 L GAS, 4 Cyl 2.4 L GAS
    2004-2005 Chevrolet ClassicBase, LS4 Cyl 2.2 L GAS
    1997-2003 Chevrolet MalibuBase, LS4 Cyl 2.4 L GAS, 6 Cyl 3.1 L GAS
    1999-2004 Oldsmobile AleroGL, GLS, GX4 Cyl 2.2 L GAS, 4 Cyl 2.4 L GAS, 6 Cyl 3.4 L GAS
    1997-1999 Oldsmobile CutlassBase, GL, GLS6 Cyl 3.1 L GAS
    1997 Oldsmobile Cutlass SupremeBase6 Cyl 3.1 L GAS
    1999-2005 Pontiac Grand AmGT, GT1, SE, SE1, SE24 Cyl 2.2 L GAS, 4 Cyl 2.4 L GAS, 6 Cyl 3.4 L GAS
    1995-2005 Pontiac SunfireBase, GT, SE4 Cyl 2.2 L GAS, 4 Cyl 2.3 L GAS, 4 Cyl 2.4 L GAS
    Warning: California's Proposition 65
  • Customer Questions & Expert Answers

    Q:
    Can you help me check if this 22610297 is the right part for my car? Posted by ChevyPartsGiant Specialist
    A:
    Please Select Your Vehicle model to see if part number 22610297 is suitable before ordering.
    Posted by ChevyPartsGiant Specialist
    Q:
    How to replace the lower control arm bushings on Chevrolet Cavalier? Posted by Customer
    A:
    To replace the lower Control Arm bushings one should gather necessary tools such as: nut (J21474-4), nut (J21474-18), bolt (J21474-19), high pressure lubricant (J23444-A), lower front Control Arm vertical bushing set (J41211), lower Control Arm bushings remover/installer (J41397). Start by removing the lower Control Arm and clamp it in a vice. Lubricate the threads of the bolt (J21474-19) with high pressure lubricant (J23444-A). Prepare the assembled bushing removal tools, mainly consisting of the bolt (J21474-19), the remover/installer in lower Control Arm bushings remover/installer (J41397) and the receiver in lower Control Arm bushings remover/installer (J41397) the nut (J21474-18). Lend a hand and look the nut up till the front bushing becomes loose from the Control Arm and let go of the pieces of the tools. Next, reassemble the bushing removal tools using nut (j21474-27), the remover/installer from the lower front control farm vertical bushing set (J41211), the receiver from the lower front Control Arm vertical bushing set (J41211), and nut (j21474-4). Across the nut (J21474-27) till the rear bushing is removed from the Control Arm and then disassemble the tools. To install, place the rear bushing into the Control Arm, which should be lubricated with high pressure lubricant (J23444-A).jvu to threads of nut (J21474-27). Assemble the bushing installation tools with nut (J21474-27), receiver/installer of the lower front Control Arm vertical bushing set (J41211), receiver from the lower front Control Arm vertical bushing set (J41211), nut (J21474-4). Tighten nut (J21474-4), completely seating rear bushing in Control Arm, then dismantling the tools. Lubricate the outer casing of the front bushing and install it into the Control Arm, then use the bolt (J21474-19), the remover/installer from the lower Control Arm bushings remover/installer (J41397), the receiver from the lower Control Arm bushings remover/installer (J41397), and nut (J21474-18) to assemble the bushing installation tools. Tighten the bolt (J21474-19) until the front bushing is solid into the arm of control then disconnecting the tools. Finally, put the lower Control Arm in place.
    Posted by ChevyPartsGiant Specialist
    Q:
    How to replace the lower control arm bushings on Chevrolet Classic? Posted by Customer
    A:
    In order to change the lower Control Arm bushings, remove the lower Control Arm, secure it with a vice. Apply high pressure lubricant (J 23444-A) or equivalent to the nut (J 21474-19) thread. Assemble the bushing removal tools, such as nut (J 21474-19), the remover/installer of front Control Arm Bushing set (J 41397), the receiver of lower Control Arm bushings remover/installer (J 41397) and j 21474-18. Remove the front bushing from j21474-18; then disassemble the tools by tightening j21474-18. Next, put together the bushing removal tools with j 21474-27, remover/installer from front Control Arm Bushing set (J 41211), receiver from front Control Arm Bushing set (J 41211), and nut (J 21474-4). Creep wrench j 21474-27 to some point of the bushing at the rear of Control Arm, then disassemble tools. For installation, push the rear bushing in the Control Arm and coat the threads of j 21474-27, with high pressure lubricant (J 23444-A) or equivalent. Assemble the bushing installations using the j 21474-27, the receiver/installer from front Control Arm Bushing set (J 41211), and receiver from the front Control Arm Bushing set (J 41211), and nut (J 21474-4). Tighten j 21474-4 until the rear bushing is completely inserted in the Control Arm and then remove the tools. Lubricate outer casing of front bushing as well as insert it into the Control Arm and attach the bushing installation tools with nut (J 21474-19), the remover/installer from lower Control Arm bushings remover/installer (J 41397), the receiver from lower Control Arm bushings remover/installer (J 41397), and j 21474-18. Tighten j 21474-19 until the front bushing seats to the Control Arm fully and disassemble the tools and install the lower Control Arm.
    Posted by ChevyPartsGiant Specialist
    Q:
    How to replace the lower control arm bushings on Chevrolet Malibu? Posted by Customer
    A:
    Starting the lower Control Arm Bushing replacement process requires first removing the Control Arm before positioning it in a holding vice. Use high pressure lubricant (J 23444-A) or equivalent product to coat the threads of nut (J 21474-19). The tool kit for bushing removal consists of the nut (J 21474-19) alongside the remover/installer segment from the lower Control Arm bushings remover/installer (J 41397) and the receiver portion from lower Control Arm bushings remover/installer (J 41397) with the bushing removal tool (J 21474-18). The bushing removal tool (J 21474-18) requires tightening to extract the front bushing from the Control Arm before tool disassembly. Assembly of bushing removal tools consists of the bushing removal tool (J 21474-27) with the front Control Arm Bushing set (J 41211) remover/installer and receiver as well as the nut (J 21474-4). Thread the bushing removal tool (J 21474-27) until the rear bushing detaches from the Control Arm before disassembling the tools. When installing the rear bushing into the Control Arm use high pressure lubricant (J 23444-A) or an equivalent to treat the threads on the bushing installation tool (J 21474-27). Complete assembly of bushing installation tools includes the bushing installation tool (J 21474-27) and both receiver/installer and receiver from the front Control Arm Bushing set (J 41211) and a nut (J 21474-4). Use the nut (J 21474-4) to torque the Control Arm until the complete rear bushing seats and then separate the tools. Lubricate the front bushing outer casing before placing it inside the Control Arm while using the bushing installation tool (J 21474-19) with the remover/installer from the lower Control Arm bushings remover/installer (J 41397) and receiver from lower Control Arm bushings remover/installer (J 41397) and bushing removal tool (J 21474-18). Use the tool j 21474-19 to screw down the bushing unit until the front bushing reaches the Control Arm's end. Afterward detach the tools to install the new lower Control Arm.
    Posted by ChevyPartsGiant Specialist
    Q:
    What should be disconnected after removing the tire and wheel assemblies for the 2002 Chevrolet Cavalier? Posted by Customer
    A:
    Disconnect the brake hoses from the axle and remove the wheel speed sensor harness from the retainers on the axle.
    Posted by ChevyPartsGiant Specialist
    See expert answers on similar Control Arm Bushing
    Q:
    What tools are needed for the bushing removal for the 2003 Chevrolet Cavalier? Posted by Customer
    A:
    Bolt (J 21474-19), the remover/installer from (J 41397), the receiver from (J 41397), and Nut (J 21474-18).
    Posted by ChevyPartsGiant Specialist
    See expert answers on similar Control Arm Bushing
    Q:
    What is the final step in the process for the 2001 Chevrolet Cavalier? Posted by Customer
    A:
    Install the tire and wheel assemblies, lower the vehicle, and tighten the control arm nuts to 120 Nm (52 ft. lbs.).
    Posted by ChevyPartsGiant Specialist
    See expert answers on similar Control Arm Bushing
    Q:
    What is the final step in the bushing installation process for the 2000 Chevrolet Cavalier? Posted by Customer
    A:
    Tighten the 3/8 Inch Bolt (J 21474-19) until the bushing is completely seated in the control arm, then disassemble the bushing installation tools.
    Posted by ChevyPartsGiant Specialist
    See expert answers on similar Control Arm Bushing
    Q:
    What is the next step after installing the rear bushing for the 2000 Chevrolet Malibu? Posted by Customer
    A:
    Lubricate the outer casing of the front bushing and insert it into the control arm.
    Posted by ChevyPartsGiant Specialist
    See expert answers on similar Control Arm Bushing
    Q:
    What tools are needed for bushing removal for the 2001 Chevrolet Malibu? Posted by Customer
    A:
    The tools include the Nut (J21474-19), the remover/installer from the Lower Control Arm Bushings Remover/Installer (J41397), the receiver from the Lower Control Arm Bushings Remover/Installer (J41397), and the bushing removal tool (J21474-18).
    Posted by ChevyPartsGiant Specialist
    See expert answers on similar Control Arm Bushing
    Q:
    What should be disconnected after removing the tire and wheel assemblies for the 2004 Chevrolet Cavalier? Posted by Customer
    A:
    Disconnect the brake hoses from the axle and remove the wheel speed sensor harness from the retainers on the axle.
    Posted by ChevyPartsGiant Specialist
    See expert answers on similar Control Arm Bushing
    If you have any questions about this product, please don't hesitate to ask us. We will be happy to help you!

OEM GM Lower Control Arm Bushing, Front 22610297 Designed for Proper Fit and Performance

Original OEM GM parts deliver superior quality and meet all performance standards needed for optimal automotive operation. The authentic part identified by 22610297 Lower Control Arm Bushing, Front is available in the market under the name GM Control Arm Bushing. This genuine product has a full warranty coverage from the manufacturer available at all authorized GM dealers throughout the United States. This part 22610297 Lower Control Arm Bushing, Front fits certain Chevrolet Malibu, Classic, Cavalier models, as well as Pontiac Grand Am, Sunfire. Additionally, it is compatible with Oldsmobile Cutlass, Alero, Cutlass Supreme models.
The original GM component designated by manufacturer part number 22610297 maintains top performance when functioning as the Bushing, Front Lower Control Arm unit at its Front Lower. The component 22610297 is constructed from durable material and its dimensions span 3.5 x 3.2 x 2.6 inches while weighing 0.80 Pounds. The component is ready in New condition to ensure full compatibility with your vehicle system. This component receives the designation of Lower Control Arm Rear Bushing; Bushings. The part 22610297 has available replacement options listed under 22710854. GM manufacturer provides a warranty that ensures reliable operation of this product. The Shipping Policy and Return Policy pages outline complete details regarding shipping procedures and return processes.
If you want to save money in the long run on maintenance and repairs, you should choose OEM products because they're of the top level of durability. Are you on the quest of finding GM parts, our site is worth a visit. We stock an endless selection of high-quality GM components including things like ignition coils all the way through to fan shrouds and all at prices that can not be matched. You have nothing to worry about because all our OEM parts are covered with a manufacturer warranty, which guarantees superior quality and value.