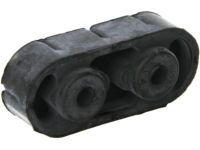
Make sure this part fits

GM 15798946
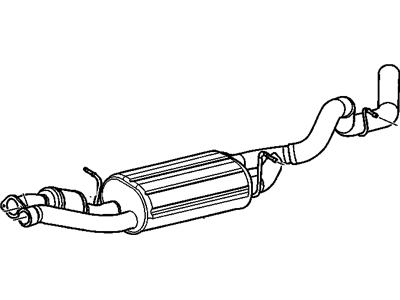
Muffler

2001-2007 GM

Customer Questions & Expert Answers (13)
GM 15798946 Muffler
  • Part Description
    Muffler Assembly-Exhaust (W/Exhaust & Tail Pipe & 3W
  • Manufacturer
    General Motors
Make sure this part fits
$1007.38 MSRP: $1500.27
You Save: $492.89 (33%)
Core Charge: $400.00
Currently Unavailable

Due to manufacturer supply shortage, this item isn't currently available for ordering.

  • Vehicle Fitment

    Year Make Model Trim Engine
    2003-2004 Chevrolet Silverado 1500LS, LT, SS8 Cyl 6.0 L GAS
    2001-2003 Chevrolet Silverado 1500 HDLS, LT8 Cyl 6.0 L GAS
    2001-2004 Chevrolet Silverado 2500Base, LS, LT, WT8 Cyl 6.0 L BI-FUEL, 8 Cyl 6.0 L CNG, 8 Cyl 6.0 L GAS
    2001-2006 Chevrolet Silverado 2500 HDBase, LS, LT, WT8 Cyl 6.0 L BI-FUEL, 8 Cyl 6.0 L CNG, 8 Cyl 6.0 L GAS, 8 Cyl 8.1 L GAS
    2007 Chevrolet Silverado 2500 HD ClassicLS, LT, WT8 Cyl 6.0 L GAS, 8 Cyl 8.1 L GAS
    2001-2006 Chevrolet Silverado 3500Base, LS, LT, WT8 Cyl 6.0 L CNG, 8 Cyl 6.0 L GAS, 8 Cyl 8.1 L GAS
    2007 Chevrolet Silverado 3500 ClassicLS, LT, WT8 Cyl 8.1 L GAS
    2001-2004 GMC Sierra 1500Base, C3, Denali, SLE, SLT, WT8 Cyl 6.0 L GAS
    2001-2003 GMC Sierra 1500 HDSLE, SLT8 Cyl 6.0 L GAS
    2001-2004 GMC Sierra 2500Base, SL, SLE, SLT, WT8 Cyl 6.0 L BI-FUEL, 8 Cyl 6.0 L CNG, 8 Cyl 6.0 L GAS
    View More
    Warning: California's Proposition 65
  • Customer Questions & Expert Answers

    Q:
    Is this 15798946 designed for my car? Posted by ChevyPartsGiant Specialist
    A:
    Please Select Your Vehicle model to see if part number 15798946 is suitable before ordering.
    Posted by ChevyPartsGiant Specialist
    Q:
    How to replace the muffler on 6.0L, 6.6L, and 8.1L engines on Chevrolet Silverado 2500? Posted by Customer
    A:
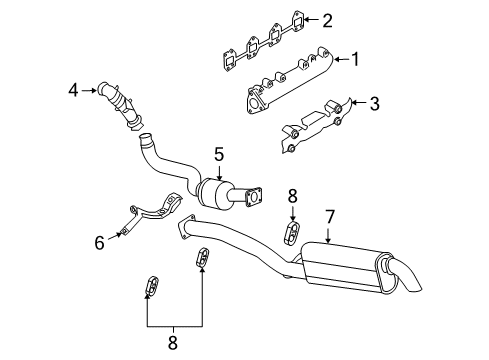
    First tasks begin by lifting and supporting the vehicle while also removing the spare tire to replace the Muffler on 6.0l, 6.6l, and 8.1l engines. Rear axle jack stands with adjustment capability should be installed if necessary along with removal of the rear axle vent hose and vent hose swivel clip from the rear brake crossover pipe if your vehicle uses an 8.6 or 9.5 inch ring gear or a 10.5 inch ring gear. First lower the rear axle by removing the bolts and nuts on the rear Shock Absorber lower sections when needed. To work on 6.0l or 8.1l engines you must unfasten and cut the oxygen sensor connection and cpa fastener. Maintain support of the Muffler as an assistant stands by while you remove exhaust Muffler nuts then loosen the Exhaust Pipe clamp. Engine owners with 6.6l should remove all exhaust Muffler nuts. Initiate Muffler separation by shifting it towards the rear then detach it from the Catalytic Converter and exhaust Muffler pipe. Discard exhaust manifold pipe gasket alongside insulators if required. Before replacing the Muffler as a single component, mark down the band clamp position on the intermediate Exhaust Pipe and then cut off the weld before adding a new band clamp. For 6.0l and 8.1l engine replacement, install the original oxygen sensor with anti-seize compound gm p/n 12377953 applied to threads before securing it at 42 nm (31 ft. Lbs.). Apply lubrication to the insulators to assist with easier installation before attaching a new exhaust Muffler gasket to forward slide the Muffler onto the exhaust Muffler pipe connection. Install the insulators to the frame hangers and those equipped with a 6.0l or 8.1l engine should install them to the Muffler hangers as well. The exhaust Muffler assembly requires a new gasket along with forward positioning to connect with the Catalytic Converter and subsequent insulator installation. For 6.6l engines users should install and tighten exhaust Muffler nuts to 40 nm (30 ft. Lbs.). Secure the new band clamp to the intermediate Exhaust Pipe with the bolt above the pipe level before tightening both the exhaust Muffler nuts to 40 nm (30 ft. Lbs.) and the Exhaust Pipe clamp bolt to 44 nm (33 ft. Lbs.). Reconnect both the oxygen sensor electrical connector and cpa retainer before securing the connector to the frame or support when possible. To finish up install the rear shock absorbers and their lower bolts and nuts with secure torque of 95 nm (70 ft. Lbs.). Afterward reconnect the rear axle vent hose and swivel clip if required. Finally remove the jack stands and install any extra tire if applicable before lowering your vehicle.
    Posted by ChevyPartsGiant Specialist
    Q:
    How to replace the Exhaust Pipe on 6.0L, 6.6L, and 8.1L engines on Chevrolet Silverado 2500? Posted by Customer
    A:
    Before installing a new exhaust manifold pipe on 6.0l, 6.6l, and 8.1l engines, start by lifting and supporting the vehicle, follow it up by installing a suitable transmission jack to support the transmission. The transmission support nuts need to be removed from the transmission mount then lift the transmission over the support while extracting the transmission support crossmember bolts and crossmember. Prior to Oxygen Sensor removal on 6.0l and 8.1l engines, users must detach the exhaust Muffler followed by unclipping the engine harness while disconnecting the connector position assurance (CPA) retainer and Oxygen Sensor electrical connector. After removing exhaust manifold pipe nuts, users should lower the transmission slightly and proceed to remove exhaust Muffler nuts along with Exhaust Pipe clamp separation for 6.6l engines. The exhaust manifold pipe installation for 6.0l and 8.1l engines requires the discarding of the exhaust manifold pipe seal while 6.6l engines follow the same procedure. The installation of the exhaust manifold pipe involves using water-based lubricant on the Exhaust Pipe hanger bracket for 6.6l engine vehicles. The exhaust manifold pipe hanger must slide into the bracket while new exhaust manifold pipe seals need installation for 6.0l engines with y91 rpo before fitting the exhaust manifold pipe. To install the manifold pipe properly position it perfectly square to the Exhaust Pipe adapter before applying torque on the Exhaust Pipe clamp to 40 nm and Muffler nuts to 40 nm. It is essential to install and torque the exhaust manifold pipe nuts to 50 nm (39 ft. Lbs.) for 6.0l and 8.1l engines. Replace the old Oxygen Sensor with a new one by applying gm p/n 12377953 anti-seize compound to its threads and tighten it to 42 nm (31 ft. Lbs.). Connect the Oxygen Sensor electrical connector along with the cpa retainer and engine harness clip only if the original parts were not replaced. Attach the exhaust Muffler for 6.0l or 8.1l engines before installing the transmission support crossmember and its bolts to a torque of 95 nm (70 ft. Lbs.). First lower the transmission onto the support and then bolt the transmission mount to transmission support nuts before tightening them to 40 nm (30 ft. Lbs.). After that remove the support from the transmission and finally lower the vehicle.
    Posted by ChevyPartsGiant Specialist
    Q:
    How to replace the Exhaust Pipe on 6.0L, 6.6L, and 8.1L engines on GMC Sierra 3500? Posted by Customer
    A:
    The exhaust manifold pipe replacement on 6.0l, 6.6l and 8.1l engines requires vehicle elevation with proper support alongside the installation of a suitable transmission jack. First drain the transmission mount to transmission support nuts before raising the transmission off the support. Then extract the transmission support crossmember bolts as well as the crossmember itself. First disconnect the Oxygen Sensor of 6.0l or 8.1l engines through clip removal around the engine harness and cpa retainer and electrical connector removal before taking out the Oxygen Sensor. The transmission requires lowering next while you remove exhaust manifold pipe nuts. If you are working on a 6.6l engine then remove exhaust Muffler nuts and slide up the Exhaust Pipe clamp onto the Exhaust Pipe adapter. Clear the exhaust manifold pipe from its position and throw the seal into waste disposal. The installation process for the exhaust manifold pipe starts with applying water-based lubrication to the hanger bracket and inserting the hanger through the bracket when working with a vehicle powered by 6.6l. The installation of a new exhaust manifold pipe seal for 6.0l engines with y91 rpo must be completed before fitting the exhaust manifold pipe. The installation of hanger bracket for 6.0l or 8.1l engines requires sliding the hanger into bracket twice while using new placement seals. Use 40 nm torque for the Exhaust Pipe clamp while applying the same torque value to the Muffler nuts. Tighten 6.0l and 8.1l exhaust manifold pipe nuts to 50 nm. Apply anti-seize compound gm p/n 12377953 to the Oxygen Sensor threads after replacing the exhaust manifold pipe and perform a 42 nm (31 ft. Lbs.) torque on it. The replacement of the Oxygen Sensor electrical connector along with the cpa retainer and clip should be completed if the Exhaust Pipe was left undisturbed. The exhaust Muffler installation for 6.0l or 8.1l engines should be followed by transmission support crossmember bolt installation which requires 95 nm (70 ft. Lbs.) torque setting. Start by lowering the transmission onto the support then install transmission mount support nuts before tightening them to 40 nm (30 ft. Lbs.). Afterward remove support from transmission and complete the lowering process of the vehicle.
    Posted by ChevyPartsGiant Specialist
    Q:
    What is the first step to replace the right exhaust pipe on a 6.6L (LLY) engine for the 2006 Chevrolet Silverado 3500? Posted by Customer
    A:
    First, remove the turbocharger exhaust pipe and then the exhaust pipe bolts in the proper sequence.
    Posted by ChevyPartsGiant Specialist
    See expert answers on similar Exhaust Pipe
    Q:
    How should the muffler be aligned for 6.6L engines during installation for the 2007 Chevrolet Silverado 3500 Classic? Posted by Customer
    A:
    Align the muffler locator button with the catalytic converter coupling groove and install the muffler until fully engaged by the coupling clip.
    Posted by ChevyPartsGiant Specialist
    See expert answers on similar Muffler
    Q:
    What is the torque specification for the exhaust manifold pipe nuts for the 2007 Chevrolet Silverado 3500 Classic? Posted by Customer
    A:
    Tighten them to 50 Nm (39 ft. lbs.).
    Posted by ChevyPartsGiant Specialist
    See expert answers on similar Exhaust Pipe
    Q:
    How should the old oxygen sensor be re-installed for 6.0L or 8.1L engines for the 2006 Chevrolet Silverado 3500? Posted by Customer
    A:
    Apply anti-seize compound GM P/N 12377953 to its threads and tighten it to 42 Nm (31 ft. lbs.).
    Posted by ChevyPartsGiant Specialist
    See expert answers on similar Muffler
    Q:
    What components need to be removed to take out the muffler for the 2007 GMC Sierra 3500 Classic? Posted by Customer
    A:
    Remove the exhaust muffler to exhaust manifold pipe nuts, loosen the exhaust muffler clamp, and take out the heated oxygen sensor (HO2S).
    Posted by ChevyPartsGiant Specialist
    See expert answers on similar Muffler
    Q:
    What is the first step to replace the exhaust manifold pipe on a 6.0L Cab/Chassis for the 2007 GMC Sierra 3500 Classic? Posted by Customer
    A:
    Remove the heated oxygen sensor (HO2S) and support the transmission with a suitable transmission jack.
    Posted by ChevyPartsGiant Specialist
    See expert answers on similar Exhaust Pipe
    Q:
    What steps are required for the 2007 GMC Sierra 3500 Classic? Posted by Customer
    A:
    Remove the rear axle vent hose and the vent hose swivel clip from the rear brake crossover pipe.
    Posted by ChevyPartsGiant Specialist
    See expert answers on similar Muffler
    Q:
    What should be done after tightening the exhaust components for the 2005 GMC Sierra 3500? Posted by Customer
    A:
    Raise the rear axle using adjustable jack stands if necessary, install the rear shock absorbers lower bolts and nuts, tightening them to 95 Nm (70 ft. lbs.).
    Posted by ChevyPartsGiant Specialist
    See expert answers on similar Muffler
    Q:
    What should be done before installing the new muffler for the 2004 GMC Sierra 1500? Posted by Customer
    A:
    Again, apply lubricant to the exhaust insulators to assist with the process.
    Posted by ChevyPartsGiant Specialist
    See expert answers on similar Muffler
    If you have any questions about this product, please don't hesitate to ask us. We will be happy to help you!

OEM GM Muffler 15798946 Designed for Proper Fit and Performance

Original OEM GM parts deliver superior quality and meet all performance standards needed for optimal automotive operation. The authentic part identified by 15798946 Muffler is available in the market under the name GM Exhaust Pipe, Muffler. This genuine product has a full warranty coverage from the manufacturer available at all authorized GM dealers throughout the United States. This part 15798946 Muffler fits certain Chevrolet Silverado 1500, Silverado 2500 HD, Silverado 2500 models, as well as GMC Sierra 1500, Sierra 2500 HD, Sierra 2500 models.
The original GM component designated by manufacturer part number 15798946 maintains top performance when functioning as the Muffler Assembly-Exhaust (W/Exhaust & Tail Pipe & 3W unit. The component 15798946 is constructed from durable material and its dimensions span 144.9 x 45.5 x 23.1 inches while weighing 161.60 Pounds. The Direct Replacement component is ready in New condition to ensure full compatibility with your vehicle system. This component receives the designation of Muffler, Exhaust. The part 15798946 has available replacement options. GM manufacturer provides a warranty that ensures reliable operation of this product. The Shipping Policy and Return Policy pages outline complete details regarding shipping procedures and return processes.
If you want to save money in the long run on maintenance and repairs, you should choose OEM products because they're of the top level of durability. Are you on the quest of finding GM parts, our site is worth a visit. We stock an endless selection of high-quality GM components including things like ignition coils all the way through to fan shrouds and all at prices that can not be matched. You have nothing to worry about because all our OEM parts are covered with a manufacturer warranty, which guarantees superior quality and value.