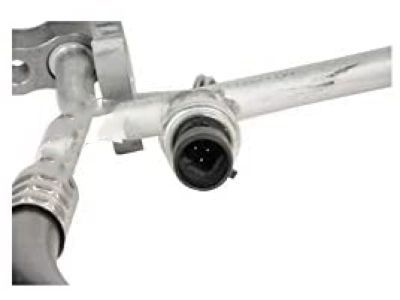
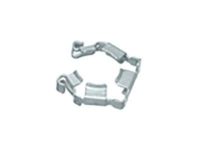
Make sure this part fits

GM 19356341
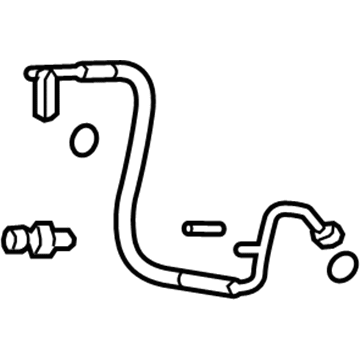
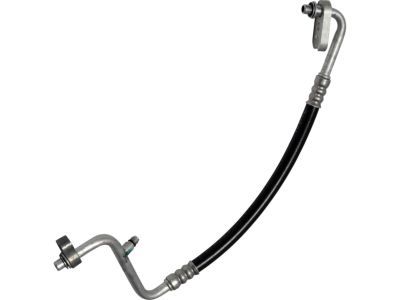
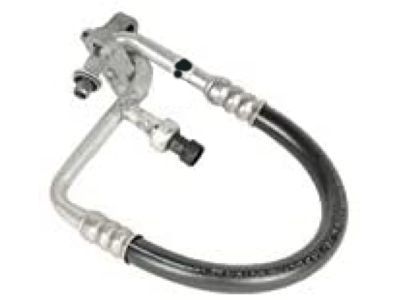
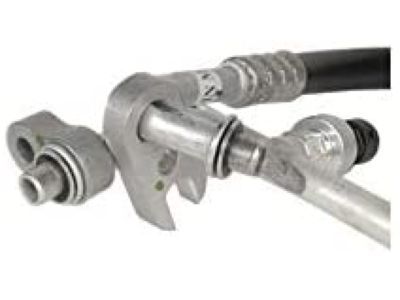
Discharge Hose

2007-2012 GM

Customer Questions & Expert Answers (15)
GM 19356341 Discharge Hose
  • Part Description
    Hose, Air Conditioner Compressor; A/C Refrigerant Liquid Hose; A/C Hose
  • Replaces
    15926077, 22757062, 22744629
  • Manufacturer
    General Motors
Make sure this part fits
$65.59 MSRP: $134.78
You Save: $69.19 (52%)
Ships in 1-3 Business Days
1
ADD TO CART
  • Related Parts
  • Product Specifications
  • Vehicle Fitment
  • Customer Questions & Expert Answers
  • Product Specifications

    BrandGenuine GM
    Manufacturer Part Number19356341
    Part DescriptionHose, Air Conditioner Compressor; A/C Refrigerant Liquid Hose; A/C Hose
    Other NamesPressure Hose; Compressor & Condenser Hose; Hose, A/C Compressor Suction And Discharge; Hose, A/C Compressor
    Item Dimensions12.7 x 1.1 x 1.0 inches
    Item Weight0.80 Pounds
    ConditionNew
    Fitment TypeDirect Replacement
    Replaces15926077, 22757062, 22744629
    ManufacturerGeneral Motors
    SKU19356341
    WarrantyThis genuine GM part is guaranteed by GM's factory warranty.
    Shipping & ReturnShipping Policy Return Policy
    Warning: California's Proposition 65
  • Vehicle Fitment

    Year Make Model Trim Engine
    2008-2012 Buick EnclaveBase, CX, CXL6 Cyl 3.6 L GAS
    2009-2012 Chevrolet TraverseLS, LT, LTZ6 Cyl 3.6 L GAS
    2007-2012 GMC AcadiaDenali, SL, SLE, SLT6 Cyl 3.6 L GAS
    2007-2010 Saturn OutlookXE, XR6 Cyl 3.6 L GAS
  • Customer Questions & Expert Answers

    Q:
    Is this 19356341 designed for my car? Posted by ChevyPartsGiant Specialist
    A:
    Please Select Your Vehicle model to see if part number 19356341 is suitable before ordering.
    Posted by ChevyPartsGiant Specialist
    Q:
    How to Replace an A/C Hose for Suction Hose on Buick Enclave? Posted by Customer
    A:
    Start by recovering all refrigerant before you raise and support the vehicle for replacement of the suction hose. The first step for suction hose replacement involves removing both the right front wheel house liner and the right front engine splash shield. The first step involves removing the suction hose bracket nut followed by the bracket while the suction hose/pipe bolt leads to disconnecting the suction hose/pipe from the A/C Compressor. Unfasten the txv tube nut from the suction hose/pipe and cut the hose/pipe loose from the txv tube before totally disconnecting the suction hose/pipe components. Replace all extracted o-rings from the suction hose/pipe with fresh components before attaching them to the suction hose/pipe. After installing the suction hose/pipe onto the txv tube you should fasten the txv nut with a bolt at 9 n.m (80 lb in). The suction hose/pipe should be attached to the A/C Compressor before applying the suction hose/pipe bolt which must be tightened to 9 n.m (80 lb in). Reattach the suction hose/pipe bracket with its nut before replacing both the right front engine splash shield and right front wheel house liner. After lowering the vehicle use proper equipment to evacuate and recharge the refrigerant system. The halogen leak detector (J 39400-A) should perform a leak test to inspect the fittings of this component.
    Posted by ChevyPartsGiant Specialist
    Q:
    How to Replace the Auxiliary A/C Hose for Evaporator Tube on Buick Enclave? Posted by Customer
    A:
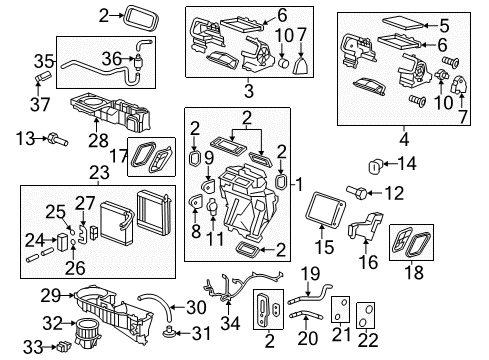
    The first step to replace an auxiliary air conditioning evaporator tube requires refrigerant recovery through usage of the halogen leak detector (J 39400-A). The first step requires vehicle lift. The right rear inner wheelhouse liner must come out if necessary. Begin by detaching the auxiliary evaporator tube nut then using a downward force to free the auxiliary a/c evaporator tubes from the auxiliary hvac module. Detach the auxiliary evaporator tube clip nuts before freeing the tubes out of their respective clips. The procedure starts with txv tube and condenser tube removal while unfastening retaining nuts before heater/a/c tubes retaining nuts are taken off from their four frame-mounted studs and clips. You should take away both auxiliary a/c evaporator tubes from their clamps after extracting them from the vehicle. Insert the auxiliary a/c evaporator tubes into their vehicle positions and clamp them into place for installation. The driver should install the retaining nuts of the retaining studs and frames, then tighten them to 7 nm while connecting the auxiliary a/c evaporator tubes between the txv tube and condenser tube and definitely tighten the retaining nuts to 16 nm. The hvac module should receive the auxiliary a/c evaporator tubes before tightening all retaining nuts to 16 nm (12 lb ft). Secure the auxiliary evaporator tubes using nuts and tighten them to 4 nm (35 lb in) then reinstall the right rear inner wheelhouse liner when needed before lowering the vehicle and performing a leak test using the halogen leak detector (J 39400-A).
    Posted by ChevyPartsGiant Specialist
    Q:
    How to replace the auxiliary A/C hose on GMC Acadia? Posted by Customer
    A:
    The first step to replace the auxiliary air conditioning evaporator tube requires refrigerant recovery of the system followed by raising the vehicle. The right rear inner wheelhouse liner needs to be removed if required. The auxiliary evaporator tube nut needs appropriate tools for removal before you can pull the auxiliary a/c evaporator tubes downward from the auxiliary hvac module. Start by removing the auxiliary evaporator tube clip nuts then extract the tubes from their positions. The next step involves removing the txv tube retaining nuts and the auxiliary a/c evaporator tubes from their position on the txv tube as well as condenser tube. At this point the heater/a/c tubes retaining nuts should be removed from their studs and clips which run along the frame in four different sections. Uninstall the auxiliary a/c evaporator tubes from their clamps followed by removing them from the vehicle. The replacement a/c and heater pipes arrive at customers in two separate segments which need splicing before final installation. Connect the auxiliary a/c evaporator tubes to the vehicle framework before securely mounting them on the clamps. Secure the heater/a/c tubes retaining nut to four frame retaining studs and clips by tightening it to 7 n.m (62 lb in). Install the auxiliary a/c evaporator tubes by connecting them to the txv tube and condenser tube then fasten them with retaining nuts that reach 16 n.m (12 lb ft). The hvac module requires the auxiliary a/c evaporator tubes installation together with a retaining nut that needs to be tightened to 16 n.m (12 lb ft). Secure auxiliary evaporator tubes to retaining clips while installing nuts which should be tightened to 4 n.m (35 lb in). Reassemble the right rear inner wheelhouse liner on the vehicle and lower the compartment after you recharge the refrigerant system to permitted levels and test all fittings with the halogen leak detector (J 39400-A).
    Posted by ChevyPartsGiant Specialist
    Q:
    How to replace the A/C Hose in the discharge location on Chevrolet Traverse? Posted by Customer
    A:
    The first step to replace a discharge hose requires refrigerant recovery through suitable methods. You must first strip off the front fascia and the front bumper upper fascia support. Begin by disconnecting the a/c pressure switch electrical connector then remove the discharge line bolt from the A/C Compressor and detach the discharge line from it. Unscrew first the discharge line to condenser bolt then disconnect the discharge line from the condenser before proceeding to remove the discharge line. Follow this by removing discharge line o-rings and installing new ones to the discharge line. Reinstall the a/c pressure switch before you place the discharge line onto the condenser and bolt down the discharge line to condenser using 9 nm (80 lb in). The discharge line requires connection to the A/C Compressor and its discharge line bolt requires installation following another 9 nm (80 lb in) torque specification. The service tool contains a self-evaporation system to ensure safe decarbonization in the cooling system. Install the front bumper upper fascia support and front fascia afterward. Complete the evacuation procedure of the refrigerant system then recharge it before using the halogen leak detector (J 39400-A) for component fitting leak assessments.
    Posted by ChevyPartsGiant Specialist
    Q:
    What is the next connection to make after the condenser for the 2009 Buick Enclave? Posted by Customer
    A:
    Connect the discharge line to the A/C compressor and install the discharge line bolt to the A/C compressor, also tightening it to 9 Nm (80 lb in).
    Posted by ChevyPartsGiant Specialist
    See expert answers on similar A/C Hose
    Q:
    What should be done after removing the auxiliary A/C evaporator tubes for the 2008 Buick Enclave? Posted by Customer
    A:
    Install the new auxiliary A/C evaporator tubes, ensuring they are spliced together.
    Posted by ChevyPartsGiant Specialist
    See expert answers on similar A/C Hose
    Q:
    What is the first step to replace the discharge hose for the 2010 Buick Enclave? Posted by Customer
    A:
    Recover the refrigerant using the Halogen Leak Detector (J 39400-A).
    Posted by ChevyPartsGiant Specialist
    See expert answers on similar A/C Hose
    Q:
    What is the next connection to make after the TXV connection for the 2009 Chevrolet Traverse? Posted by Customer
    A:
    Connect the liquid line to the auxiliary evaporator tube, install the liquid line nut, and tighten it to 9 Nm (80 lb in).
    Posted by ChevyPartsGiant Specialist
    See expert answers on similar A/C Hose
    Q:
    What is the torque specification for tightening the liquid line to TXV nut for the 2007 GMC Acadia? Posted by Customer
    A:
    Tighten the bolt to 9 N.m (80 lb in).
    Posted by ChevyPartsGiant Specialist
    See expert answers on similar A/C Hose
    Q:
    What is the final step after reinstalling the components for the 2010 Chevrolet Traverse? Posted by Customer
    A:
    Evacuate and recharge the refrigerant system and perform a leak test on the fittings of the component using J 39400-A.
    Posted by ChevyPartsGiant Specialist
    See expert answers on similar A/C Hose
    Q:
    What is the next step after disconnecting the discharge line from the A/C compressor for the 2007 GMC Acadia? Posted by Customer
    A:
    Remove the discharge line to condenser bolt and disconnect the discharge line from the condenser before removing the discharge line itself.
    Posted by ChevyPartsGiant Specialist
    See expert answers on similar A/C Hose
    Q:
    What is the first step in the installation process for the 2010 GMC Acadia? Posted by Customer
    A:
    Install new O-rings to the discharge line.
    Posted by ChevyPartsGiant Specialist
    See expert answers on similar A/C Hose
    Q:
    What is the first step in the installation process for the 2008 GMC Acadia? Posted by Customer
    A:
    Start by installing new O-rings to the discharge line and then install the A/C pressure switch.
    Posted by ChevyPartsGiant Specialist
    See expert answers on similar A/C Hose
    Q:
    What should be done with the discharge line bolt from the A/C compressor for the 2009 GMC Acadia? Posted by Customer
    A:
    Remove the discharge line bolt and disconnect the discharge line from the A/C compressor.
    Posted by ChevyPartsGiant Specialist
    See expert answers on similar A/C Hose
    If you have any questions about this product, please don't hesitate to ask us. We will be happy to help you!

OEM GM 19356341, Excellent Performance and Perfect Fitment

To ensure reliability, purchase GM part # 19356341 Discharge Hose. It is sometimes referred to as GM A/C Hose. Choosing OEM parts is the optimal decision for guaranteeing superior quality and perfect performance. These components undergo stringent quality checks and are carefully constructed to comply with GM's factory specifications, ensuring a smooth installation process.

ChevyPartsGiant.com is a leading supplier of genuine GM parts such as GM 19356341 Discharge Hose. Our website boasts an extensive inventory of OEM GM parts, available at highly competitive prices in the market. Should you require any new genuine GM parts, rest assured we will deliver them swiftly and efficiently to your doorstep. Furthermore, all our parts come with the assurance of a manufacturer's warranty. For detailed Chevy parts information, click here.
Choose ChevyPartsGiant for discounted prices, exceptional service and fast delivery