Make sure this part fits

GM 12600499
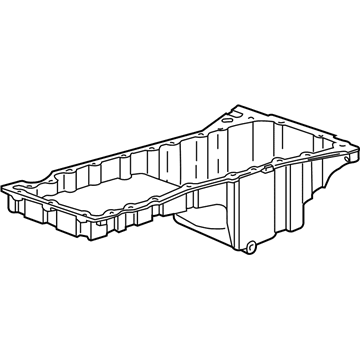
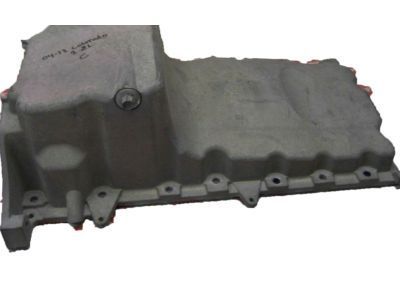
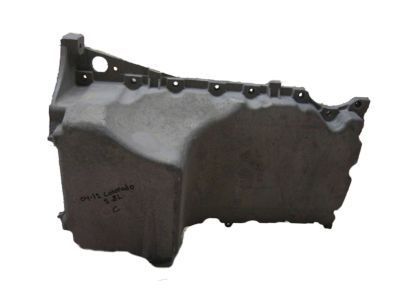
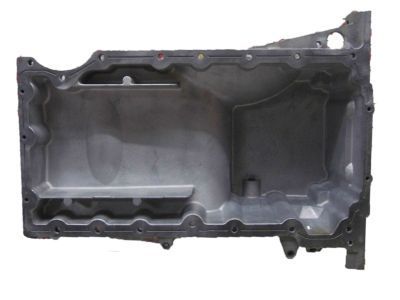
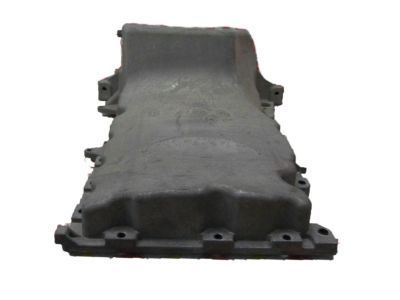
Oil Pan

2004-2012 GM

Customer Questions & Expert Answers (9)
GM 12600499 Oil Pan
GM 12600499 Oil Pan
  • Part Description
    Pan, Engine Oil
  • Replaces
    12580240
  • Manufacturer
    General Motors
Make sure this part fits
$217.54 MSRP: $342.28
You Save: $124.74 (37%)
Currently Unavailable

Due to manufacturer supply shortage, this item isn't currently available for ordering.

  • Related Parts
  • Product Specifications
  • Vehicle Fitment
  • Customer Questions & Expert Answers
  • Product Specifications

    BrandGenuine GM
    Manufacturer Part Number12600499
    Part DescriptionPan, Engine Oil
    Item Dimensions20.4 x 12.4 x 6.1 inches
    Item Weight16.30 Pounds
    ConditionNew
    Fitment TypeDirect Replacement
    Replaces12580240
    ManufacturerGeneral Motors
    SKU12600499
    WarrantyThis genuine GM part is guaranteed by GM's factory warranty.
    Shipping & ReturnShipping Policy Return Policy
    Warning: California's Proposition 65
  • Vehicle Fitment

    Year Make Model Trim Engine
    2004-2012 Chevrolet ColoradoBase, LS, LT, Sport, Sport LS, WT, Z71, Z71 LS, Z85, Z85 LS4 Cyl 2.8 L GAS, 4 Cyl 2.9 L GAS
    2004-2012 GMC CanyonSL, SLE, SLT, WT, Z71 Fleet, Z71 SL, Z71 SLE, Z85 SL, Z85 SLE4 Cyl 2.8 L GAS, 4 Cyl 2.9 L GAS
  • Customer Questions & Expert Answers

    Q:
    Is this 12600499 designed for my car? Posted by ChevyPartsGiant Specialist
    A:
    Please Select Your Vehicle model to see if part number 12600499 is suitable before ordering.
    Posted by ChevyPartsGiant Specialist
    Q:
    How to replace the oil pan on Chevrolet Colorado? Posted by Customer
    A:
    The oil level indicator and tube needs removal before you can proceed with taking out the engine protection shield. Clearing the Oil Pan requires draining the engine oil and taking out several components. For rwd, remove the crossmember; the differential carrier assembly requires stable pinion yoke maintenance and downward motion at this point so remove the front propeller shaft and differential carrier assembly bushing to frame bolts. Begin by removing three components: the service slot plug, the transmission fuel hose/pipe bracket securing nuts, and the four lower transmission mounting bolts from the Oil Pan. To access the power steering gear you must first remove the mounting bolts then pull it downward. First disconnect the engine wiring harness retainers from the Oil Pan followed by removing the Oil Pan bolts. Tighten two bolts into the threaded holes at the rear of the Oil Pan to operate as jack screws before removing both the Oil Pan and the two bolts from their positions. Check and clean both the Oil Pan and the engine block sealing contact surfaces. Use a 5.5 mm (0.22 inch) bead of sealer gm p/n 12378521 (Canadian P/N 88901148) in the marked areas of the Oil Pan while ensuring the sealer does not come into contact with the oil pump pipe and screen assembly. Place the Oil Pan on the engine block while making sure the rear Oil Pan surface matches the rear block surface. Tighten all side bolts of the Oil Pan to 25 nm (18 ft. Lbs.) while ending bolts require a torque of 10 nm (89 inch lbs.). Ensure Oil Pan alignment through transmission check. After mounting the power steering gear to the frame assembly you should install its mounting bolts. Complete the wiring harness retainers connection to the Oil Pan. Secure the four lower transmission mounting bolts with 50 nm torque settings before bolting the transmission fuel hose/pipe bracket to its position. Apply 20 nm torque settings for this bracket assembly also. The installation requires the service slot plug together with crossmember for rwd or differential carrier assembly positioning on the frame followed by frame bolt installation of the differential carrier assembly bushing. Torque all frame bolts to 152 nm (112 ft. Lbs.) prior to front propeller shaft mounting. Complete the installation by installing the shield, filling the engine with oil and adding the level indicator and its tube.
    Posted by ChevyPartsGiant Specialist
    Q:
    How to Ensure Proper Installation of the Oil Pan on Chevrolet Colorado? Posted by Customer
    A:
    To replace the Oil Pan you first need to remove the oil level indicator and tube and the engine protection shield. Drain the engine oil and then remove parts to acquire the clearance for the Oil Pan. For rwd, take off the power steering gear. For the 4wd, the first thing you should be doing is taking out the front propeller shaft, then the differential carrier assembly bushing to frame bolts, and pull towards down while securing the pinion yoke in not to rotate. At this point, pull out the service, plug out the nut attaching the fuel hose/pipe bracket to the transmission and the four lower bolts of the transmission securing them to the Oil Pan. For 4wd also unbolt the power steering gear mounting bolts and pull the power steering gear down for access. Now we can disconnect the engine wiring harness retainers from the Oil Pan, thereafter remove the Oil Pan bolts. Install two bolts in the tapped holes at the rear of the Oil Pan as jack screws, and screw them in evenly to release the Oil Pan from the engine block, and remove the Oil Pan and two bolts from the jack screw holes. Check and clean the sealing surface of the engine block. While mating the Oil Pan, spread a 5.5mm (0.22 in) narrow sealer at the marked and 3mm (0.12 in) spread at the mark while making sure that the sealer does not run on the oil pump pipe and screen assembly. Position the Oil Pan to the engine block so the rear Oil Pan surface is level to the rear block surface. In case transmission is removed, use a straight edge for a requirement of alignment; if installed, make sure the Oil Pan is completely rearward from the transmission mounting surface. Mount the Oil Pan bolts, fitting its side bolts to 25 n.m. (18 lb ft), and its end bolts to 10 n.m (89 lb in). Attach the engine wiring harness retainers to the Oil Pan and for 4wd mount the power steering gear on top of the frame assembly to tighten mounting bolts. Installs the four lower transmission mounting bolts with tightening 50n.m (37 lb ft) and later tightening the nuts connecting the fuel hose/pipe bracket to the transmission 20 n.m (15 lb ft). Mount the service slot plug and relevant parts: for rwd, install the power steering gear; for rwd, install the power steering gear; for 4 wd, position the differential carrier assembly to the frame, install bush to the frame bolt, 152 n.m(112 lb ft), install front propeller shaft. Lastly, after checking that the engine spacer will have no problem fitting into the spare cylinder, install the engine protection shield, the oil level indicator and tube, and fill the engine with oil.
    Posted by ChevyPartsGiant Specialist
    Q:
    How to Properly Service and Replace the Oil Pan on GMC Canyon? Posted by Customer
    A:
    The replacement of an Oil Pan starts with removing the oil level indicator and tube followed by removing the engine protection shield. First drain the engine oil then remove the necessary components to achieve sufficient space for Oil Pan replacement. The power steering gear must be removed when dealing with rwd models. Crews installing the front propeller shaft and differential carrier assembly bushing to frame bolts must pull the differential carrier assembly downward with a mounted pinion yoke to prevent rotation. First remove the service slot plug and then unfasten the brackets that hold the fuel hose/pipe in place by loosening the attached nuts. Finally detach the four lower transmission mounting bolts which connect to the Oil Pan. The power steering gear removal requires disassembly of steering gear mounting bolts in addition to pulling the gear downward. Remove the engine wiring harness retainers from the Oil Pan before unfastening the Oil Pan bolts. Apply two bolts into the threaded holes at the rear of the Oil Pan to function as jack screws before tightening them evenly so that the Oil Pan detaches from the engine block then extract the Oil Pan with its jack screws. Apply a 5.5 mm (0.22 in) bead of sealer to the Oil Pan marked areas after cleaning and inspecting the engine block sealing surface but avoid letting the sealer touch the oil pump pipe and screen assembly. Align the Oil Pan with the engine block by matching the rear Oil Pan surface to the rear block surface and performing proper alignment depending on transmission installation. Tighten the Oil Pan bolts beginning with side bolts at 25 n.m (18 lb ft) and moving to end bolts set to 10 n.m (89 lb in). Reattach the engine wiring harness retainers while raising the power steering gear into position followed by installation of the four lower transmission mounting bolts and torque them to 50 n.m (37 lb ft). Secure the transmission-facing nuts on the fuel hose/pipe bracket while tightening them to 20 n.m (15 lb ft) and install the service slot plug. The power steering gear should be installed as part of rwd setup. Install the front propeller shaft after positioning the differential carrier assembly to the frame while tightening bushing to frame bolts to 152 n.m (112 lb ft). Install the engine protection shield and oil level indicator and tube before you fill the engine with oil.
    Posted by ChevyPartsGiant Specialist
    Q:
    How to replace the oil pan on GMC Canyon? Posted by Customer
    A:
    The first step to replace the Oil Pan requires removal of both the oil indicator tube and level indicator after taking out the engine protection shield. Clearance for the Oil Pan requires draining engine oil along with removing components. For rwd, remove the crossmember; the Oil Pan replacement requires different steps for rwd and 4wd systems. Rwd owners must remove the crossmember while 4wd owners must remove front propeller shafts and differential carrier assembly bushing to frame bolts before pulling the assembly downward and securing the pinion yoke to avoid rotation. The service slot plug and the fuel hose/pipe bracket nuts and the four lower transmission mounting bolts on the Oil Pan must all be removed. Pry out the power steering gear mounting bolts before pulling the power steering gear down to gain access then disconnect the engine wiring harness retainers from the Oil Pan and finish by unscrewing all Oil Pan bolts. After drilling two jack screws into the threaded Oil Pan holes at its rear you need to uniformly tighten them until the pan separates from the engine block. Remove the Oil Pan and jack screw bolts. Cleanness and visual scan must follow the inspection of both the Oil Pan and the engine block sealing face. Place 5.5 mm (0.22 inch) bead of sealer gm p/n 12378521 (Canadian P/N 88901148) on the Oil Pan in areas marked while applying a 3 mm (0.12 inch) bead on areas marked . Ensure the sealer does not touch the oil pump pipe and screen assembly. Before installing the Oil Pan to the engine block position the rear Oil Pan surface directly against the rear block surface then finalize the alignment details in relation to the presence or absence of the Transmission Assembly. Follow these torque requirements: tighten the side bolts to 25 nm (18 ft. Lbs.) and the end bolts to 10 nm (89 inch lbs.) during the Oil Pan bolt installation process. Connect the power steering gear mounting bolts then position the power steering gear so it points toward the frame assembly. Next, install the engine wiring harness retainers to the Oil Pan. Secure the four lower transmission mounting bolts at 50 nm (37 ft. Lbs.) before installing nuts that hold the fuel hose/pipe bracket to the transmission and set their torque to 20 nm (15 ft. Lbs.). After service slot installation you must place applicable components for rwd or 4wd, then add the engine protection shield with the oil level indicator tubing and engage engine oil prior to installation completion.
    Posted by ChevyPartsGiant Specialist
    Q:
    What should be done after removing the oil pan for the 2008 Chevrolet Colorado? Posted by Customer
    A:
    Clean and inspect the engine block sealing surface.
    Posted by ChevyPartsGiant Specialist
    See expert answers on similar Oil Pan
    Q:
    What additional steps are needed for the 2006 Chevrolet Colorado? Posted by Customer
    A:
    Remove the front propeller shaft, the differential carrier assembly bushing to frame bolts, pull the differential carrier assembly downward, secure the pinion yoke to prevent rotation, remove the service slot plug, and detach the nuts securing the fuel hose/pipe bracket to the transmission.
    Posted by ChevyPartsGiant Specialist
    See expert answers on similar Oil Pan
    Q:
    How should the oil pan be positioned when installing for the 2010 GMC Canyon? Posted by Customer
    A:
    Ensure the rear oil pan surface is flush with the rear block surface.
    Posted by ChevyPartsGiant Specialist
    See expert answers on similar Oil Pan
    Q:
    What is the torque specification for tightening the oil pan bolts for the 2009 GMC Canyon? Posted by Customer
    A:
    Tighten the side bolts to 25 Nm (18 lb ft) and the end bolts to 10 Nm (89 lb in).
    Posted by ChevyPartsGiant Specialist
    See expert answers on similar Oil Pan
    If you have any questions about this product, please don't hesitate to ask us. We will be happy to help you!

OEM GM 12600499, Excellent Performance and Perfect Fitment

To ensure reliability, purchase GM part # 12600499 Oil Pan. It is sometimes referred to as GM Oil Pan. Choosing OEM parts is the optimal decision for guaranteeing superior quality and perfect performance. These components undergo stringent quality checks and are carefully constructed to comply with GM's factory specifications, ensuring a smooth installation process.

ChevyPartsGiant.com is a leading supplier of genuine GM parts such as GM 12600499 Oil Pan. Our website boasts an extensive inventory of OEM GM parts, available at highly competitive prices in the market. Should you require any new genuine GM parts, rest assured we will deliver them swiftly and efficiently to your doorstep. Furthermore, all our parts come with the assurance of a manufacturer's warranty. For detailed Chevy parts information, click here.
Choose ChevyPartsGiant for discounted prices, exceptional service and fast delivery