Make sure this part fits

GM 12471300
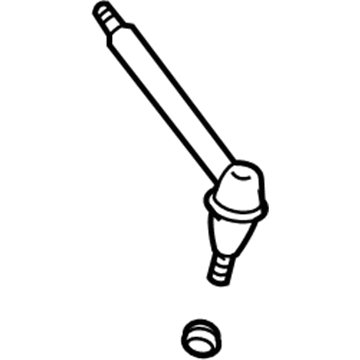
Outer Tie Rod

1984-2005 GM

Customer Questions & Expert Answers (7)
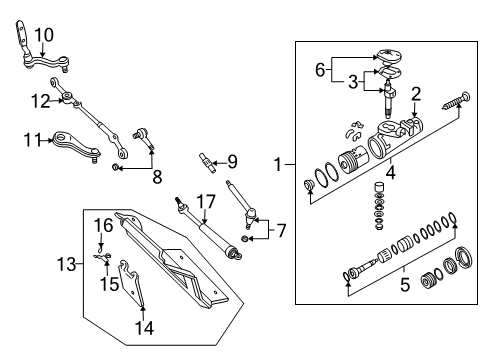
GM 12471300 Outer Tie Rod
  • Part Description
    Rod Kit, Steering Linkage Outer Tie; Steering Tie Rod End; Outer Tie Rod End; Tie Rod End
  • Position
    Outer
  • Replaces
    14067619, 26033089
  • Manufacturer
    General Motors
  • Manufacturer's Notes
    This part is discontinued.
Make sure this part fits
  • Vehicle Fitment

    Year Make Model Trim Engine
    1995-2005 Chevrolet BlazerBase, LS, LT, Trailblazer, Xtreme, ZR26 Cyl 4.3 L GAS
    1984-2004 Chevrolet S10Baja, Base, Durango, EL, LS, Sport, SS, Tahoe, Xtreme, ZR2, ZR54 Cyl 1.9 L GAS, 4 Cyl 2.0 L GAS, 4 Cyl 2.2 L DIESEL, 4 Cyl 2.2 L FLEX, 4 Cyl 2.2 L GAS, 4 Cyl 2.5 L GAS, 6 Cyl 2.8 L GAS, 6 Cyl 4.3 L GAS
    1984-1994 Chevrolet S10 BlazerBase, High Country, LT, Sport, Tahoe, Tahoe LT4 Cyl 1.9 L GAS, 4 Cyl 2.0 L GAS, 4 Cyl 2.2 L DIESEL, 4 Cyl 2.5 L GAS, 6 Cyl 2.8 L GAS, 6 Cyl 4.3 L GAS
    1992-2001 GMC JimmyBase, Diamond Edition, Envoy, SL, SLE, SLS, SLT6 Cyl 4.3 L GAS
    1984-1990 GMC S15Base, EL, Gypsy, High Sierra, Sierra Classic4 Cyl 1.9 L GAS, 4 Cyl 2.0 L GAS, 4 Cyl 2.2 L DIESEL, 4 Cyl 2.5 L GAS, 6 Cyl 2.8 L GAS, 6 Cyl 4.3 L GAS
    1984-1991 GMC S15 JimmyBase, Gypsy, High Sierra, Sierra Classic, SLE, SLS, SLT, Timberline4 Cyl 1.9 L GAS, 4 Cyl 2.0 L GAS, 4 Cyl 2.5 L GAS, 6 Cyl 2.8 L GAS, 6 Cyl 4.3 L GAS
    1991-2004 GMC SonomaBase, GT, SL, SLE, SLS4 Cyl 2.2 L FLEX, 4 Cyl 2.2 L GAS, 4 Cyl 2.5 L GAS, 6 Cyl 2.8 L GAS, 6 Cyl 4.3 L GAS
    1991 GMC SycloneBase6 Cyl 4.3 L GAS
    1992-1993 GMC TyphoonBase6 Cyl 4.3 L GAS
    1996-2004, 1991-1994 Oldsmobile BravadaBase6 Cyl 4.2 L GAS, 6 Cyl 4.3 L GAS
    Warning: California's Proposition 65
  • Customer Questions & Expert Answers

    Q:
    Is this 12471300 designed for my car? Posted by ChevyPartsGiant Specialist
    A:
    Please Select Your Vehicle model to see if part number 12471300 is suitable before ordering.
    Posted by ChevyPartsGiant Specialist
    Q:
    How to replace the tie rod on a 4WD on Chevrolet Blazer? Posted by Customer
    A:
    The procedure to change a Tie Rod starts with vehicle lifting and suspension using safety stands. Start the replacement by removing the outer Tie Rod ball stud pin and continuing with both outer and inner Tie Rod ball stud nut removal. Steering linkage joints must not be detached by placing wedges between them and their attachment parts because these procedures will cause damage to the seals. You must utilize the j24319-b steering linkage and Tie Rod puller to separate the outer Tie Rod ball stud from its knuckle position while the j6627-a Tie Rod puller will remove the inner Tie Rod ball stud from the relay rod. Remove the Tie Rod ends from adjuster tube by unscrewing the assemblies while also loosening their clamp bolts. Thoroughly examine Tie Rod ends alongside their seals and threads along with their adjuster tube for any sign of damage while checking for severe wear. The ball stud threads, ball stud nut and all tapered components need to undergo cleaning operations. A chassis lubricant should be applied to the removed Tie Rod ends while maintaining their thread count within three threads. Install the Tie Rod ends to the adjuster tube then mount the inner Tie Rod ball stud onto the relay rod with its seal in position and tighten a new nut until it reaches 47 nm (35 ft. Lbs.). Mount the outer Tie Rod ball stud to the Steering Knuckle while ensuring the presence of the seal and tighten the nut to 53 nm (39 ft. Lbs.). Then advance the nut to line up with the cotter pin hole. The replacement pin needs proper spreading before the vehicle is lowered to the floor. First adjust the front toe then place both clamps between the locating dimples located at the adjuster tube's end points while avoiding alignment between clamp slots and adjuster tube slots. Keep the Tie Rod ends in place before clamp tightening actions according to specification guidelines or let their ends make contact if necessary. Secure the adjuster tube clamp bolts by tightening them to 21 nm (16 ft. Lbs.).
    Posted by ChevyPartsGiant Specialist
    Q:
    How to replace a tie rod on Chevrolet S10? Posted by Customer
    A:
    The replacement of the Tie Rod begins by raising and supporting the vehicle with safety stands installed. The procedure starts with removing the cotter pin along with the outer Tie Rod ball stud nut then moving to take off the inner Tie Rod ball stud nut. The joints in the steering linkage should remain undamaged when using any techniques for disassembly instead of a wedge. The j 24319-b steering linkage and Tie Rod puller should be used for removing the outer Tie Rod ball stud from the steering knuckle and the j 6627-a Tie Rod puller for extracting the inner Tie Rod ball stud from the relay rod. First disconnect the adjuster tube Tie Rod ends by loosening bolt clamps while rotating the assemblies out. Check the Tie Rod ends together with their seals as well as threads and adjuster tube for any evidence of damage. Thoroughly clean both ball stud threads and ball stud nut in addition to the tapered surfaces. The Tie Rod ends require chassis lubrication after removal but the threads of both main elements must be identical within three threads. To assemble the Tie Rod ends properly install them to the adjuster tube and join the inner rod ball stud to the relay rod with the seal facing the stud before using the j 29193 steering linkage installer (12 mm) or j 29194 steering linkage installer (14 mm) to torque the taper to 54 nm (40 ft. Lbs.). Secure the outer Tie Rod ball stud nut to 53 nm (39 ft. Lbs.) force while avoiding moving the nut to reach the cotter pin hole. The new cotter pin should be installed and then its ends must be opened to their fullest extent. Deenergize the steering wheel and place the vehicle onto the ground while you perform front toe adjustment. Set the two clamps between locating dimples located at the ends of the adjuster tube but avoid lining up the clamp slot with the adjuster tube slot. Each Tie Rod End must stay in position during clamp tightening according to specified requirements while the ends can be allowed to touch if needed. The last step involves tightening the adjuster tube clamp bolts until they reach 21 nm (16 ft. Lbs.).
    Posted by ChevyPartsGiant Specialist
    Q:
    How to replace the tie rod on ZR2 on Chevrolet S10? Posted by Customer
    A:
    Start replacing the tie rod of ZR2 models by properly raising and supporting the vehicle until the rear axle reaches curb height. The procedure entails removing the rear tie rod mounting bolt and washers alongside the nut from the frame bracket and axle bracket before extracting the rear tie rod. You should put the new rear tie rod into the frame bracket before installing its bolt and washers and nut to the axle bracket. Install the rear tie rod into the axle bracket first by loosely adding the bolt together with washers and nut to the frame bracket while following fastener precautions. The fitment requires tightening the rear tie rod to axle bracket nut to 61 Nm (45 ft. lbs.) and also the tie rod to frame bracket nut to 61 Nm (45 ft. lbs.). When completing the procedure the vehicle should be lowered after removing the rear axle support.
    Posted by ChevyPartsGiant Specialist
    Q:
    How to service and repair the tie rod end on GMC Jimmy? Posted by Customer
    A:
    To service and repair Tie Rod end raise and support the vehicle suitably with safety stands. Start with the cotter pin removal of the outer Tie Rod ball stud nut, followed by the same of the outer Tie Rod ball stud nut and inner Tie Rod ball stud nut. Steer clear of disconnecting a steering linkage joint by driving a wedge between it and the attached part to prevent seal from being damaged. Separate all tie rods and ball joints by using the steering linkage and Tie Rod puller (J 24319-B) to remove the outer Tie Rod ball stud from the Steering Knuckle and the Tie Rod puller (J 6627-A) to the inner Tie Rod ball stud from the relay rod. It is only necessary to loosen the clamp bolts and unscrewness the assemblies to remove the Tie Rod ends from the adjuster tube. Check for damage or severe wear on the tie rods end, seals, threads, and adjuster tube. Measure and install a ball stud maximum of 65mm (2 1/2 in.) antagonist platform ball stud. If the Tie Rod ends were removed, also lubricate them with chassis lubricant and make sure the number of threads each inner and the outer Tie Rod ends is equal in three threads respectively. Connect the end of the Tie Rod to the adjuster tube, position the inner Tie Rod ball stud to the relay rod and ensure that the seal is on the former, seat the taper with the help of the steering linkage installer (12 mm) (J 29193) or steering linkage installer (14 mm) (J 29194) and tighten up to 54 nm (40 ft. Lbs.). Scrub off the installer and apply a new nut to the inner Tie Rod ball stud and tighten to 47 nm (35 ft. Lbs.). Next, install the out t.ie rod ball stud to the Steering Knuckle, with seal on the stud and seat the taper again using either j 29193 or j 29194, apply 54 nm (40 ft. Lbs.). Remove the installer and install nut onto the outer Tie Rod ball stud and tighten to 53 nm (39 ft. Lbs.) make sure that the nut acts forward to align to the hole of cotter pin. Place a new cotter pin to the outer rod nut of the Tie Rod and open the ends of the cotter pin. Lower the vehicle and adjust tail end towards. Place the two clamps between the locating dimples at each end of the adjuster tube while ensuring that the clamp slot is not aligned with the adjuster tube slot and continue holding the position of each Tie Rod end as the clamps are being tightened to allow free movement in the each joint. Lastly, install the adjuster tube clamp bolts and tighten them up to 21 nm (16 ft. Lbs).
    Posted by ChevyPartsGiant Specialist
    Q:
    How do you adjust the front toe for the 2004 Chevrolet S10? Posted by Customer
    A:
    Position the two clamps between the locating dimples at either end of the adjuster tube, ensuring the clamp slot is not aligned with the adjuster tube slot.
    Posted by ChevyPartsGiant Specialist
    See expert answers on similar Tie Rod
    Q:
    How should the tie rod ends be connected to the adjuster tube for the 2003 GMC Sonoma? Posted by Customer
    A:
    Connect the tie rod ends to the adjuster tube, install the inner tie rod ball stud to the relay rod ensuring the seal is on the stud.
    Posted by ChevyPartsGiant Specialist
    See expert answers on similar Tie Rod
    If you have any questions about this product, please don't hesitate to ask us. We will be happy to help you!

OEM GM Outer Tie Rod 12471300 Designed for Proper Fit and Performance

Original OEM GM parts deliver superior quality and meet all performance standards needed for optimal automotive operation. The authentic part identified by 12471300 Outer Tie Rod is available in the market under the name GM Tie Rod, Tie Rod End. This genuine product has a full warranty coverage from the manufacturer available at all authorized GM dealers throughout the United States. This part 12471300 Outer Tie Rod fits certain Chevrolet S10, Blazer, S10 Blazer models, as well as GMC Sonoma, Typhoon, Syclone. Additionally, it is compatible with Oldsmobile Bravada models.
The original GM component designated by manufacturer part number 12471300 maintains top performance when functioning as the Rod Kit, Steering Linkage Outer Tie; Steering Tie Rod End; Outer Tie Rod End; Tie Rod End unit at its Outer. The component 12471300 is constructed from durable material and its dimensions span 4.8 x 2.4 x 10.7 inches while weighing 1.80 Pounds. The Direct Replacement component is ready in New condition to ensure full compatibility with your vehicle system. This component receives the designation of Rod Kit, Steering Tie Rod Outer. The part 12471300 has available replacement options 14067619, 26033089. GM manufacturer provides a warranty that ensures reliable operation of this product. The Shipping Policy and Return Policy pages outline complete details regarding shipping procedures and return processes.
If you want to save money in the long run on maintenance and repairs, you should choose OEM products because they're of the top level of durability. Are you on the quest of finding GM parts, our site is worth a visit. We stock an endless selection of high-quality GM components including things like ignition coils all the way through to fan shrouds and all at prices that can not be matched. You have nothing to worry about because all our OEM parts are covered with a manufacturer warranty, which guarantees superior quality and value.