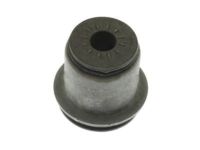
Make sure this part fits

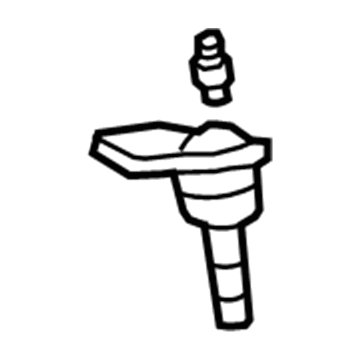
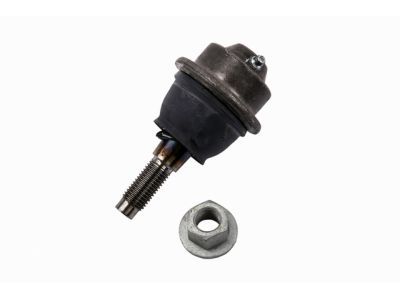
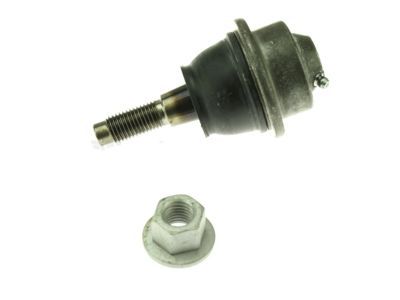
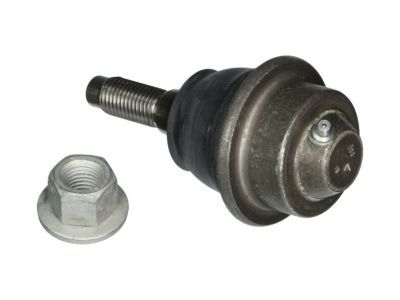
GM 19207137
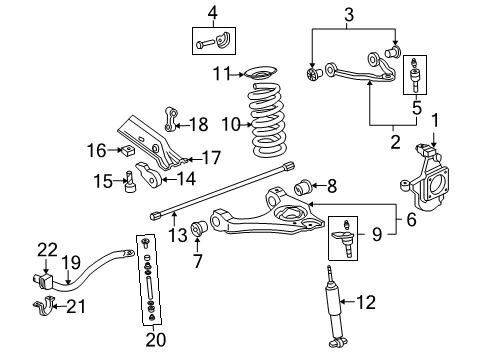
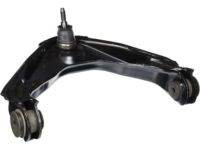
Lower Ball Joint, Front

1999-2013 GM

Customer Questions & Expert Answers (18)
GM 19207137 Lower Ball Joint, Front
  • Part Description
    Stud Kit, Front Lower Control Arm Ball; Suspension Ball Joint; Ball Joint
  • Position
    Front Lower
  • Replaces
    12472820, 12475477
  • Manufacturer
    General Motors
Make sure this part fits
$74.80 MSRP: $127.34
You Save: $52.54 (42%)
Ships in 1-2 Business Days
1
ADD TO CART
  • Related Parts
  • Product Specifications
  • Vehicle Fitment
  • Customer Questions & Expert Answers
  • Product Specifications

    BrandGenuine GM
    Manufacturer Part Number19207137
    Part DescriptionStud Kit, Front Lower Control Arm Ball; Suspension Ball Joint; Ball Joint
    Other NamesStud Kit, Steering Knuckle Lower Control Arm Pivot
    Item Dimensions7.0 x 4.4 x 4.5 inches
    Item Weight2.20 Pounds
    PositionFront Lower
    ConditionNew
    Fitment TypeDirect Replacement
    Replaces12472820, 12475477
    ManufacturerGeneral Motors
    SKU19207137
    WarrantyThis genuine GM part is guaranteed by GM's factory warranty.
    Shipping & ReturnShipping Policy Return Policy
    Warning: California's Proposition 65
  • Vehicle Fitment

    Year Make Model Trim Engine
    2002-2005 Chevrolet Avalanche 1500Base, LS, LT, North Face, On Road Edition, WBH, Z66, Z718 Cyl 5.3 L FLEX, 8 Cyl 5.3 L GAS
    2002-2006 Chevrolet Avalanche 2500Base, LS, LT8 Cyl 8.1 L GAS
    2001-2007 Chevrolet Silverado 1500Base, Hybrid, LS, LT, LTZ, SS, WT, Z71 Off-Road6 Cyl 4.3 L GAS, 8 Cyl 4.8 L GAS, 8 Cyl 5.3 L FLEX, 8 Cyl 5.3 L FULL HYBRID EV-GAS (FHEV), 8 Cyl 5.3 L GAS, 8 Cyl 6.0 L GAS
    2007 Chevrolet Silverado 1500 ClassicLS, LT, SS, WT6 Cyl 4.3 L GAS, 8 Cyl 4.8 L GAS, 8 Cyl 5.3 L FLEX, 8 Cyl 5.3 L GAS, 8 Cyl 6.0 L GAS
    2005-2006, 2001-2003 Chevrolet Silverado 1500 HDBase, LS, LT8 Cyl 6.0 L GAS
    2007 Chevrolet Silverado 1500 HD ClassicLT8 Cyl 6.0 L GAS
    1999-2004 Chevrolet Silverado 2500Base, LS, LT, WT8 Cyl 5.3 L GAS, 8 Cyl 6.0 L BI-FUEL, 8 Cyl 6.0 L CNG, 8 Cyl 6.0 L GAS
    2001-2010 Chevrolet Silverado 2500 HDBase, LS, LT, LTZ, WT8 Cyl 6.0 L BI-FUEL, 8 Cyl 6.0 L CNG, 8 Cyl 6.0 L FLEX, 8 Cyl 6.0 L GAS, 8 Cyl 6.6 L DIESEL, 8 Cyl 8.1 L GAS
    2007 Chevrolet Silverado 2500 HD ClassicLS, LT, WT8 Cyl 6.0 L GAS, 8 Cyl 6.6 L DIESEL, 8 Cyl 8.1 L GAS
    2001-2006 Chevrolet Silverado 3500Base, LS, LT, WT8 Cyl 6.0 L CNG, 8 Cyl 6.0 L GAS, 8 Cyl 6.6 L DIESEL, 8 Cyl 8.1 L GAS
    View More
  • Customer Questions & Expert Answers

    Q:
    Is this 19207137 designed for my car? Posted by ChevyPartsGiant Specialist
    A:
    Please Select Your Vehicle model to see if part number 19207137 is suitable before ordering.
    Posted by ChevyPartsGiant Specialist
    Q:
    How to replace the lower ball joint on a with torsion bar suspension on Chevrolet Avalanche 2500? Posted by Customer
    A:
    When installing a new Ball Joint on vehicles with torsion bar suspension start by lifting the car and using jack stands for support. You next need to take off the wheel and tire then detach the lower Control Arm which should be clamp-mounted in a vice. You should use a chisel to remove the 4 locking crimps on the Ball Joint body of a 15 series before putting the part in a press to take out the assembly from the lower Control Arm. After placing the new Ball Joint it should enter its outer position by pushing it in. Reinstall the lower Control Arm into the bench vice. Secure four crimps to the Ball Joint with a punch based on position settings from the replaced Ball Joint of a 15 series. Replace the lower Control Arm before putting back the tire and wheel combination. End by taking off safety stands and lowering the vehicle while testing wheel alignment.
    Posted by ChevyPartsGiant Specialist
    Q:
    How to replace the upper ball joint on Chevrolet Avalanche 1500? Posted by Customer
    A:
    Your first step requires lifting the vehicle then taking off the tire and wheel. To disconnect the bracket remove bolt and nut then take out the bracket itself. You need to remove the bolt fixing the brake hose bracket to the axle. Apply j 44664 nut extractor to take off the upper Ball Joint nut that secures Steering Knuckle components. Unscrew the upper Ball Joint and its two retaining bolts and stud . Use the j 44663 tool to extract the upper Ball Joint stud from the Steering Knuckle and afterward take out the upper Ball Joint completely. Press the upper Ball Joint onto the Steering Knuckle and fasten it with both retaining bolts and stud which you should tighten to 110 n.m (81 lb ft). Screw the nut onto the Steering Knuckle with the help of j 44664 (J 44664) until you reach 200 n.m torque (147 lb ft torque). Press the bracket onto its final position over the Axle Shaft then connect the bolt and nut that support the bracket and torque them at 25 n.m. Secure the brake hose bracket bolt onto the axle at 12 n.m (106 lb in). Put the tire back on and lower the vehicle before having the wheels properly aligned.
    Posted by ChevyPartsGiant Specialist
    Q:
    How to replace the lower ball joint on a torsion bar suspension on Chevrolet Silverado 3500 Classic? Posted by Customer
    A:
    You must lift and stabilize the vehicle first before taking off the tire and wheel assemblage followed by unscrewing the lower Control Arm for placement in the bench vice. Use a chisel to remove boot crimping if needed before putting the Ball Joint into press system to take it off lower Control Arm. Place the Ball Joint into the pressing tool using its outer flange and press it into position. Reinstall the lower Control Arm into the vice. Attach crimps when needed following the replacement Ball Joint as your guide using a punch. Put back the lower Control Arm and wheel assembly before taking out the safety stands then lower the car. Test the wheel alignment by performing the recommended measurement procedure.
    Posted by ChevyPartsGiant Specialist
    Q:
    How to replace the lower ball joint on a torsion bar suspension on Chevrolet Silverado 2500? Posted by Customer
    A:
    Use a lift to support the vehicle and take its tire and wheel off to start changing the lower Ball Joint in a torsion bar suspension system. After taking out the lower Control Arm you need to place the Control Arm in the bench vice for security. Time this step is possible remove the Ball Joint crimps with a chisel and install it in a press to separate the Ball Joint from the lower Control Arm. Install the new Ball Joint by fitting it with the Ball Joint opening. Fix the lower Control Arm in the bench vice before placing Ball Joint crimping points if needed. Use the old Ball Joint as guide. Install the lower Control Arm first with the tire and wheel afterward. Once the safety stands are removed you can let the vehicle down and inspect its wheel alignment.
    Posted by ChevyPartsGiant Specialist
    Q:
    How to replace the lower ball joint on Chevrolet Suburban 1500? Posted by Customer
    A:
    First lift and stabilize the vehicle before taking off the tire and wheel unit for lower Ball Joint work. Place the lower Control Arm into a bench vice or substitute equipment for safekeeping. Use a center punch to drill out the rivets that attach the lower Ball Joint to the Control Arm. Fasten the new Ball Joint segment to the lower Control Arm and bolt it down according to the fastener notice instructions from the service precautions. Loosen the lower Control Arm from the bench vice before installing it back on your vehicle driven by 70 nm torque. Reinstall the tire and wheel set before taking out safety stands while lowering the vehicle. Finally, verify the wheel alignment.
    Posted by ChevyPartsGiant Specialist
    Q:
    How to replace the lower ball joint on a coil spring suspension on Chevrolet Silverado 3500? Posted by Customer
    A:
    When working on cars with coil spring suspension raise the vehicle and take off the wheel and tire. Position the lower Control Arm in the bench vice and take it off next. Use a center punch tool to mark the rivet heads then drill out the lower Ball Joint rivets to take them out. Attach the new Ball Joint to the lower Control Arm and bolt it into place using the right torque of 70 nm for both bolt and nut. Put the removed lower Control Arm back into the bench vice before installing it. Put back the tire and wheel unit and remove the protection steel then let the vehicle down. Test the wheel alignment to guarantee the vehicle handles properly.
    Posted by ChevyPartsGiant Specialist
    Q:
    How to replace the lower ball joint on a coil spring suspension on Chevrolet Suburban 2500? Posted by Customer
    A:
    You need to lift and support the vehicle first before taking off the tire and wheel assembly to replace its lower Ball Joint on vehicles with coil spring suspension. Take the lower Control Arm off the vehicle and clamp it in the bench vice for work. Stan the rivet heads before you drill out the lower Ball Joint assembly. Fasten the new Ball Joint onto the lower Control Arm then install replacement bolts according to service precautions. Fasten the nuts over bolts with a torque of 70 nm (52 ft. Lbs.). Connect the lower Control Arm back into place then install tire and wheel on the vehicle. Place the car on the ground and take off the safety stands before testing wheel alignment.
    Posted by ChevyPartsGiant Specialist
    Q:
    How to replace the upper ball joint on Chevrolet Silverado 2500? Posted by Customer
    A:
    To install the new Ball Joint raise the vehicle and take off the tire and wheel first. Disconnect the bolt and nut between the bracket and axle part. Then take out the entire bracket. Take out the bolt that connects the brake hose bracket to the axle section. Using the j 44664 remove the top Ball Joint from the Steering Knuckle by taking out its attaching nut. Afterward detach the upper Ball Joint retaining bolts and stud. Use the j 44663 tool to take out the Steering Knuckle upper Ball Joint stud before taking out the upper Ball Joint from the vehicle. Position the upper Ball Joint onto the Steering Knuckle then install its locking bolts and stud. Fix them until they reach 110 nm (81 ft. Lbs.) torque. After placing the nut in position thread it onto the upper Ball Joint using j 44664 tool until it reaches 200 nm (147 ft. Lbs). Connect the bracket first before tightening both bolt and nut to 25 nm (18 ft. Lbs.). Secure the bolt which holds the brake hose bracket in place using a force of 12 nm (106 inch lbs.). Put back the tire and wheel then drop the vehicle while aligning all four wheels.
    Posted by ChevyPartsGiant Specialist
    Q:
    How to replace the lower ball joint on a coil spring suspension on Chevrolet Silverado 1500 Classic? Posted by Customer
    A:
    You need to lift and stabilize the vehicle before you take off the wheel and tire for lower Ball Joint replacement on coil spring suspension vehicles. Put the lower Control Arm in a bench vice before disconnecting it from the vehicle. Make marks on the rivet heads before using a drill to eliminate the lower Ball Joint part. After slotting the new Ball Joint onto the bottom Control Arm setup both replacement bolts within it. Secure the nuts with 70 nm torque (52 ft. Lbs.). Put the Control Arm back into the bench vice before you put on both the wheel and tire assembly. Take safety stands off and lower the car before inspecting wheel alignment.
    Posted by ChevyPartsGiant Specialist
    Q:
    How to replace the lower ball joint on a torsion bar suspension on GMC Sierra 1500 Classic? Posted by Customer
    A:
    You must lift and stabilize the vehicle first before taking off the tire and wheel assemblage followed by unscrewing the lower Control Arm for placement in the bench vice. Use a chisel to remove boot crimping if needed before putting the Ball Joint into press system to take it off lower Control Arm. Place the Ball Joint into the pressing tool using its outer flange and press it into position. Reinstall the lower Control Arm into the vice. Attach crimps when needed following the replacement Ball Joint as your guide using a punch. Put back the lower Control Arm and wheel assembly before taking out the safety stands then lower the car. Test the wheel alignment by performing the recommended measurement procedure.
    Posted by ChevyPartsGiant Specialist
    Q:
    How to replace the lower control arm ball joint on cast iron lower control arms on GMC Sierra 3500 Classic? Posted by Customer
    A:
    For replacing the lower Control Arm Ball Joint on vehicle with cast iron lower control arms, first lift and support the vehicles and then tire and wheel assembly. Then, disconnect the lower Control Arm from the vehicle and fix it in a vise. In case the Ball Joint body has crimping look for help using a chisel to take out the crimps and later use a press to pull out the Ball Joint from the lower Control Arm. For installation, press the Ball Joint into place using the outer flange and on the lower Control Arm, place it in a bench vise. If needed, you might use a punch to install the crimps on the balljoint using the replaced Ball Joint as a reference. Replace the lower Control Arm in the vehicle with the tire and wheel assembly. Lower the vehicle and check the wheel alignment as per the specifications after removing the safety stand.
    Posted by ChevyPartsGiant Specialist
    Q:
    How to replace the upper ball joint on GMC Sierra 3500? Posted by Customer
    A:
    Begin the process by pulling off the tire then taking out the wheel followed by unscrewing the bolt that keeps the brake hose bracket attached to the axle. Insert j 44664 tool to loosen the upper Ball Joint nut on the Steering Knuckle then uninstall the Ball Joint retaining bolts and stud. Using the j 44663 tool to remove the Steering Knuckle upper Ball Joint stud lets you take out the upper Ball Joint from the vehicle. You should first set the upper Ball Joint onto the Steering Knuckle before using the retaining bolts and stud to secure it at 110 nm (81 ft. Lbs.). Tighten the top Ball Joint nut to the Steering Knuckle by applying 200 nm torque using the j 44664 tool. Reinstall the axle bracket while securing the brake hose bracket with the bolt at 12 nm (106 inch lbs.). Put the new tire and wheel back in place before doing an automatic steer calibration.
    Posted by ChevyPartsGiant Specialist
    Q:
    How to replace the upper ball joint on GMC Yukon XL 2500? Posted by Customer
    A:
    Before starting work on the upper Ball Joint you need to raise the car and take off the tire and wheel. Unbolt the bracket for the axle using tool and take off both bolt and nut before removing the bracket. Push out the bolt that attaches the brake hose bracket to the axle. The j 44664 (J 44664) upper Ball Joint nut remover allows you to remove the nut that secures the top Ball Joint to the Steering Knuckle. The j 44663 tool pulls out the upper Ball Joint stud from the Steering Knuckle following removal of its retaining bolts and stud. Dismount the Ball Joint from the car. Insert the new upper Ball Joint into the Steering Knuckle before installing its retaining bolts and stud. Tighten the bolts to 110 nm (81 ft. Lbs.). Use the j 44664 to fit the retaining nut onto the upper Ball Joint to the Steering Knuckle and ensure 200 nm (147 lb.ft) torque applied. Lock the bracket onto the axle while also threading bolt and nut until you reach 25 nm torque (18 ft. Lbs.). Fix the brake hose bracket bolt to its corresponding axle position while applying 12 nm (106 inch lbs.) torque. Repace the tire and wheel then let the car down before scheduling four-wheel wheel alignment service.
    Posted by ChevyPartsGiant Specialist
    Q:
    How to replace the lower ball joint on a torsion bar suspension on GMC Yukon XL 2500? Posted by Customer
    A:
    A car needs proper lifting before technicians can remove wheels and control arms to access the lower Ball Joint area on a torsion bar suspension. Place the lower Control Arm in a vise tool and pry out the lock tabs from the Ball Joint unit using a chisel when possible. Put the Ball Joint into a press while it remains on the lower Control Arm. Push the new Ball Joint inside until its edges reach the outer flange before placing the lower Control Arm back into the vice. When needed you can use a punch to create crimps on the Ball Joint while following the positioning of the replaced Ball Joint. Put back the lower Control Arm then position the tire and wheel assembly. After completing installation take off the safety stands lower the vehicle then check the wheel alignment.
    Posted by ChevyPartsGiant Specialist
    Q:
    What should be removed next for the 2004 Chevrolet Silverado 2500? Posted by Customer
    A:
    Remove the bolts that hold the lower ball joint to the steering knuckle, followed by the pinch bolt that retains the lower ball.
    Posted by ChevyPartsGiant Specialist
    See expert answers on similar Ball Joint
    Q:
    What should be removed after raising for the 2001 GMC Yukon XL 1500? Posted by Customer
    A:
    The tire and wheel assembly.
    Posted by ChevyPartsGiant Specialist
    See expert answers on similar Ball Joint
    Q:
    What should be done after removing the tire and wheel for the 2006 GMC Sierra 1500? Posted by Customer
    A:
    Take off the snap ring from the ball joint stud and remove the bolts that secure the lower ball joint to the steering knuckle.
    Posted by ChevyPartsGiant Specialist
    See expert answers on similar Ball Joint
    If you have any questions about this product, please don't hesitate to ask us. We will be happy to help you!

OEM GM 19207137, Excellent Performance and Perfect Fitment

To ensure reliability, purchase GM part # 19207137 Lower Ball Joint, Front. It is sometimes referred to as GM Ball Joint. Choosing OEM parts is the optimal decision for guaranteeing superior quality and perfect performance. These components undergo stringent quality checks and are carefully constructed to comply with GM's factory specifications, ensuring a smooth installation process.

ChevyPartsGiant.com is a leading supplier of genuine GM parts such as GM 19207137 Lower Ball Joint, Front. Our website boasts an extensive inventory of OEM GM parts, available at highly competitive prices in the market. Should you require any new genuine GM parts, rest assured we will deliver them swiftly and efficiently to your doorstep. Furthermore, all our parts come with the assurance of a manufacturer's warranty. For detailed Chevy parts information, click here.
Choose ChevyPartsGiant for discounted prices, exceptional service and fast delivery