ChevyParts
My Garage
My Account
Cart
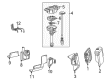
OEM 2004 Chevrolet Silverado 1500 Distributor
Ignition Distributor- Select Vehicle by Model
- Select Vehicle by VIN
Select Vehicle by Model
orMake
Model
Year
Select Vehicle by VIN
For the most accurate results, select vehicle by your VIN (Vehicle Identification Number).
1 Distributor found


 Product Specifications
- Other Name: Distributor; Distributor, Ignition
- Replaces: 01104057, 01104078, 01104050, 1104050, 1104078, 1104057, 93441559
- Item Weight: 2.60 Pounds
- Item Dimensions: 15.8 x 8.3 x 5.2 inches
- Condition: New
- Fitment Type: Direct Replacement
- SKU: 12598210
- Warranty: This genuine part is guaranteed by GM's factory warranty.
2004 Chevrolet Silverado 1500 Distributor
With a comprehensive array of OEM 2004 Chevrolet Silverado 1500 Distributor, from fuel pumps to door handles, our website is a one-stop-shop for your needs. All our genuine 2004 Chevrolet Silverado 1500 Distributor are backed by the manufacturer's warranty and are offered at competitive prices in the market. Rest assured, you can shop with complete confidence.
2004 Chevrolet Silverado 1500 Distributor Parts and Q&A
- Q: How to properly overhaul a distributor to ensure correct reassembly and prevent engine damage on 2004 Chevrolet Silverado 1500?A: To overhaul the Distributor go ahead and dismantle it first, mark the Distributor, driven gear, shaft, rotor holes, to ensure precise reassembling as wrong connection can result in no-start conditions & engine damage. Position the white paint mark of the bottom stem of the Distributor inside the pre-drilled indent hole in the bottom of the gear for the placement of the rotor segment for v6 engine; if not, replace the Distributor. Take off the screws from the rotor, and take out the rotor, while taking note of where the rotor screw holes and rotor locator pin holes are. Mount the cmp sensor screws into the square-cut hole in the vane wheel with the cmp sensor lined up, and remove and discard the cmp sensor. Watch the dimple below the roll pin hole on one side of the gear for correct orientation when assembling it. Support the driven gear in a v-block or similar fixture, drive our the roll pin with a suitable punch, remove the driven gear and round washer, loosen the tang washer and shim washer, and press the oil seal, as it cannot be removed and is incorporated in the listed washers. For assembly, align the square-cut hole on the vane wheel for cmp sensor and mount the cmp sensor with new screws (secure to 2.2 N.m./19 lb in), and then determine the correct rotor mounting holes. Install the rotor Distributor following the index marks, fasten it rotor screws to 1.9 n.m (17 lb. In.), install the shim washer, tang washer, round washer. Mount the driven gear where the index lines indicate, the rotor segment should align as indicated in a v6 engine, and the white paint from the bottom stem of the Distributor should be installed over the pre-drilled indent hole present at the bottom of the gear. Make sure that the dimple is correctly located. If the driven gear is placed wrongly, it will be about 180 degrees to the rotor segment. Position the Distributor drive gear in a v-block or an appropriate fixture, insert the roll pin using an appropriate punch and hammer, fit a new oil seal under the mounting flange of the Distributor base, and the last step is to fit the Distributor.
Related 2004 Chevrolet Silverado 1500 Parts
 2004 Chevrolet Silverado 1500 Ignition Coil
 2004 Chevrolet Silverado 1500 Camshaft Position Sensor
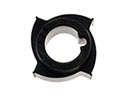 2004 Chevrolet Silverado 1500 Distributor Reluctor
 2004 Chevrolet Silverado 1500 Engine Control Module
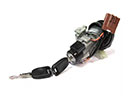 2004 Chevrolet Silverado 1500 Igniter
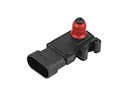 2004 Chevrolet Silverado 1500 MAP Sensor
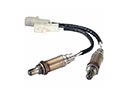 2004 Chevrolet Silverado 1500 Oxygen Sensor
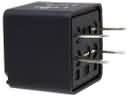 2004 Chevrolet Silverado 1500 Relay
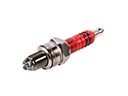 2004 Chevrolet Silverado 1500 Spark Plug
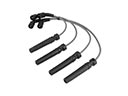 2004 Chevrolet Silverado 1500 Spark Plug Wires
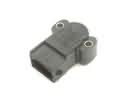 2004 Chevrolet Silverado 1500 Throttle Position Sensor
 2004 Chevrolet Silverado 1500 Vehicle Speed Sensor