ChevyParts
My Garage
My Account
Cart
OEM 2005 Chevrolet Astro A/C Accumulator
Accumulator- Select Vehicle by Model
- Select Vehicle by VIN
Select Vehicle by Model
orMake
Model
Year
Select Vehicle by VIN
For the most accurate results, select vehicle by your VIN (Vehicle Identification Number).
1 A/C Accumulator found


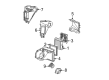
2005 Chevrolet Astro Dehydrator Part Number: 89018433
$35.08 MSRP: $65.88You Save: $30.80 (47%)Ships in 1-2 Business DaysProduct Specifications- Other Name: Accumulator, Air Conditioner Refrigerant; Drier Desiccant Element; A/C Receiver Drier; A/C Accumulator; Drier; Accumulator, A/C Refrigerant; Accumulator
- Replaces: 02724932, 2724932
- Item Weight: 1.90 Pounds
- Item Dimensions: 10.7 x 7.3 x 6.3 inches
- Condition: New
- Fitment Type: Direct Replacement
- SKU: 89018433
- Warranty: This genuine part is guaranteed by GM's factory warranty.
2005 Chevrolet Astro A/C Accumulator
With a comprehensive array of OEM 2005 Chevrolet Astro A/C Accumulator, from fuel pumps to door handles, our website is a one-stop-shop for your needs. All our genuine 2005 Chevrolet Astro A/C Accumulator are backed by the manufacturer's warranty and are offered at competitive prices in the market. Rest assured, you can shop with complete confidence.
2005 Chevrolet Astro A/C Accumulator Parts and Q&A
- Q: How to replace the A/C Accumulator on 2005 Chevrolet Astro?A: When replacing the A/C Accumulator start by obtaining the refrigerant before removing both the air cleaner and coolant recovery reservoir. Turn the four A/C Accumulator nuts to loosening status without removing the ferrules and nuts attached to the evaporator tube. The A/C Accumulator needs removal from the evaporator tube. Attach the new A/C Accumulator to the evaporator tube while placing the flow arrow in direction of the evaporator and install new o-rings onto the evaporator tube. Tightening action on the A/C Accumulator nuts should reach 15 n.m (11 lb ft). The a/c system requires evacuation and recharging while also using the halogen leak detector (J 39400-A) to conduct a leak test on all repaired or reinstalled component fittings. The last step includes placing back both the coolant recovery reservoir and the air cleaner.
Related 2005 Chevrolet Astro Parts
 2005 Chevrolet Astro Blower Motor
 2005 Chevrolet Astro Blower Motor Resistor
 2005 Chevrolet Astro A/C Compressor Cut-Out Switches
 2005 Chevrolet Astro A/C Condenser
 2005 Chevrolet Astro A/C Hose
 2005 Chevrolet Astro A/C Idler Pulley
 2005 Chevrolet Astro A/C Switch
 2005 Chevrolet Astro A/C System Valve Core
 2005 Chevrolet Astro Cabin Air Filter
 2005 Chevrolet Astro Evaporator
 2005 Chevrolet Astro HVAC Pressure Switch
 2005 Chevrolet Astro Heater Core