ChevyParts
My Garage
My Account
Cart
OEM 2009 Cadillac XLR Air Bag Clockspring
Steering Wheel Airbag Coil- Select Vehicle by Model
- Select Vehicle by VIN
Select Vehicle by Model
orMake
Model
Year
Select Vehicle by VIN
For the most accurate results, select vehicle by your VIN (Vehicle Identification Number).
1 Air Bag Clockspring found


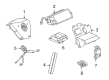
2009 Cadillac XLR Clockspring Part Number: 19180232
$266.75 MSRP: $398.73You Save: $131.98 (34%)Product Specifications- Other Name: Coil Kit, Inflatable Restraint Steering Wheel Module; Air Bag Clockspring; Coil Kit, Inflatable Restraint System
- Replaces: 15231661
- Item Weight: 1.00 Pounds
- Item Dimensions: 6.0 x 5.1 x 4.8 inches
- Condition: New
- Fitment Type: Direct Replacement
- SKU: 19180232
- Warranty: This genuine part is guaranteed by GM's factory warranty.
2009 Cadillac XLR Air Bag Clockspring
With a comprehensive array of OEM 2009 Cadillac XLR Air Bag Clockspring, from fuel pumps to door handles, our website is a one-stop-shop for your needs. All our genuine 2009 Cadillac XLR Air Bag Clockspring are backed by the manufacturer's warranty and are offered at competitive prices in the market. Rest assured, you can shop with complete confidence.
2009 Cadillac XLR Air Bag Clockspring Parts and Q&A
- Q: How to Remove and Replace the Air Bag Clockspring Assembly on 2009 Cadillac XLR?A: Before you start the air bag clock spring assembly / spiral cable replacement you need to disable the sir system activation. Straighten the wheels and lock the Steering Column into position before you start to prevent possible damage to the sir coil assembly. First loosen the Steering Wheel from the Steering Shaft before pulling out the tilt lever on vehicles equipped with a tilt column. Secondly remove 2 torx(R) head screws from the lower trim cover before removing the lower trim cover itself. Start by removing the upper trim cover through its two torx(R) head screws before taking out the upper trim cover. First disconnect the wire harness straps attached to the Steering Wheel column wire harness before removing the retaining ring and sir coil from the Steering Shaft. Remove and discard the original sir coil in replacement situations. Installation of the new sir coil assembly should happen while keeping the assembly positioned in the middle and with the vehicle steer wheel facing directly ahead. Start by aligning the sir coil assembly with the horn tower on the turn signal cancel cam assembly then slide the sir coil onto the Steering Shaft assembly until you firmly seat the retaining ring into the groove. Cut off the centering tab which is found on the new sir coil. Attach the upper trim piece with two torx(R) head screws and tighten them to 1.5 nm (13 lb in). Afterward, fix the lower trim cover in place with two torx(R) head screws while making sure the tabs correctly mesh. The tilt lever handle for vehicles with a tilt column should align and slide into the Steering Column until it locks in place. Move forward by setting the Steering Wheel onto its correct position on the Steering Shaft and active the sir system.
Related 2009 Cadillac XLR Parts
 2009 Cadillac XLR Air Bag Sensor
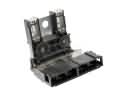 2009 Cadillac XLR Battery Fuse
 2009 Cadillac XLR Body Control Module
 2009 Cadillac XLR Crankshaft Position Sensor
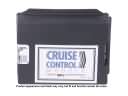 2009 Cadillac XLR Cruise Control Module
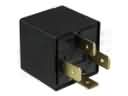 2009 Cadillac XLR Daytime Running Light Relay
 2009 Cadillac XLR Headlight Switch
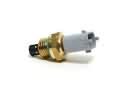 2009 Cadillac XLR Intake Manifold Temperature Sensor
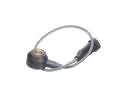 2009 Cadillac XLR Knock Sensor
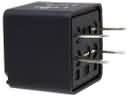 2009 Cadillac XLR Relay
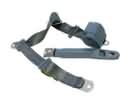 2009 Cadillac XLR Seat Belt
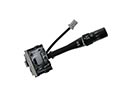 2009 Cadillac XLR Wiper Switch