ChevyParts
My Garage
My Account
Cart
OEM 2010 GMC Canyon Shift Linkage Boot
Shift Linkage Dust Boot- Select Vehicle by Model
- Select Vehicle by VIN
Select Vehicle by Model
orMake
Model
Year
Select Vehicle by VIN
For the most accurate results, select vehicle by your VIN (Vehicle Identification Number).
1 Shift Linkage Boot found


2010 GMC Canyon Inner Boot Part Number: 15840127
Product Specifications- Other Name: Boot, Manual Transmission Control Lever; Boot, Transmission Control Lever
- Replaces: 15120986
- Item Weight: 1.40 Pounds
- Item Dimensions: 8.5 x 7.6 x 4.7 inches
- Condition: New
- Fitment Type: Direct Replacement
- SKU: 15840127
- Warranty: This genuine part is guaranteed by GM's factory warranty.
2010 GMC Canyon Shift Linkage Boot
With a comprehensive array of OEM 2010 GMC Canyon Shift Linkage Boot, from fuel pumps to door handles, our website is a one-stop-shop for your needs. All our genuine 2010 GMC Canyon Shift Linkage Boot are backed by the manufacturer's warranty and are offered at competitive prices in the market. Rest assured, you can shop with complete confidence.
2010 GMC Canyon Shift Linkage Boot Parts and Q&A
- Q: How to replace the control lever and Shift Linkage Boot on 2010 GMC Canyon?A: The first step to replace the control lever and shift boot requires removal of the shift lever assembly that could be either (w/o D06) or (D06) depending on the vehicle configuration. The console removal procedure should be performed for vehicles lacking d06 when using either large w/manual or auto transmission or small w/manual transmission. The first step involves unscrewing the boot screws on the control lever before tilting the boot to free it from the lever. Apply neutral position (N) and proceed to take out the housing assembly bolts before fully removing the housing assembly with its attached gasket. Apply a mask to cover the control lever housing aperture to avoid foreign debris entry into the transmission system while performing the disassembly of the control lever housing. You should resume the housing assembly if you disassembled it and then remove the masking while checking for both dryness and cleanliness of the sealing surface. Position the control lever gasket on top of the transmission before placing the control lever housing assembly above the control lever assembly opening while aligning the bushing to the internal shift control lever. Place the control lever housing assembly bolts and apply torque to 20 nm (15 lb ft). Sitting the boot over the control lever requires careful placement without carpet material between boot and floor panel while gently dropping the boot for seating against floor level. Secure the control lever boot screws with torque setting of 2.5 nm (22 lb in). Complete the installation by inserting the console assembly without d06 if necessary along with the shift lever component (w/o D06) or (D06).
Related 2010 GMC Canyon Parts
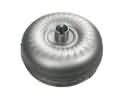 2010 GMC Canyon Torque Converter
 2010 GMC Canyon Transfer Case
 2010 GMC Canyon Automatic Transmission Seal
 2010 GMC Canyon Automatic Transmission Shifter
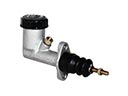 2010 GMC Canyon Clutch Master Cylinder
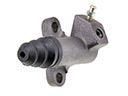 2010 GMC Canyon Clutch Slave Cylinder
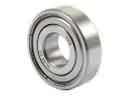 2010 GMC Canyon Pilot Bearing
 2010 GMC Canyon Pressure Plate
 2010 GMC Canyon Shift Cable
 2010 GMC Canyon Transfer Case Seal
 2010 GMC Canyon Transmission Assembly
 2010 GMC Canyon Transmission Pan