ChevyParts
My Garage
My Account
Cart
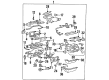
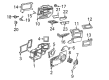
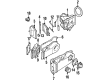
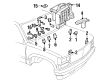
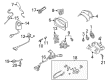
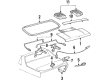
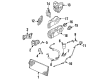
OEM Buick LeSabre Relay
Wire Relay- Select Vehicle by Model
- Select Vehicle by VIN
Select Vehicle by Model
orMake
Model
Year
Select Vehicle by VIN
For the most accurate results, select vehicle by your VIN (Vehicle Identification Number).
21 Relays found


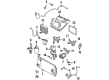
Buick LeSabre Relay Part Number: 12088576
$9.00 MSRP: $16.90You Save: $7.90 (47%)Ships in 1 Business Day

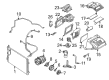
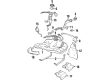
Buick LeSabre Fuel Pump Relay Part Number: 12088594
$14.29 MSRP: $26.68You Save: $12.39 (47%)


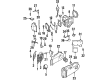
Buick LeSabre Fuel Pump Relay, Gray; Green Part Number: 13503102
$7.74 MSRP: $16.90You Save: $9.16 (55%)Ships in 1-2 Business Days


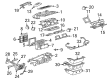
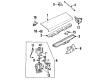
Buick LeSabre Fuel Pump Relay, Black; Gray; Green, Driver Side Part Number: 19118886
$53.58 MSRP: $115.98You Save: $62.40 (54%)Ships in 1-2 Business Days

Buick LeSabre Fuel Pump Relay, Black Part Number: 13500126
$11.65 MSRP: $21.88You Save: $10.23 (47%)Ships in 1-3 Business Days


Buick LeSabre Circuit Breaker Part Number: 13500114
$10.16 MSRP: $20.88You Save: $10.72 (52%)Ships in 1-2 Business Days


Buick LeSabre Fuel Pump Relay, Black Part Number: 13503103
$5.21 MSRP: $11.29You Save: $6.08 (54%)Ships in 1-2 Business Days

Buick LeSabre Blower Motor Relay Part Number: 25553347
$1.46 MSRP: $2.39You Save: $0.93 (39%)


Buick LeSabre Flasher Relay Part Number: 19209674
$15.50 MSRP: $25.52You Save: $10.02 (40%)Ships in 1-2 Business Days
Buick LeSabre Relay Assembly Part Number: 12495659
$13.11 MSRP: $15.00You Save: $1.89 (13%)
Buick LeSabre Fuel Pump Relay Part Number: 25530733
$10.45 MSRP: $15.55You Save: $5.10 (33%)Ships in 1-3 Business Days


Buick LeSabre Relay Part Number: 10018449


Buick LeSabre Flasher Part Number: 25654870


Buick LeSabre Blower Motor Relay Part Number: 10026663


Buick LeSabre Turn Signal Flasher Part Number: 10041074


Buick LeSabre Horn Relay Part Number: 25523703


Buick LeSabre Blower Motor Relay Part Number: 10026578

Buick LeSabre Pump Relay Part Number: 25530731

Buick LeSabre Fan Relay Part Number: 25522339

Buick LeSabre Relay, Rear Part Number: 10014885
| Page 1 of 2 |Next >
1-20 of 21 Results
Buick LeSabre Relay
Want to cut long-term maintenance and repair costs? Choose OEM Relay. Those parts deliver top durability you can trust. On our site, you'll find a huge catalog of genuine Buick LeSabre parts. Prices are unbeatable, so you can keep more in your pocket. Every OEM Buick LeSabre Relay includes a manufacturer's warranty. You can also get an easy return policy that keeps buying risk free. Fast delivery, get your car on the road quickly. It's simple to search, compare, and order. Stop guessing about quality or fit. Order today and save with parts that last.
Buick LeSabre Relay Parts and Q&A
- Q: How to replace the relay attached to the wire harness on Buick LeSabre?A:Look up the relay in the Master Electrical Component List before trying to replace it on the wire harness. Remove all fasteners holding the relay, make sure to take out any CPA devices or secondary locks, and do so slowly to prevent any damage when taking it off the connector. Once you have the relay, attach it to the connector on the wire harness, put any CPA devices or secondary locks back, and fasten the relay with either the original fasteners or some tape.

Related Buick LeSabre Parts
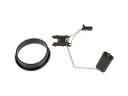 Buick LeSabre Fuel Level Sensor
 Buick LeSabre Headlight Switch
 Buick LeSabre Ignition Switch
 Buick LeSabre ABS Relay
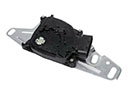 Buick LeSabre Automatic Transmission Shift Position Sensor Switch
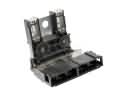 Buick LeSabre Battery Fuse
 Buick LeSabre Brake Light Switch
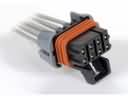 Buick LeSabre Chassis Wiring Harness Connector
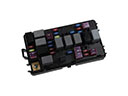 Buick LeSabre Fuse
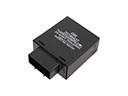 Buick LeSabre Turn Signal Flasher
 Buick LeSabre Vapor Pressure Sensor
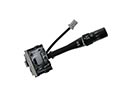 Buick LeSabre Wiper Switch