ChevyParts
My Garage
My Account
Cart
OEM Buick Rendezvous Hood Cable
Hood Release Cable- Select Vehicle by Model
- Select Vehicle by VIN
Select Vehicle by Model
orMake
Model
Year
Select Vehicle by VIN
For the most accurate results, select vehicle by your VIN (Vehicle Identification Number).
1 Hood Cable found

Buick Rendezvous Release Cable Part Number: 15265993
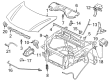
Buick Rendezvous Hood Cable
Want to cut long-term maintenance and repair costs? Choose OEM Hood Cable. Those parts deliver top durability you can trust. On our site, you'll find a huge catalog of genuine Buick Rendezvous parts. Prices are unbeatable, so you can keep more in your pocket. Every OEM Buick Rendezvous Hood Cable includes a manufacturer's warranty. You can also get an easy return policy that keeps buying risk free. Fast delivery, get your car on the road quickly. It's simple to search, compare, and order. Stop guessing about quality or fit. Order today and save with parts that last.
Buick Rendezvous Hood Cable Parts Questions & Experts Answers
- Q: How to replace the Hood Cable on Buick Rendezvous?A:Beginning the Hood Cable replacement process requires users to first open the hood and unfasten the left diagonal brace as per the instructions (Brace Replacement - Front Fender Upper Diagonal - Left). The replacement of the air cleaner assembly starts by removing this component (Air Cleaner Assembly Replacement). To begin the replacement of the Hood Cable, disconnect it from the Hood Latch (Hood Latch Replacement) and take it off the Hood Latch bracket. Next, disconnect the hood release cable retainers which are connecting the upper tie bar to the engine compartment side rail. Pull back the carpet to reach the cable after disconnecting it from the hood release handle (Hood Latch Release Handle Replacement) so you can keep the wire or string end inside the passenger space. The wire or string connected to the hood release cable end will streamline the new cable setup process. The grommet must be removed from the dash with a small flat-bladed tool. This allows access to the hood release cable in the dash for removal before the wire or string too. Fix the new Hood Cable to the vehicle by running the wire or string through the dash until the grommet fits into its hole. Start by using the small flat-bladed tool to set the grommet inside the dash opening. Afterward, install the hood release cable retainers by placing them on the front side rail and above the upper tie bar. You should install both ends of the Hood Cable at their designated locations which include connecting it to the Hood Latch (Hood Latch Replacement) and to the hood release handle (Hood Latch Release Handle Replacement). Reseating the air cleaner assembly (Air Cleaner Assembly Replacement) requires removing the block from the Hood Latch while you reposition the carpet. The installation ends with the diagonal brace (Brace Replacement - Front Fender Upper Diagonal - Left). Perform a test of the Hood Cable functionality prior to putting the hood into its final position.

Related Buick Rendezvous Parts
 Buick Rendezvous Window Motor
 Buick Rendezvous Body Mount Hole Plug
 Buick Rendezvous Emblem
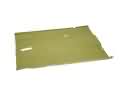 Buick Rendezvous Floor Pan
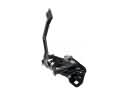 Buick Rendezvous Hood Latch
 Buick Rendezvous Lift Support
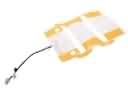 Buick Rendezvous Seat Heater Pad
 Buick Rendezvous Seat Switch Panel
 Buick Rendezvous Tailgate Latch
 Buick Rendezvous Washer Reservoir
 Buick Rendezvous Weather Strip
 Buick Rendezvous Window Channel