ChevyParts
My Garage
My Account
Cart
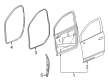
OEM Buick Weather Strip
Door Weatherstripping- Select Vehicle by Model
- Select Vehicle by VIN
Select Vehicle by Model
orMake
Model
Year
Select Vehicle by VIN
For the most accurate results, select vehicle by your VIN (Vehicle Identification Number).
830 Weather Strips found


Buick Lower Weatherstrip, Driver Side Part Number: 13333141
$32.13 MSRP: $47.83You Save: $15.70 (33%)Ships in 1-2 Business DaysProduct Specifications- Other Name: Weatherstrip, Side Door Opening; Weatherstrip, Door Weatherstrip
- Position: Driver Side

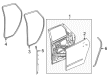
Buick Fixed Glass, Front Driver Side Part Number: 84315258
$161.54 MSRP: $241.51You Save: $79.97 (34%)Ships in 1-3 Business DaysProduct Specifications- Other Name: Weatherstrip, Front Door Window
- Position: Front Driver Side
- Replaces: 23276670


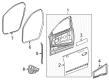
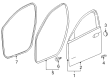
Buick Door Weatherstrip, Driver Side Part Number: 20929649
$206.52 MSRP: $308.76You Save: $102.24 (34%)Ships in 1-2 Business DaysProduct Specifications- Other Name: Weatherstrip, Door Weatherstrip; Door Seal; Weatherstrip, Side Door Opening; Weatherstrip
- Position: Driver Side
- Replaces: 25912227, 25966632


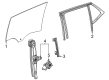
Buick Fixed Glass, Rear Passenger Side Part Number: 84087980
$112.28 MSRP: $160.67You Save: $48.39 (31%)Ships in 1-3 Business DaysProduct Specifications- Other Name: Weatherstrip, Rear Side Door Window Glass Running (Outer & Inner)
- Position: Rear Passenger Side
- Replaces: 23262475

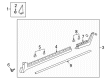
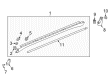
Buick Front Weatherstrip Part Number: 26233816
$15.18 MSRP: $22.59You Save: $7.41 (33%)Ships in 1-3 Business DaysProduct Specifications- Other Name: Weatherstrip Assembly-Hood Front; Weatherstrip, Hood Panel
- Position: Front
- Replaces: 26211196

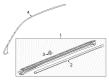
Buick Front Weatherstrip Part Number: 84882844
$39.48 MSRP: $58.76You Save: $19.28 (33%)Ships in 1-3 Business DaysProduct Specifications- Other Name: Weatherstrip Assembly-Hood Front; Weatherstrip, Hood Panel; Weatherstrip
- Position: Front

Buick Weatherstrip Part Number: 95378590
$29.41 MSRP: $43.78You Save: $14.37 (33%)Ships in 1-3 Business DaysProduct Specifications- Other Name: Weatherstrip, Door Weatherstrip
- Position: Front Rear Lower

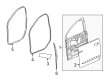
Buick Door Weatherstrip, Driver Side Part Number: 84222069
$47.21 MSRP: $70.26You Save: $23.05 (33%)Ships in 1-3 Business DaysProduct Specifications- Other Name: Weatherstrip, Door Weatherstrip; Door Seal; Weatherstrip
- Position: Driver Side

Buick Front Weatherstrip, Passenger Side Part Number: 26211299
$41.83 MSRP: $62.26You Save: $20.43 (33%)Ships in 1-3 Business DaysProduct Specifications- Other Name: Weatherstrip Assembly-Front Side Door Front Auxiliary; Door Seal; Weatherstrip, Door Weatherstrip
- Position: Front Passenger Side
- Replaces: 26674458

Buick Fixed Glass, Rear Passenger Side Part Number: 42820477
$77.11 MSRP: $114.77You Save: $37.66 (33%)Ships in 1-3 Business DaysProduct Specifications- Other Name: Weatherstrip, Rear Side Door Window Glass Running (Outer & Inner)
- Position: Rear Passenger Side
- Replaced by: 42918481

Buick Door Weatherstrip, Passenger Side Part Number: 13454650
$37.28 MSRP: $55.49You Save: $18.21 (33%)Ships in 1-3 Business DaysProduct Specifications- Other Name: Weatherstrip, Door Weatherstrip; Door Seal; Weatherstrip
- Position: Passenger Side
- Replaces: 22909569, 13228153


Buick Weatherstrip On Body, Passenger Side Part Number: 84938715
$16.58 MSRP: $24.67You Save: $8.09 (33%)Ships in 1-3 Business DaysProduct Specifications- Other Name: Weatherstrip, Door Weatherstrip
- Position: Passenger Side

Buick Weatherstrip, Passenger Side Part Number: 23204899
$34.69 MSRP: $51.63You Save: $16.94 (33%)Ships in 1-3 Business DaysProduct Specifications- Other Name: Weatherstrip, Door Weatherstrip
- Position: Passenger Side

Buick Weatherstrip, Passenger Side Part Number: 23253908
$48.91 MSRP: $72.80You Save: $23.89 (33%)Ships in 1-3 Business DaysProduct Specifications- Other Name: Weatherstrip, Door Weatherstrip
- Position: Passenger Side

Buick Weatherstrip On Body Part Number: 26685875
$55.20 MSRP: $82.17You Save: $26.97 (33%)Ships in 1-3 Business DaysProduct Specifications- Other Name: Weatherstrip Assembly, Front Side Door (Body Side); Weatherstrip, Door Weatherstrip
- Replaces: 26685877, 26237535, 84522950

Buick Surround Weatherstrip, Driver Side Part Number: 84222073
$46.16 MSRP: $68.70You Save: $22.54 (33%)Ships in 1-3 Business DaysProduct Specifications- Other Name: Weatherstrip, Door Weatherstrip; Door Seal; Weatherstrip
- Position: Driver Side

Buick Front Weatherstrip, Driver Side Part Number: 84886902
$19.16 MSRP: $28.52You Save: $9.36 (33%)Ships in 1-3 Business DaysProduct Specifications- Other Name: Weatherstrip Assembly-Front Side Door Front Auxiliary; Weatherstrip, Door Weatherstrip
- Position: Front Driver Side
Buick Front Weatherstrip, Passenger Side Part Number: 23277118
$18.33 MSRP: $28.69You Save: $10.36 (37%)Ships in 1-3 Business DaysProduct Specifications- Other Name: Weatherstrip Assembly-Front Side Door Front Auxiliary; Door Seal; Weatherstrip, Door Weatherstrip
- Position: Front Passenger Side

Buick Front Weatherstrip Part Number: 95286061
$68.50 MSRP: $101.95You Save: $33.45 (33%)Ships in 1-3 Business DaysProduct Specifications- Other Name: Weatherstrip Assembly-Front Side Door Front Auxiliary; Weatherstrip, Door Weatherstrip
- Position: Front
- Replaces: 95016847

Buick Weatherstrip Part Number: 84099720
$68.68 MSRP: $102.22You Save: $33.54 (33%)Ships in 1-3 Business DaysProduct Specifications- Other Name: Seal, Roof Panel
- Replaces: 22967981
| Page 1 of 42 |Next >
1-20 of 830 Results
Buick Weather Strip
Want to cut long-term maintenance and repair costs? Choose OEM Weather Strip. Those parts deliver top durability you can trust. On our site, you'll find a huge catalog of genuine Buick parts. Prices are unbeatable, so you can keep more in your pocket. Every OEM Buick Weather Strip includes a manufacturer's warranty. You can also get an easy return policy that keeps buying risk free. Fast delivery, get your car on the road quickly. It's simple to search, compare, and order. Stop guessing about quality or fit. Order today and save with parts that last.
Buick Weather Strip Parts Questions & Experts Answers
- Q: How to replace the rear door window Weather Strip on Buick LeSabre?A:Start by positioning the rear door window fully down before following steps to remove the door trim panel and door module after taking out the water deflector and the window inner and outer belt sealing strips. Start by removing the rear door window together with the fastener from the division post before proceeding to detach both the rear door stationary window and its window weather strip assembly. You can remove the weather strip and rear door stationary window as an assembly when you pull out the window weather strip from the door frame by grasping the division post. To minimize splaying of the window weather strip you should achieve a tighter fit in the flange mounting area by squeezing together its carrier with thumb and index finger across its length. First prepare and then install the window weather strip together with the stationary window inside the door by seating the stationary window into the frame followed by adding the weather strip into its designated slot. Begin installation by securing the division post fastener to 9 N.m (80 lb in torque). Afterward you can proceed with mounting the rear door window as well as the window outer and inner belt sealing strips, water deflector, door module and lastly the door trim panel.
- Q: How to replace the rear door opening Weather Strip on Buick Enclave?A:The process of changing the rear door opening weather strip begins with pulling out the rear door sill plate. The first step in this process includes removing the weather strip which is installed on the pinch-weld flange. When installing use the door opening to position the weather strip correctly while placing the bond joint centered at the lower part. Reinstall the rear door sill plate after you have appropriately installed the weather strip onto the pinch-weld flange.
- Q: How to replace the rear door window Weather Strip on Buick Regal?A:You should start by putting the rear window in its complete downward position to change the rear door window weather strip. Begin by removing the trim panel which holds part number 123456 and subsequently detach the water deflector carrying part number 234567. You should start by extracting the inner sealing strip labeled part number: 345678 and also the stationary window molding with part number: 456789. Phase one requires pulling the door weather strip away before taking out the window weather strip from the door itself. Begin by setting the window weather strip on the door starting from the corner then extend both ways until it seats firmly. Check the glass position within the window while you close the window to verify that the weather strip is correctly seated. Begin the installation by attaching the stationary window molding which has part number 456789 followed by the inner sealing strip numbered 345678 then the water deflector numbered 234567 before finishing with the trim panel identified as part number 123456.


Related Buick Parts
 Buick Emblem
 Buick Cup Holder
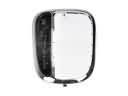 Buick Automatic Transmission Shift Indicator
 Buick Body Mount Hole Plug
 Buick Door Armrest
 Buick Door Lock
 Buick Door Moldings
 Buick Door Seal
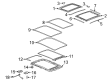
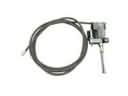 Buick Sunroof Cable
 Buick Tailgate Lock
 Buick Trunk Lid Lift Support
 Buick Wiper Pulse Module