ChevyParts
My Garage
My Account
Cart
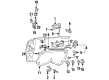
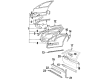
OEM Buick Door Lock
Power Door Lock Actuator- Select Vehicle by Model
- Select Vehicle by VIN
Select Vehicle by Model
orMake
Model
Year
Select Vehicle by VIN
For the most accurate results, select vehicle by your VIN (Vehicle Identification Number).
261 Door Locks found


Buick Lock Assembly, Front Driver Side Part Number: 15110641
$203.31 MSRP: $298.61You Save: $95.30 (32%)Ships in 1-2 Business DaysProduct Specifications- Other Name: Lock, Front Side Door; Door Latch Assembly; Door Lock; Lock; Latch; Lock, Door Lock
- Position: Front Driver Side
- Replaces: 15068497, 16637881, 16637319, 25765990, 25732592


Buick Lock, Front Driver Side Part Number: 13579564
$132.94 MSRP: $195.26You Save: $62.32 (32%)Ships in 1-2 Business DaysProduct Specifications- Other Name: Latch Assembly-Front Side Door; Door Latch Assembly; Door Lock; Latch; Latch, Front Side Door
- Position: Front Driver Side


Buick Lock Actuator, Passenger Side Part Number: 22087542
Product Specifications- Other Name: Actuator; Door Lock Actuator Motor; Door Lock Actuator; Actuator, Door Electric And Vacuum Locks
- Position: Passenger Side
Buick Lock Actuator, Driver Side Part Number: 22094353
Product Specifications- Other Name: Actuator; Door Lock Actuator Motor; Door Lock Actuator; Actuator, Door Electric And Vacuum Locks
- Position: Driver Side

Buick Lock Actuator, Rear Part Number: 20246964
Product Specifications- Other Name: Actuator, Rear Compartment Lid Release; Tailgate Lock Motor; Trunk Lock Motor; Door Lock Motor.; Striker Actuator; Actuator
- Position: Rear
Buick Lock Actuator, Driver Side Part Number: 22087543
Product Specifications- Other Name: Actuator, Door Electric And Vacuum Locks; Door Lock Actuator Motor; Door Lock Actuator; Actuator
- Position: Driver Side

Buick Glass Lock, Rear Part Number: 20482218
Product Specifications- Other Name: Lock, Rear Compartment Lid Or Tail Gate Latch; Door Lock; Lock; Lock, Rear Compartment Or Tail Gate Lock
- Position: Rear

Buick Lock Assembly, Front Driver Side Part Number: 16634797
Product Specifications- Other Name: Lock Assembly-Front Side Door; Door Latch Assembly; Door Lock; Lock, Front Side Door
- Position: Front Driver Side
Buick Lock Assembly, Front Driver Side Part Number: 16634341
Product Specifications- Other Name: Lock, Front Side Door; Door Latch Assembly; Door Lock; Lock
- Position: Front Driver Side

Buick Lock Assembly, Front Passenger Side Part Number: 16629624
Product Specifications- Other Name: Lock, Front Side Door; Door Latch Assembly; Door Lock; Lock
- Position: Front Passenger Side
Buick Lock Assembly, Front Passenger Side Part Number: 16634340
Product Specifications- Other Name: Lock, Front Side Door; Door Latch Assembly; Door Lock; Lock
- Position: Front Passenger Side
Buick Lock Assembly, Front Passenger Side Part Number: 16634800
Product Specifications- Other Name: Lock Assembly-Front Side Door; Door Latch Assembly; Door Lock; Lock, Front Side Door
- Position: Front Passenger Side
Buick Lock Assembly, Front Driver Side Part Number: 16634801
Product Specifications- Other Name: Lock Assembly-Front Side Door; Door Latch Assembly; Door Lock; Lock, Front Side Door
- Position: Front Driver Side
Buick Lock Assembly, Front Driver Side Part Number: 16629625
Product Specifications- Other Name: Lock, Front Side Door; Door Latch Assembly; Door Lock; Lock
- Position: Front Driver Side


Buick Lock Assembly, Rear Driver Side Part Number: 12525873
Product Specifications- Other Name: Lock Kit, Rear Side Door; Door Lock
- Position: Rear Driver Side
Buick Lock Assembly, Rear Passenger Side Part Number: 12524322
Product Specifications- Other Name: Lock Kit, Rear Side Door; Door Latch Assembly; Door Lock; Lock
- Position: Rear Passenger Side


Buick Lock Assembly, Front Passenger Side Part Number: 16603890
Product Specifications- Other Name: Lock, Front Side Door; Door Lock; Lock
- Position: Front Passenger Side

Buick Lock Assembly, Rear Driver Side Part Number: 16630851
Product Specifications- Other Name: Lock, Rear Side Door; Door Lock; Lock
- Position: Rear Driver Side

Buick Lock Assembly, Front Passenger Side Part Number: 16629132
Product Specifications- Other Name: Lock, Front Side Door; Door Lock; Lock
- Position: Front Passenger Side

Buick Lock Assembly, Front Passenger Side Part Number: 12524320
Product Specifications- Other Name: Lock Kit, Front Side Door; Door Lock; Lock
- Position: Front Passenger Side
| Page 1 of 14 |Next >
1-20 of 261 Results
Buick Door Lock
Choose OEM Door Lock, you're making the optimal decision for superior quality and perfect performance. You can feel confident because each component goes through stringent quality checks. Every part is carefully built to comply with Buick's factory specifications. You'll enjoy a smooth, worry-free installation that fits just right. At ChevyPartsGiant.com, you'll find it easy to get top-quality OEM Buick Door Lock. You can shop at highly competitive prices and protect your budget. All our genuine Buick parts include a dependable manufacturer's warranty. You'll also appreciate our straightforward return policy and swift delivery services for extra convenience.
Buick Door Lock Parts and Q&A
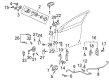
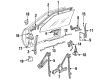
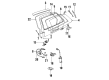
- Q: How to replace the rear door lock with a fork bolt lock design and safety interlock feature on Buick Century?A:The door locks feature a fork bolt design which has a safety interlock to secure the door when the fork bolt strikes the metal piece while enabling interior locking by pulling the knob. The process of replacing the rear door lock begins with trimming the panel and removing the water deflector. The first step includes detaching both the outside handle rod from the lock then removing the inside handle rods from the handle followed by removing the clip which connects the inside handle rods to the door. Open the door and unscrew the three lock screws (1, 2, 3) holding the lock to the door before removing the piece with attached inside handle rods. Close the power source before removing the inside handle rods from the lock. Install the door lock by placing its rods through the door inner panel access hole then connecting the electrical connectors. Apply loctite(R) blue gm p/n 12345382 or equivalent before fastener installation then secure door lock screws by following the specified tightening pattern (1, 2, 3) which starts with the top screw followed by the bottom and ending with the middle screw and fasten each screw to 10 N.m (89 lb in). Insert a new outside handle rod-to-lock clip onto the door lock lever followed by attaching the outside door handle rod inside the clip to eliminate any free play and fastening the clip cover over the threaded outside door handle rod. After fitting the clip on the inside handle rods you should proceed to connect these rods to the handle. To complete the installation position the water deflector and the trim panel in its correct position.
- Q: How to replace the front door lock on Buick Regal?A:The front door lock replacement process begins by removing the trim panel together with the water deflector. You must first disconnect the inside handle rods from the handle before removing their attaching clip that fixes them to the door. Side cutters can remove the outside handle rod-to-lock clip from the lock before you discard it and unscrew the remaining clip portion. The installation starts with removing screws (1, 2, 3) which hold the lock to the door followed by disconnecting electricity wires before taking out inside handle rods from within the lock. When installing place the inside hand rods on the door lock then insert the door lock through the inner panel access hole. Apply Locktite(R) Blue GM P/N 12345382 or Canadian P/N 10953489 or equivalent solution onto the electrical connectors before assembling the door lock screws by tightening them to 10 N.m (89 lb in) in the correct sequence starting with top, bottom, middle, 1, 2, 3. Fasten a fresh outside handle rod-to-lock clip at the door lock lever before inserting the external rod to ensure no slack occurs while securing the clip cover on the threaded rod. First mount the clip onto the inside handle rods before you attach the internal rods to the handle unit. The installation process ends with water deflector and trim panel replacement.


Related Buick Parts
 Buick Bumper
 Buick Window Motor
 Buick Door Armrest
 Buick Door Hinge
 Buick Door Lock Cylinder
 Buick Liftgate Hinge
 Buick Mirror Cover
 Buick Power Steering Pressure Switch
 Buick Tailgate Latch
 Buick Weather Strip
 Buick Windshield Wiper
 Buick Wiper Motor