ChevyParts
My Garage
My Account
Cart
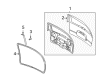
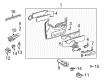
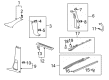
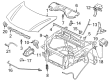
OEM Buick Terraza Weather Strip
Door Weatherstripping- Select Vehicle by Model
- Select Vehicle by VIN
Select Vehicle by Model
orMake
Model
Year
Select Vehicle by VIN
For the most accurate results, select vehicle by your VIN (Vehicle Identification Number).
16 Weather Strips found


Buick Terraza Door Weatherstrip, Passenger Side Part Number: 10449199
$106.06 MSRP: $151.76You Save: $45.70 (31%)

Buick Terraza Door Weatherstrip, Front Part Number: 10449198
$105.04 MSRP: $154.08You Save: $49.04 (32%)Ships in 1-2 Business Days

Buick Terraza Lower Weatherstrip Part Number: 10383150
$13.11 MSRP: $18.75You Save: $5.64 (31%)

Buick Terraza Run Weatherstrip, Front Driver Side Part Number: 10294036
$13.72 MSRP: $20.42You Save: $6.70 (33%)Ships in 1-3 Business Days

Buick Terraza Outer Seal Part Number: 25887140
$13.11
Buick Terraza Lift Gate Weatherstrip, Rear Part Number: 15294464
$22.05 MSRP: $31.56You Save: $9.51 (31%)
Buick Terraza Seal Strip, Front Part Number: 15238491
$72.43 MSRP: $90.55You Save: $18.12 (21%)Ships in 1-2 Business DaysBuick Terraza Door Weatherstrip, Driver Side Part Number: 10449200
$13.31 MSRP: $18.25You Save: $4.94 (28%)Ships in 1-2 Business DaysBuick Terraza Run Weatherstrip, Front Passenger Side Part Number: 10294035
$57.43 MSRP: $85.48You Save: $28.05 (33%)Ships in 1-2 Business Days


Buick Terraza Lower Weatherstrip Part Number: 10383149


Buick Terraza Rear Weatherstrip Part Number: 10330793

Buick Terraza Rear Weatherstrip Part Number: 89044623

Buick Terraza Drip Weatherstrip, Driver Side Part Number: 19153439

Buick Terraza Rear Weatherstrip Part Number: 15263851

Buick Terraza Weatherstrip, Rear Part Number: 10353838

Buick Terraza Lower Weatherstrip Part Number: 10232754
$5.79 MSRP: $8.62You Save: $2.83 (33%)
Buick Terraza Weather Strip
Want to cut long-term maintenance and repair costs? Choose OEM Weather Strip. Those parts deliver top durability you can trust. On our site, you'll find a huge catalog of genuine Buick Terraza parts. Prices are unbeatable, so you can keep more in your pocket. Every OEM Buick Terraza Weather Strip includes a manufacturer's warranty. You can also get an easy return policy that keeps buying risk free. Fast delivery, get your car on the road quickly. It's simple to search, compare, and order. Stop guessing about quality or fit. Order today and save with parts that last.
The Buick Terraza Weather Strip relates to the critical part list that greatly satisfies the enhanced dependability and performance of Buick Terraza automobiles. Needed to fit around door and window frames, or around roof rails, the Weather Strip helps to keep water and air out of the car cabin and thus provide a comfortable and silent ride. Cut from the same cloth as the Weather Strip is that it is made from hard-wearing rubber or silicone and it is not affected by temperatures or the indulgent fluids of automobiles; Buick Terraza owners can therefore rely on it. The adaptability of the part with the Terraza models manufactured from the year 2005 to 2007 proves its role in sustaining the car's structure and security. This part not only helps the Buick Terraza run more efficiently by reducing noise and drafts but also helps to preserves the car from corroding and rotting. Other aspects that set Buick Terraza Weather Strip in the automobile market include: Specialty coatings that improve the ability of the automotive part in withstanding chemicals and ultraviolet light. When weather strips have visible cracks, or let air through the gaps, it is time for replacement because failing weather strips affects comfort and safety. Therefore, it is relevant to state that the Buick Terraza Weather Strip is indispensable for increasing the Buick Terraza vehicles' durability and responsiveness and remains a noteworthy feature that will appeal to all drivers.
Buick Terraza Weather Strip Parts and Q&A
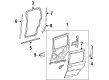
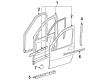
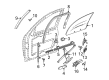
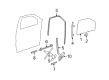
- Q: How to replace the front door opening Weather Strip on Buick Terraza?A:The first step to replace front door opening Weather Strip requires removal of front door opening sill plates. Clean all adhesive material from the front door pinch-weld flange before removing the front door opening Weather Strip from its pinch-weld mounting point. The front door opening Weather Strip has built-in mastic/sealer/glue therefore do not apply additional adhesive when installation. Place the Weather Strip over the front door pinch-weld flange using the bottom joint while aligning the proper dot to the beginning position at the lower center of the flange-install the green-dotted Weather Strip on the right side and the red-dotted Weather Strip on the left side. Roll the entire length of Weather Strip onto the flange following the indicated arrows while ensuring full seating into all corners at the expense of no Weather Strip stretching. You should affix the loose Weather Strip end to the already installed section using your hands to guide the rip strip towards the instrument panel top and bottom sections. Check if spooning the inner lip over the trim is necessary after pulling out this lip with the tear strip removal. Humans must cut the removal strip from the Weather Strip while they manually spoon the interior trim's lip in case they are using the old Weather Strip. The front door opening sill plates need to be reinstalled after carefully examining the Weather Strip for any wrinkles or creases.
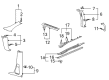
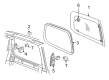
- Q: How to replace the rear quarter window Weather Strip on Buick Terraza?A:Begin by removing the rear quarter window in step with the required procedure for you which can be the A20 Power or A20 Manual. Remove the rear quarter window weather strip from its pinch-weld flange after you pull it loose from the car. Use a cleaning solution to eliminate all traces of adhesive from the pinch-weld flange of the quarter window. You need to make adjustments to the rear quarter window weather strip service replacement part because it exists as a cut-to-fit component that requires fitting to the window opening before joining together the pieces. Position the front end of the rear quarter window weather strip on the vehicle frame with a 50 mm (1.96 in) forward position from the front edge of the lower window opening radius. Use the joint section of the weather strip to wind it across the entire perimeter of the window opening flange before you reinstall the rear quarter window according to the A20 Power or A20 Manual instructions.


Related Buick Terraza Parts
 Buick Terraza Door Hinge
 Buick Terraza Door Latch Assembly
 Buick Terraza Door Lock Actuator
 Buick Terraza Door Lock Cylinder
 Buick Terraza Door Seal
 Buick Terraza Door Striker
 Buick Terraza Emblem
 Buick Terraza Hood Cable
 Buick Terraza Lift Support
 Buick Terraza Window Channel
 Buick Terraza Window Motor
 Buick Terraza Window Regulator