ChevyParts
My Garage
My Account
Cart
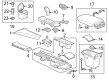
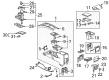
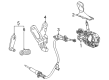
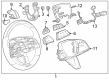
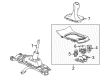
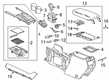
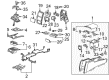
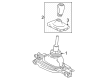
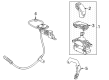
OEM Cadillac Automatic Transmission Shifter
AT Shifter- Select Vehicle by Model
- Select Vehicle by VIN
Select Vehicle by Model
orMake
Model
Year
Select Vehicle by VIN
For the most accurate results, select vehicle by your VIN (Vehicle Identification Number).
107 Automatic Transmission Shifters found

Cadillac Shifter Part Number: 87844031
$240.52 MSRP: $378.36You Save: $137.84 (37%)Ships in 1-2 Business DaysProduct Specifications- Other Name: Control Assembly-Automatic Transmission Electronic; Control, Transmission Shift
- Replaced by: 85768369
- Replaces: 86792033

Cadillac Gear Shift Assembly Part Number: 15146475
$163.17 MSRP: $256.74You Save: $93.57 (37%)Ships in 1-3 Business DaysProduct Specifications- Other Name: Shifter; Shift Lever

Cadillac Gear Shift Assembly Part Number: 13545100
$77.60 MSRP: $121.53You Save: $43.93 (37%)Ships in 1-2 Business DaysProduct Specifications- Other Name: Control Assembly-Automatic Transmission (W/O Base); Shift Lever; Shifter

Cadillac Switch Part Number: 13554750
$71.70 MSRP: $112.29You Save: $40.59 (37%)Ships in 1-2 Business DaysProduct Specifications- Other Name: Control Assembly-Automatic Transmission Electronic; Control, Transmission Shift
- Replaced by: 13564963

Cadillac Gear Shift Assembly Part Number: 24279884
$320.36 MSRP: $504.06You Save: $183.70 (37%)Ships in 1-3 Business DaysProduct Specifications- Other Name: Control Assembly-Manual Transmission (W/O Shift Knob & Boot; Shift Lever; Shifter; Control, Transmission Shift Control

Cadillac Gear Shift Assembly Part Number: 85579716
$150.29 MSRP: $236.42You Save: $86.13 (37%)Ships in 1-3 Business DaysProduct Specifications- Other Name: Control Assembly-Automatic Transmission Electronic; Shifter; Control, Transmission Shift Control; Control, Transmission Shift
- Replaces: 85130297, 84791123, 84767922, 85512306

Cadillac Gear Shift Assembly, Jet Black Part Number: 85136216
$268.07 MSRP: $421.79You Save: $153.72 (37%)Ships in 1-3 Business DaysProduct Specifications- Other Name: Control Assembly-Automatic Transmission Electronic *Jet Black; Shift Lever; Shifter
- Replaced by: 86574211
Cadillac Shifter, Jet Black Part Number: 42833263
$267.71 MSRP: $421.23You Save: $153.52 (37%)Ships in 1-2 Business DaysProduct Specifications- Other Name: Control Assembly-Automatic Transmission Electronic *Jet Black; Control, Transmission Shift
- Replaced by: 42869328

Cadillac Shift Knob, Olive Part Number: 19180504
$144.01 MSRP: $226.59You Save: $82.58 (37%)Ships in 1-3 Business DaysProduct Specifications- Other Name: Handle Assembly, Automatic Transmission Control Lever *Saddle Olive; Automatic Transmission Selector Handle; Handle, Transmission Control Lever
- Replaces: 19150320

Cadillac Gear Shift Assembly Part Number: 24045653
$618.50 MSRP: $977.35You Save: $358.85 (37%)Ships in 1-3 Business DaysProduct Specifications- Other Name: Control Assembly-Manual Transmission (W/O Shift Knob & Boot); Shift Lever; Shifter; Control, Transmission Shift Control; Control, Transmission Shift

Cadillac Shift Lever Part Number: 84171609
$100.68 MSRP: $157.67You Save: $56.99 (37%)Ships in 1-3 Business DaysProduct Specifications- Other Name: Lever, Transmission Mounted Gearshift (External); Gear Shift Assembly
Cadillac Gear Shift Assembly Part Number: 13536594
$28.26 MSRP: $44.25You Save: $15.99 (37%)Ships in 1-3 Business DaysProduct Specifications- Other Name: Control, Transmission Shift; Shift Lever; Shifter; Control, Transmission Shift Control
Cadillac Gear Shift Assembly Part Number: 15146472
$184.42 MSRP: $290.18You Save: $105.76 (37%)Ships in 1-3 Business DaysProduct Specifications- Other Name: Shifter; Shift Lever
- Replaces: 25771130
Cadillac Gear Shift Assembly Part Number: 84791124
$262.58 MSRP: $413.06You Save: $150.48 (37%)Ships in 1-3 Business DaysProduct Specifications- Other Name: Control, Transmission Shift; Shift Lever; Shifter
- Replaces: 84767923
Cadillac Gear Shift Assembly Part Number: 86792033
$240.52 MSRP: $378.36You Save: $137.84 (37%)Ships in 1-3 Business DaysProduct Specifications- Other Name: Control Assembly-Automatic Transmission Electronic
- Replaced by: 85768369
Cadillac Gear Shift Assembly Part Number: 85579717
$256.02 MSRP: $402.83You Save: $146.81 (37%)Ships in 1-2 Business DaysProduct Specifications- Other Name: Control Assembly-Automatic Transmission Electronic; Control, Transmission Shift Control; Control, Transmission Shift
- Replaced by: 86517326

Cadillac Shifter Assembly Part Number: 85130198
$270.25 MSRP: $425.14You Save: $154.89 (37%)Product Specifications- Other Name: Control Assembly-Automatic Transmission Electronic; Gear Shift Assembly
- Replaced by: 86532514
Cadillac Shifter Assembly Part Number: 85580237
$159.42 MSRP: $384.30You Save: $224.88 (59%)Ships in 1-3 Business DaysProduct Specifications- Other Name: Control Assembly-Automatic Transmission Electronic; Gear Shift Assembly; Control, Transmission Shift
Cadillac Gear Shift Assembly Part Number: 84885880
$255.01 MSRP: $401.16You Save: $146.15 (37%)Ships in 1-3 Business DaysProduct Specifications- Other Name: Control Assembly-Automatic Transmission Electronic; Shift Lever
Cadillac Gear Shift Assembly Part Number: 84509478
$270.23 MSRP: $425.18You Save: $154.95 (37%)Ships in 1-3 Business DaysProduct Specifications- Other Name: Control Assembly-Automatic Transmission Electronic; Shift Lever; Shifter
- Replaced by: 86797093
| Page 1 of 6 |Next >
1-20 of 107 Results
Cadillac Automatic Transmission Shifter
Want to cut long-term maintenance and repair costs? Choose OEM Automatic Transmission Shifter. Those parts deliver top durability you can trust. On our site, you'll find a huge catalog of genuine Cadillac parts. Prices are unbeatable, so you can keep more in your pocket. Every OEM Cadillac Automatic Transmission Shifter includes a manufacturer's warranty. You can also get an easy return policy that keeps buying risk free. Fast delivery, get your car on the road quickly. It's simple to search, compare, and order. Stop guessing about quality or fit. Order today and save with parts that last.
Cadillac Automatic Transmission Shifter Parts Questions & Experts Answers
- Q: How to replace the Automatic Transmission Shifter lever on Cadillac DeVille?A:The first step to replace an automatic transmission shift lever requires sir system deactivation. Use sliding motion to move the shift lever seal upward through the shift lever. And if needed, remove each steering column trim covering. Separate the shift lever connector working at the column base before you take off the shift lever screw from the shift lever assembly. First pull out the shift lever along with its seal from the linear shift assembly but make sure you extract the shift lever seal by pushing it down towards the narrow segment of the shift lever. Put the shift lever seal on the minimal end of the shift lever before joining the shift lever assembly to the linear shift assembly. The installation of shift lever screw into the shift lever assembly requires a tightening force of 1.5 nm (13 in. Lbs.). Move the shift lever seal down the shift lever assembly until it matches the position of the steering column trim covers. The sir system should be activated only after reattaching steering column trim covers.
- Q: How to replace the Automatic Transmission Shifter on Cadillac Eldorado?A:Start the replacement of the shift control by removing the console trim plate followed by unsnapping the shift cable terminal from the shifter pin. The automatic transmission shift lock actuator solenoid wire harness connector needs to be disconnected before you take out the shifter assembly by removing its fasteners. Set the shifter assembly into the console then fasten the shift pieces while torquing them to 9 Nm (79 inch lbs.). Install the console trim plate once you have connected the automatic transmission shift lock solenoid wire harness connector to the shifter control and properly placed the shift cable onto the shifter control.
- Q: How to service and repair the Automatic Transmission Shifter on Cadillac Seville?A:The first step in shifter A/T repair and service should start with gathering the specific tool J 43146 Tamper Proof Bit (J 43146). Proceed with the removal of console trim plates beginning with the one on the console and the one on the left side. Use the J 43146 tamper proof bit to remove the anti-theft plate along with the tamper proof fastener from the shifter when the vehicle carries RPO Code (T1A). The beginning of the shifter A/T service and repair process involves unfastening the shift cable terminal from the shifter pin and taking out the shift cable bolt with its wire from the shifter followed by unlinking the BTSI wire harness connector from the BTSI solenoid. The locking tab on the cable park lock needs to be released before lifting the cable away from the slot in the shifter and removing it from the park lock cam of the shifter. Remove the shifter fasteners by disconnecting the wire harness connector for the backlight function. The shifter assembly will become accessible after separating the console side panels. The installation process requires you to spread the console side panels again before installing the shifter assembly while securing each shifter fastener at 9 Nm (79 inch lbs.). The shifter backlight wire harness connector should be connected and then the park lock cable must be inserted into the park lock cam located on the shifter before sliding the park lock cable into the shifter while ensuring the cable locking tab stays fully engaged. Join the BTSI solenoid wire harness connector then snap the shift cable terminal on the shifter pin before fastening the shift cable to the shifter while tightening the fastener to 25 Nm (18 ft. lbs.). The shift cable adjustment requires putting the shifter into the N position followed by unfastening and then re-tightening the adjuster nut to 25 Nm (18 ft. lbs.). Users with T1A RPO Code need to install the anti-theft plate and tamper proof fastener on the shifter through the usage of J 43146 tamper proof bit. Finish by adding the console trim plate from the left side together with the other console plate.


Related Cadillac Parts
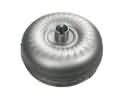 Cadillac Torque Converter
 Cadillac Automatic Transmission Filter
 Cadillac Automatic Transmission Input Shaft Seal
 Cadillac Automatic Transmission Seal
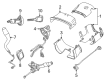
 Cadillac Automatic Transmission Shift Levers
 Cadillac Flywheel
 Cadillac Shift Cable
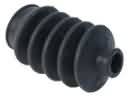 Cadillac Shift Linkage Boot
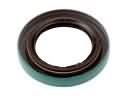 Cadillac Transfer Case Seal
 Cadillac Transmission Assembly
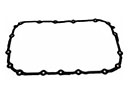 Cadillac Transmission Gasket
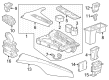
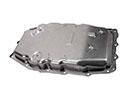 Cadillac Transmission Pan