ChevyParts
My Garage
My Account
Cart
OEM Cadillac Eldorado Antenna
Radio Antenna- Select Vehicle by Model
- Select Vehicle by VIN
Select Vehicle by Model
orMake
Model
Year
Select Vehicle by VIN
For the most accurate results, select vehicle by your VIN (Vehicle Identification Number).
12 Antennas found

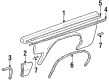
Cadillac Eldorado Antenna Part Number: 22072174
$181.53 MSRP: $335.82You Save: $154.29 (46%)


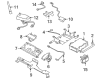
Cadillac Eldorado Power Antenna Part Number: 88891017


Cadillac Eldorado Power Antenna Part Number: 19245563


Cadillac Eldorado Power Antenna Part Number: 19245562


Cadillac Eldorado Power Antenna Part Number: 19245561


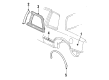
Cadillac Eldorado Antenna Mast Part Number: 19151302


Cadillac Eldorado Antenna Mast Part Number: 19117040
Cadillac Eldorado Antenna Part Number: 22054210

Cadillac Eldorado Antenna Mast Part Number: 19151300

Cadillac Eldorado Power Antenna Part Number: 16157995

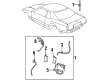
Cadillac Eldorado Antenna Assembly Part Number: 12450708

Cadillac Eldorado Antenna Assembly Part Number: 12355706
Cadillac Eldorado Antenna
Want to cut long-term maintenance and repair costs? Choose OEM Antenna. Those parts deliver top durability you can trust. On our site, you'll find a huge catalog of genuine Cadillac Eldorado parts. Prices are unbeatable, so you can keep more in your pocket. Every OEM Cadillac Eldorado Antenna includes a manufacturer's warranty. You can also get an easy return policy that keeps buying risk free. Fast delivery, get your car on the road quickly. It's simple to search, compare, and order. Stop guessing about quality or fit. Order today and save with parts that last.
Cadillac Eldorado Antenna Parts and Q&A
- Q: How to ensure proper operation of the radio and power antenna through cleaning on Cadillac Eldorado?A:Regular cleaning of the radio system and power antenna ensures their proper functioning. Identify the correct ignition position from on, run, acc, or accessory based on your vehicle line specification. Turn the radio on to fully extend the antenna mast. Use a grease cleaning solvent such as mineral spirits, rubbing alcohol or tar remover on a damp cloth to wipe your mast sections including all joints where dirt builds up. Turn the radio Ston then on to retract and extend the antenna after each cleaning session by repeating the process at least twice.
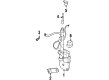
- Q: How to replace the power antenna mast on Cadillac Eldorado?A:To replace the power Antenna mast gets the radio on and stick the thinnest rod section (100 rod) about 26mm (1 in) above the other sections immediately disconnect the power on the battery or disconnect the battery or disconnect the power lead from the radio or disconnect the power lead from the Antenna. Next, unscrew the last using a wrench (or other proper size pliers) on the flat surface while ensuring that the 100 rod section is not turned from its position using padded pliers to prevent damage. The 100 rod is not movable but should not be bent as well. After that pull up and slide the sections (3,4) over the 100 rod with the help of fingers or long nose pliers and then remove them. During the installation, grease with the provided grease contractor and drive the assembly tool (brass tube) over the contractor to press the contractor fingers, which forms part of the change of parts package. Slide the mast assemblies (3, 4) over the 100 rod section and down into the mast stationary tube past the contractor fingers then take off assembly tool. Install the bottom mast into the stationary tube above the top of other tubes, with the threaded top of the 100 rod section; next, install the insulator stop and the last. Reconnect the power source and turn the Antenna mast.


Related Cadillac Eldorado Parts
 Cadillac Eldorado Air Charge Temperature Sensor
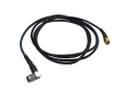 Cadillac Eldorado Antenna Cable
 Cadillac Eldorado Body Control Module
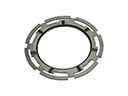 Cadillac Eldorado Fuel Tank Lock Ring
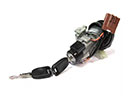 Cadillac Eldorado Igniter
 Cadillac Eldorado Ignition Switch
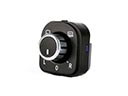 Cadillac Eldorado Mirror Switch
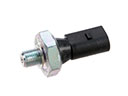 Cadillac Eldorado Oil Pressure Switch
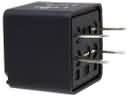 Cadillac Eldorado Relay
 Cadillac Eldorado Seat Switch
 Cadillac Eldorado Window Regulator
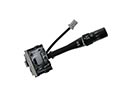 Cadillac Eldorado Wiper Switch