ChevyParts
My Garage
My Account
Cart
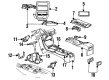
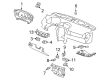
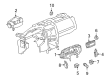
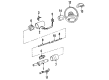
OEM Cadillac Neutral Safety Switch
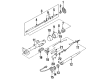
Transmission Neutral Safety Switch- Select Vehicle by Model
- Select Vehicle by VIN
Select Vehicle by Model
orMake
Model
Year
Select Vehicle by VIN
For the most accurate results, select vehicle by your VIN (Vehicle Identification Number).
33 Neutral Safety Switches found


Cadillac Paddle Switch, Passenger Side Part Number: 23133990
$102.86 MSRP: $161.00You Save: $58.14 (37%)Product Specifications- Other Name: Switch, Automatic Transmission Manual Shift Auxiliary Position *Dusk Chrome; Transmission Range Sensor; Switch, Transmission Control Cable; Switch, Transmission Control
- Position: Passenger Side
- Replaces: 23120469


Cadillac Clutch Switch Part Number: 15027967
$31.20 MSRP: $97.33You Save: $66.13 (68%)Ships in 1-2 Business DaysProduct Specifications- Other Name: Switch, Cruise Control Selector; Switch, Transmission Safety Starting or Speed Sensing; Hydraulic Clutch Main Cylinder.

Cadillac Neutral Safety Switch Part Number: 29542692
$140.79 MSRP: $229.70You Save: $88.91 (39%)Ships in 1-2 Business DaysProduct Specifications- Other Name: Detent, Transmission Throttle Valve; Automatic Transmission Position Switch; Switch, Transmission Mounted Gearshift (External)

Cadillac Paddle Switch, Black, Driver Side Part Number: 23156473
$28.44 MSRP: $44.51You Save: $16.07 (37%)Ships in 1-2 Business DaysProduct Specifications- Other Name: Switch, Automatic Transmission Manual Shift Auxiliary Position; Transmission Range Sensor; Range Sensor; Shift Paddle
- Position: Driver Side
- Replaces: 22771713
Cadillac Paddle Switch, Black, Passenger Side Part Number: 23156471
$24.10 MSRP: $36.36You Save: $12.26 (34%)Ships in 1-2 Business DaysProduct Specifications- Other Name: Switch, Automatic Transmission Manual Shift Auxiliary Position; Transmission Range Sensor; Range Sensor; Shift Paddle
- Position: Passenger Side

Cadillac Neutral Safety Switch Part Number: 24226755
$84.49 MSRP: $124.09You Save: $39.60 (32%)Ships in 1-2 Business DaysProduct Specifications- Other Name: Switch, Transmission Control
- Replaces: 24205999

Cadillac Range Sensor Part Number: 24270012
$152.63 MSRP: $276.26You Save: $123.63 (45%)Ships in 1-2 Business DaysProduct Specifications- Other Name: Switch, Transmission Safety Starting Switch Or Speed Sensing; Switch, Transmission Safety Start/Warning


Cadillac Back-Up Switch Part Number: 12479776
Product Specifications- Other Name: Switch Assembly, Back Up Lamp; Back Up Light Switch; Switch, Back Up Lamp


Cadillac Neutral Safety Switch Part Number: 96042540
Product Specifications- Other Name: Switch, Transmission Control

Cadillac Neutral Safety Switch Part Number: 14047186
Product Specifications- Other Name: Switch A; Back Up Light Switch; Back-Up Switch; Switch, Back Up Lamp

Cadillac Switch Part Number: 15776590
Product Specifications- Other Name: Switch, Throttle Control (Electric); Switch, Transmission Control

Cadillac Back-Up Switch Part Number: 10232545
Product Specifications- Other Name: Switch; Back Up Light Switch; Switch, Back Up Lamp

Cadillac Parking Brake Warning Switch Part Number: 12532082
Product Specifications- Other Name: Switch, Parking Brake Indicator

Cadillac Neutral Safety Switch Part Number: 1994253
Product Specifications- Other Name: Switch Assembly-Automatic Transmission Neutral Start; Back Up Light Switch; Back-Up Switch; Transmission Safety Starting/Sensing; Back Up Lamp

Cadillac Neutral Safety Switch Part Number: 12450158
Product Specifications- Other Name: Switch, Transmission Safety Start/Warning

Cadillac Neutral Safety Switch Part Number: 14103396
Product Specifications- Other Name: Switch, Transmission Safety Start/Warning; Clutch Switch; Switch, Transmission Safety Starting Switch Or Speed Sensing


Cadillac Neutral Safety Switch Part Number: 1994329
Product Specifications- Other Name: Switch Assembly; Switch, Transmission Safety Start/Warning

Cadillac Neutral Safety Switch Part Number: 1994359
Product Specifications- Other Name: Switch Assembly-Parking/Neutral Position; Back Up Light Switch; Back-Up Switch; Switch, Transmission Safety Start/Warning

Cadillac Neutral Safety Switch Part Number: 1994363
Product Specifications- Other Name: Switch Assembly-Parking/Neutral Position; Back Up Light Switch; Back-Up Switch; Switch, Transmission Safety Start/Warning
- Replaces: 1994335
Cadillac Back-Up Switch Part Number: 1994267
Product Specifications- Other Name: Switch; Back Up Light Switch; Switch, Transmission Safety Start/Warning; Switch, Back Up Lamp
| Page 1 of 2 |Next >
1-20 of 33 Results
Cadillac Neutral Safety Switch
Want to cut long-term maintenance and repair costs? Choose OEM Neutral Safety Switch. Those parts deliver top durability you can trust. On our site, you'll find a huge catalog of genuine Cadillac parts. Prices are unbeatable, so you can keep more in your pocket. Every OEM Cadillac Neutral Safety Switch includes a manufacturer's warranty. You can also get an easy return policy that keeps buying risk free. Fast delivery, get your car on the road quickly. It's simple to search, compare, and order. Stop guessing about quality or fit. Order today and save with parts that last.
Cadillac Neutral Safety Switch Parts Questions & Experts Answers
- Q: How to replace the Neutral Safety Switch on the 4L80-E/4L85-E transmission on Cadillac Escalade?A:To replace the park/neutral position switch on the 4 l 80- e/4l 85- e transmission, start by using the park motor to take the selection to the neutral and then park and apply the park. If the car is four-wheel drive (4WD), the front propeller shaft should be removed. Lift and adequately support the vehicle, then remove park/neutral position (PNP) switch electrical connectors. Then remove range selector end from the range selector lever ball stud, control lever to the manual shaft nut, and remove the range selector control lever from the manual shaft nt. Next, remove the pnp switch bolts and pull the pnp switch off the manual shaft; if it does not slide out easily, file the outer edge of the manual shaft to remove burrs. Removal is also easy: it is enough to remove a switch from a shaft and at the same time remove the mounting bracket from transmission bosses. In the case where a new pnp switch will be wired, it will have a positive assurance bracket attached to it, thus rendering the need of a park neutral switch aligner redundant. Mount the pnp switch bolts with with finger tight tension, then hold the connecting tool, j 41364-a park neutral switch aligner (J 41364-A) on the pnp switch ensuring that the two slots on the switch fall in the lower tabs of the tool. Turn the j 41364-a in both ways to place the upper locator pin into the slot on the top of the switch then tighten the bolts to 25 nm (18 ft. Lbs.). Take off the j 41364-a from the pnp switch and, if necessary, remove the positive assurance bracket. Replace the control lever on the manual shaft with the nut (torque to 25 Nm or 18 ft. Lbs.), mount the end of the range selector cable to the ball stud of the range selector lever, and connect the pnp switch electrical connections. Instead if four wd, reinstall front pro retier shaft, lower the veh, verify the pnp switch so that it will work properly, engine will start only in the park (P) or neu tral (N). If it doesn't, then replace switch.
- Q: How to identify issues with the Neutral Safety Switch on Cadillac CTS?A:To replace the transmission position switch/sensor, first lift and assume the position of the vehicle. Install a new shaft seal with j44767 seal installer where leaking, and remove manual transmission shift shaft nut. Detach the shift linkage from the transmission manual shift shaft and remove the exhaust system. Release the coupler of the propeller shaft by pushing the front propeller shaft toward the rear of the vehicle from the transmission flange, disconnecting the propeller shaft coupler. Cinch mechanics wire on the shift control lever to the front propeller shaft. Eliminate and dispose of the shaft seal and cup plug in case of leaking. Transmissions do not need to be removed for the shift shaft position switch replacement except for manual shift shaft change. Disconnect the manual shift shaft position switch electrical connector and remove the retaining pin with the use of a suitably sized pin punch. Remove the manual shift shaft detent spring and bolts then place a suitable transmission jack under the support and also remove the support from the body. Lower the rear of the transmission just enough to allow the manual shift shaft to clear the vehicle floor pan, then extract the manual shift shaft from the transmission case to remove the manual shift shaft position switch, the manual shift shaft detent lever, the manual shift shaif assembly spacer, and the park pawl actuator as an assembly. For installation, put into the manual shift shaft position switch , detent lever , assembly spacer and park pawl actuator as one assembly, with the park pawl pushed up if necessary. Fully insert the manual shift shaft into the transmission case, lift up the transmission to its usual location and then install the transmission support. Take out the transmission jack, put in deftness syringe of manual shift shaft spring, and secure it, using control valve body bolts without tightening. Ensure that manual shift shaft detent lever locating pin fits in manual valve link and manual shift shaft switch with detent spring roller . (04.05). Employ a proper pin punch for the purpose of installing the manual shift shaft position switch retaining pin and join the related electrical connector with the switch. Place a 0.8 mm spacer between the manual shaft detent lever and the detent spring, and then tighten the detent spring bolts to 11 nm (97 inch lbs). Put aside the spacer, substitute the transmission fluid pan, and filter, and if taken out previously, apply a new shaft seal utilizing the j44767 seal installer. Mount the seal on the j44767 and then insert it into the transmission case to make sure it is seated properly. If previously removed, install a new cup plug lubricated with transmission fluid up flush with the transmission case. Undo the mechanics oiler securing the front propeller shaft to the shift control lever, insert the propeller shaft coupler (to the transmission flange) and reinstall the tyre system. Connect the shift linkage to the transmission manual shift shaft and install the manual shift shaft nut with securing it to the extent of 15 nm (11 ft. Lbs.). Last, modify shift control linkage and bring down the vehicle.
- Q: How to replace the Neutral Safety Switch on the 5L50-E automatic transmission on Cadillac SRX?A:Replacements of the 5l50-e automatic transmission manual shaft shift position switch require first securing and elevating the vehicle. A new shaft seal should be installed with the j 44767 seal installer before removing the transmission manual shift shaft nut. When replacing the manual shift shaft you need to detach its linkage from the shaft and remove the exhaust components together with the transmission propeller shaft coupler. To release the coupler slide the front propeller shaft toward the rear while securing the front propeller shaft to the shift control lever with mechanics wire. Leaking requires the removal of shaft seal and cup plug where transmission replacement is only necessary when manual shift shaft demands replacement. The manual shift shaft position switch electrical connector receives detachment before using a suitable pin punch to remove its retaining pin. Before support removal position a suitable transmission jack under the transmission support then disconnect the support from the body. Drop the transmission's rear section over the Floor Pan limit to extract the manual shift shaft which will allow removal of the manual shift shaft position switch and detent lever and assembly spacer plus park pawl actuator assembly. To install the manual shift shaft position switch and other components as an assembly users should insert the manual shift shaft completely into the transmission case then raise the transmission to its original height. After installing the transmission support remove the transmission jack to correctly install the manual shift shaft detent spring along with the control valves body bolts while keeping the detent lever locating pin in position with the detent spring roller secured. Assemble the transmission while carefully inserting the pin punch to set the retaining pin then connect the electrical connector. Afterward, place a 0.8 mm spacer between the manual shaft detent lever and spring. When installing the transmission fluid pan reinstall the filter while removing the spacer then tighten detent spring bolts to 11 nm (97 inch lbs.). Use j 44767 to replace the old shaft seal and verify its complete seat. In case of a missing cup plug, install a new plug by applying transmission fluid. Completion includes front propeller shaft attachment to shift control lever followed by installation of propeller shaft coupler to transmission flange. Then reinstall the exhaust system and connect shift linkage before tightening the transmission manual shift shaft nut to 9 nm. Next adjust the shift control linkage before finally lowering the vehicle.


Related Cadillac Parts
 Cadillac Air Suspension Compressor
 Cadillac Antenna
 Cadillac Crankshaft Position Sensor
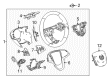
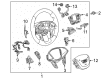
 Cadillac Air Bag Clockspring
 Cadillac Air Charge Temperature Sensor
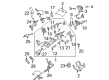
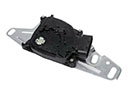 Cadillac Automatic Transmission Shift Position Sensor Switch
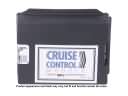 Cadillac Cruise Control Module
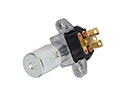 Cadillac Dimmer Switch
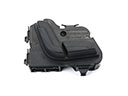 Cadillac Seat Switch
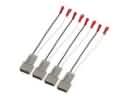 Cadillac Speaker Connector
 Cadillac Suspension Control Module
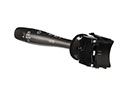 Cadillac Turn Signal Switch