ChevyParts
My Garage
My Account
Cart
OEM Cadillac XLR A/C Switch
Air Conditioning Switch- Select Vehicle by Model
- Select Vehicle by VIN
Select Vehicle by Model
orMake
Model
Year
Select Vehicle by VIN
For the most accurate results, select vehicle by your VIN (Vehicle Identification Number).
2 A/C Switches found

Cadillac XLR Heater Control Part Number: 15855707
Cadillac XLR Heater Control Part Number: 15299606
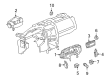
Cadillac XLR A/C Switch
Want to cut long-term maintenance and repair costs? Choose OEM A/C Switch. Those parts deliver top durability you can trust. On our site, you'll find a huge catalog of genuine Cadillac XLR parts. Prices are unbeatable, so you can keep more in your pocket. Every OEM Cadillac XLR A/C Switch includes a manufacturer's warranty. You can also get an easy return policy that keeps buying risk free. Fast delivery, get your car on the road quickly. It's simple to search, compare, and order. Stop guessing about quality or fit. Order today and save with parts that last.
Cadillac XLR A/C Switch Parts and Q&A
- Q: How to replace the A/C Switch control module on Cadillac XLR?A:Start by disconnecting the battery then remove the i/p accessory trim plate before unfastening the HVAC Control Module retaining screws to extract the component. Install the HVAC Control Module onto the i/p trim plate according to the fastener notice then secure the module with retaining screws tight to 1.6 n.m (14 lb in). Start by connecting electric cables to the hvac control unit then install the i/p accessory assembly before restoring power to the system. Adjustments of HVAC Control Module controls during self-calibration should always stay unchanged because improper system performance might result. Engine operation needs to continue for a minimum of one minute for the calibration process to finish successfully.
- Q: How to change the A/C Switch in a Cadillac XLR?A:To remove the HVAC Control Module, first, turn the battery off, then thoroughly remove the i/p accessory trim plate, and remove the retaining screws from the HVAC Control Module before making the actual withdrawal of the module. For mounting, mount the HVAC Control Module onto the i/p trim plate and fasten using the retaining screws that should be tightened to 1.6n.m (14 lb in). Then, connect the electrical connectors into the HVAC Control Module and replace the i/p accessory trim plate. Reconnect the battery and then turn the engine on and let it run for at least a minute. It is essential not to change any controls on the HVAC Control Module while self-calibrating, as an interruption can result in an incorrect hvac operation; do not test the engine while running so that calibration is achieved.

Related Cadillac XLR Parts
 Cadillac XLR A/C Compressor
 Cadillac XLR A/C Condenser
 Cadillac XLR A/C Expansion Valve
 Cadillac XLR A/C Service Cap
 Cadillac XLR A/C System Valve Core
 Cadillac XLR Air Temperature Sensor
 Cadillac XLR Ambient Temperature Sensor
 Cadillac XLR Blend Door Actuator
 Cadillac XLR Blower Control Switches
 Cadillac XLR Blower Motor
 Cadillac XLR Cabin Air Filter
 Cadillac XLR Heater Core