ChevyParts
My Garage
My Account
Cart
OEM Chevrolet Impala Hood Latch
Engine Hood Latch- Select Vehicle by Model
- Select Vehicle by VIN
Select Vehicle by Model
orMake
Model
Year
Select Vehicle by VIN
For the most accurate results, select vehicle by your VIN (Vehicle Identification Number).
7 Hood Latches found


Chevrolet Impala Lock Part Number: 25868008
$87.31 MSRP: $124.92You Save: $37.61 (31%)Ships in 1-3 Business Days


Chevrolet Impala Lock Assembly Part Number: 15757371
$93.13 MSRP: $138.61You Save: $45.48 (33%)Ships in 1-3 Business Days

Chevrolet Impala Lock Part Number: 10352081
$81.59 MSRP: $121.44You Save: $39.85 (33%)Ships in 1-3 Business Days
Chevrolet Impala Lock Part Number: 20763655
$149.11 MSRP: $222.93You Save: $73.82 (34%)Ships in 1-3 Business Days
Chevrolet Impala Lock Part Number: 84156187
$66.79 MSRP: $99.40You Save: $32.61 (33%)Ships in 1-3 Business Days
Chevrolet Impala Safety Catch, Upper Part Number: 14032197


Chevrolet Impala Safety Catch, Upper Part Number: 10213284
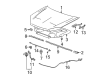
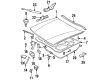
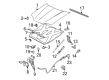
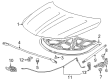
Chevrolet Impala Hood Latch
Want to cut long-term maintenance and repair costs? Choose OEM Hood Latch. Those parts deliver top durability you can trust. On our site, you'll find a huge catalog of genuine Chevrolet Impala parts. Prices are unbeatable, so you can keep more in your pocket. Every OEM Chevrolet Impala Hood Latch includes a manufacturer's warranty. You can also get an easy return policy that keeps buying risk free. Fast delivery, get your car on the road quickly. It's simple to search, compare, and order. Stop guessing about quality or fit. Order today and save with parts that last.
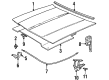
The Hood Latch in Chevrolet Impala cars is very essential in making sure that the hood does not open during the operation of the car. This component is located right at the underside of the front part of the hood so that the crucial components such as the engine, the radiator, and battery among others are well shielded while in operation. Chevrolet Impala cars of different years may have different types of Hood Latch as over the years the car makers try to improve on the security and reliability of the car. Again it is not made clear as to what extent these types are different from one another, but the underlying principle stays the same in its aim to protect the vital organs of the car. The function of the Chevrolet Impala's Hood Latch is important for the contonation of the vehicle as a safe means of transport on the roads.
Chevrolet Impala Hood Latch Parts and Q&A
- Q: How to replace the primary and secondary hood latch on Chevrolet Impala?A:Begin the hood primary and secondary latch replacement by opening the hood and removing the upper radiator air baffle first. The next procedure involves removing the front upper fascia support bracket. Apply a grease pencil mark to the Hood Latch's location on the center support bracket before completely removing bolts from the Hood Latch while guarding against damages to the hood release cable. After squeezing the cable retainer you can disconnect the hood release cable from the Hood Latch and take out the Hood Latch from the vehicle. When mounting the Hood Latch you need to place the hood release cable on the new Hood Latch while the center support bracket marks guide its placement. Mount the Hood Latch to the center support bolts and tighten their screws to 10 nm (89 lb in). The installation process includes reattaching the front upper fascia support bracket together with the upper radiator air baffle. Use hood adjusters if required before sealing the hood.

Related Chevrolet Impala Parts
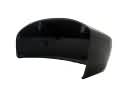 Chevrolet Impala Mirror Cover
 Chevrolet Impala Window Regulator
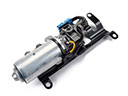 Chevrolet Impala Convertible Top Motor
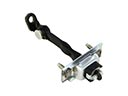 Chevrolet Impala Door Check
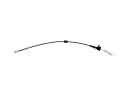 Chevrolet Impala Door Latch Cable
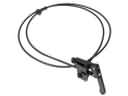 Chevrolet Impala Hood Cable
 Chevrolet Impala Lift Support
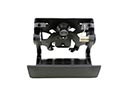 Chevrolet Impala Tailgate Handle
 Chevrolet Impala Tailgate Lift Support
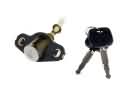 Chevrolet Impala Trunk Lock Cylinder
 Chevrolet Impala Weather Strip
 Chevrolet Impala Window Crank Handles