ChevyParts
My Garage
My Account
Cart
OEM Chevrolet Metro Blower Control Switches
HVAC Control Switch- Select Vehicle by Model
- Select Vehicle by VIN
Select Vehicle by Model
orMake
Model
Year
Select Vehicle by VIN
For the most accurate results, select vehicle by your VIN (Vehicle Identification Number).
2 Blower Control Switches found


Chevrolet Metro Dash Control Unit Part Number: 30007398
$11.98 MSRP: $21.41You Save: $9.43 (45%)
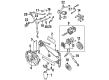
Chevrolet Metro On/Off Switch Part Number: 30007752
Chevrolet Metro Blower Control Switches
Want to cut long-term maintenance and repair costs? Choose OEM Blower Control Switches. Those parts deliver top durability you can trust. On our site, you'll find a huge catalog of genuine Chevrolet Metro parts. Prices are unbeatable, so you can keep more in your pocket. Every OEM Chevrolet Metro Blower Control Switches includes a manufacturer's warranty. You can also get an easy return policy that keeps buying risk free. Fast delivery, get your car on the road quickly. It's simple to search, compare, and order. Stop guessing about quality or fit. Order today and save with parts that last.
Chevrolet Metro Blower Control Switches Parts and Q&A
- Q: How to replace the blower control switches on Chevrolet Metro?A:You must start by taking off the center console trim bezel and the radio unit. Use force to pull out the heater control unit knobs before unscrewing and lifting off the right-side lower cover of the instrument panel cluster. Pull the heater face plate apart from the unit and detach the illumination lamp socket. Unplug the temperature control wires as well as mode control and fresh/recirculation control wires from both heater and blower cases. Take out the 2 screws from the heater control unit while disconnecting its electrical connection to the blower switch. Pull the unit from its position inside the instrument panel (IP) through the radio opening by disconnecting the blower switch from the heater control unit first. Hook the blower switch to the heater control unit then reconnect the control unit into the ip while screwing the unit using the two screws. Reconnect all electrical wires namely blower motor electrical connector, temperature control cable, mode control cable, and fresh/recirc control cable. Fix the illumination lamp socket to the heater face plate before putting back the bottom panel of the Instrument Cluster. Secure it with one screw. Secure the heater control unit lever knobs back into place before putting on the radio and center console trim parts. End by properly aligning the temperature, mode, and fresh/recirc control wires.

Related Chevrolet Metro Parts
 Chevrolet Metro A/C Accumulator
 Chevrolet Metro A/C Clutch
 Chevrolet Metro A/C Compressor
 Chevrolet Metro A/C Compressor Cut-Out Switches
 Chevrolet Metro A/C Condenser
 Chevrolet Metro A/C Expansion Valve
 Chevrolet Metro A/C Hose
 Chevrolet Metro A/C Idler Pulley
 Chevrolet Metro A/C Orifice Tube
 Chevrolet Metro A/C Switch
 Chevrolet Metro Evaporator
 Chevrolet Metro HVAC Pressure Switch