ChevyParts
My Garage
My Account
Cart
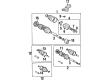
OEM Chevrolet Prizm CV Boot
Axle Boot- Select Vehicle by Model
- Select Vehicle by VIN
Select Vehicle by Model
orMake
Model
Year
Select Vehicle by VIN
For the most accurate results, select vehicle by your VIN (Vehicle Identification Number).
2 CV Boots found

Chevrolet Prizm Inner Boot, Front Part Number: 26037601
$26.78 MSRP: $53.77You Save: $26.99 (51%)
Chevrolet Prizm Outer Boot, Front Part Number: 26053177
Chevrolet Prizm CV Boot
Want to cut long-term maintenance and repair costs? Choose OEM CV Boot. Those parts deliver top durability you can trust. On our site, you'll find a huge catalog of genuine Chevrolet Prizm parts. Prices are unbeatable, so you can keep more in your pocket. Every OEM Chevrolet Prizm CV Boot includes a manufacturer's warranty. You can also get an easy return policy that keeps buying risk free. Fast delivery, get your car on the road quickly. It's simple to search, compare, and order. Stop guessing about quality or fit. Order today and save with parts that last.
The CV Boot remains as one of the vital parts that make the Chevrolet Prizm series produced between the years 1989 to 2002 possible. This flexible rubber or plastic component proves to be very important in shielding the constant velocity (CV) joints that are central in transmitting torque from the transaxle to the wheels. This article shows that through preserving the right lubrication and barring contaminants from components like the CV Boot, then the latter would provide efficient and long-lasting formulation to the car. Its relevance of this work for the Prizm's driving efficiency and safety: compatibility with various Prizm models is shown by the possibility of the internet, including with the first, second, and third generations of the car. Tire and wheel inspection involves the evaluation of the CV Boot and if it is damaged or has cracks or a tear, the CV joint can fail affecting the performance of your vehicle. In the list of CV Boot Manufacturing Companies, it is unique due to the durability in the construction and high-quality production to favor differentiated driving. In this case, the Chevrolet Prizm has efficient fuel economy 28 / 32 mpg city / highway; CV Boot is dependable; thereby the driver can have a safe and comfortable ride. In conclusion, the CV Boot is not just an armor; but a testimony to the Chevrolet dedication on the production of high quality and efficient vehicle alike the Prizm that remains relevant for drivers.
Chevrolet Prizm CV Boot Parts Questions & Experts Answers
- Q: How to replace the inner CV Boot and CV Joint of the axle shaft assembly on Chevrolet Prizm?A:The first step to replace the inner joint and seal of the Axle Shaft assembly starts by disassembly of the wheel drive shaft and the large side inner joint boot clamp with the j 35566 seal clamp tool followed by the small side inner joint boot clamp. Mark index points on both the wheel drive shaft and inner joint housing before sliding the boot to wheel drive shaft's center. First remove the inner joint housing from the tripot joint spider then mark both the tripot joint spider and wheel drive shaft before proceeding. Detach the snap ring on the wheel drive shaft followed by the application of a brass drift combined with a hammer to release the tripot joint so the spider remains untouched by solvent. Use a dry cloth to clean the tripot joint while inspecting it for any severe wear or structural damage. Replace it when necessary. Inspect the inner boot for damage while cleaning it before performing a replacement if required. Check the right wheel drive shaft's dynamic damper for damage before performing a replacement. The j 22912-01 bearing puller tool helps remove the inner joint housing seal while a press is needed to install a new inner joint seal. When reattaching the damper to the wheel drive shaft you must install it ahead of the inner joint position. Position the damper assembly on the right side wheel drive shaft where it fits into the groove while the centerline measures 431.3 mm (16.980 inch) away from the outer joint using the j 22610. Position the inner joint housing boot alongside its clamps without crimping them so the index marks on tripot joints and wheel drive shafts remain aligned and the splines' bevelled faces point away from the transaxle. After installing the tripot joint and snap ring apply 165 to 185 grams of grease from the inner joint boot kit to pack the inner joint housing. Install the inner joint housing after aligning its index marks with the tripot joint marks. Proceed by installing the inner joint boot and clamps. Proper boot placement requires measuring the wheel drive shaft lengths because the right shaft standard aligns at 857.4 mm (33.756 inch) and the left reaches 540.2 mm (21.268 inch) yet both span within ± 5.0 mm (0.197 inch) tolerance. Use j 35566 to properly secure clamp installation while checking for any signs of boot damage or deformation. Correct any issues and reinstall the wheel drive shaft.

Related Chevrolet Prizm Parts
 Chevrolet Prizm Axle Shaft
 Chevrolet Prizm Ball Joint
 Chevrolet Prizm CV Joint
 Chevrolet Prizm Coil Springs
 Chevrolet Prizm Control Arm
 Chevrolet Prizm Drive Shaft
 Chevrolet Prizm Front Cross-Member
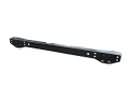 Chevrolet Prizm Rear Crossmember
 Chevrolet Prizm Shock Absorber
 Chevrolet Prizm Sway Bar Bracket
 Chevrolet Prizm Sway Bar Kit
 Chevrolet Prizm Trailing Arm