
Popular OEM Chevrolet Prizm Parts
- Body & Hardware Parts View More >
- Steering Parts View More >
- Electrical Parts View More >
- Air & Fuel Delivery Parts View More >
- Charging & Starting Parts View More >
- Engine Parts View More >
- Belts & Cooling Parts View More >
- Suspension Parts View More >
- Emission Control & Exhaust Parts View More >
- Transmission Parts View More >
- Brakes Parts View More >
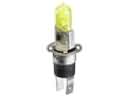
- Headlights & Lighting Parts View More >


Why Buy Genuine Chevrolet Prizm Parts From ChevyPartsGiant.com
Looking for real Chevrolet Prizm parts? ChevyPartsGiant.com may be a better choice to find genuine parts at wallet-friendly prices. We sell only OEM Chevrolet Prizm parts, ensuring perfect fit, reliability, and long-term performance. With our website, you can easily get access to the same parts found at local Chevrolet stores. All components are produced by Chevrolet and are exclusively fitted on Chevrolet Prizm automobiles. By shopping at our store, you can enjoy the quality of the Chevrolet factory without the high prices of brick-and-mortar facilities. We achieve this because we are an online store operating at lower costs, which we pass on to you. We also have a user-friendly platform where you can find and order genuine Chevrolet Prizm parts swiftly. We are here to make your process of restoring a Chevrolet Prizm or dealing with simple repairs quick and inexpensive. We also make it easy to obtain Chevrolet Prizm parts at competitive shipping prices and a team of knowledgeable staff ready to take your order. Choose ChevyPartsGiant.com to save time and money, as well as keep your Chevrolet Prizm in the good condition.
The Chevrolet Prizm underwent production for 13 consecutive years between 1989 and 2002 as it went through sales under Geo until Chevrolet took over its retail during its final production years. The Chevrolet Prizm ran exclusively in the United States between 1989 and 2002 using E90, E100, and E110 platforms. Two engine options became available for the Chevrolet Prizm from 1990 until 1992 - 4A-FE was standard while 4A-GE remained optional. The 4A-FE and 7A-FE engines were standard on Prizm models produced from 1993 to 1997. Finally, Prizm production phases from 1998 to 2002 featured the 1ZZ-FE engine. The Toyota VVT-i equipped 1.8L 1ZZ-FE power unit offered 125 horsepower with 122 lb-ft torque at 4,400 rpm. Users of the Chevrolet Prizm could choose manual or automatic transmission options consisting of three and four and five-speed transmission configurations for stable front-wheel power distribution. The vehicle achieved 10.1 seconds to travel from 0 to 60 mph along with a 17.3-second quarter-mile run. The vehicle achieved better handling from its front stabilizer bar combined with independent front suspension coupled with rear torsion beam suspension which provided both simplicity and durability. The durability along with affordability of Chevrolet Prizm parts has built their reputation because these genuine parts are made specifically to maintain vehicle performance stability.
To group their common concerns, Chevrolet Prizm does it in ignition service, EVAP emissions, and braking. Also, during ignition, 100,000-mile spark plug intervals are required in the Prizm to ensure the use of spark plugs. Worn spark plugs increase the misfires counts and decrease the fuel consumption on the Prizm. Install new spark plugs, test coil strength, and be sure of idle trim steadiness. With EVAP, the Prizm can also lighten a warning signal of a lousy gas cap. Wrap the neck, put the gas cap back and run monitor readiness. Only after determining proper purge and vent operation on the Prizm, repair wiring. When braking, the Chevrolet Prizm can feel as though the pedal is pulsating when slowing at low velocities. Front brake rotors, at times, wear out and produce uneven thickness, giving vibration. The front brake rotors need to be replaced, and an appropriately matched set of brake pads needs to be installed. Also, balance the lug nuts on the torque on and bed the pads in controlled stops. Repair and road test the Chevrolet Prizm and scan data review. Test temperature stability, fuel trims and correct gauge response. Checking on leaks, settling the ground and recording values on Chevrolet service continuity. Verify pitch alignment, tire balance and hub runout to reduce pedal shake. Readings should also be taken periodically, frequently check the schedule, and update the maintenance history.
Chevrolet Prizm Parts Questions & Answers
- Q: How to replace the rear bumper fascia on Chevrolet Prizm?A:The process of replacing the rear bumper fascia starts with opening the rear compartment lid then disconnecting the left rear end trim finish panel and right rear end trim finish panel and removing the rear compartment sill trim plate. You must remove the license plate lamps before starting to detach them from the rear bumper fascia. The installation requires removal of 4 center nuts and 2 bottom plastic retainers and the 3 nuts located at each side. Pull the rear bumper fascia towards the rear and take it out from the vehicle. Secure the rear bumper fascia by attaching it to the vehicle using the 3 side-mounted nuts along with bottom-bolted 2 plastic retainers and center-mounted 4 nuts then tighten the nuts to 20 N.m torque (15 lb ft). Reinstall the plate lamps followed by left and right end finish panel and rear sill trim plate reattachment before closing the compartment.
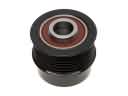
- Q: How to replace the alternator on Chevrolet Prizm?A:The primary step to replace the generator should start with removing the negative (-) battery cable to prevent physical harm from tool shorting. A clockwise turn of the Drive Belt tensioner allows you to loosen belt tension to remove the Drive Belt. Remove the rubber cap and nut by disconnecting the wire clamp from the wire clip on the rectifier end frame. Disconnection of generator wire and generator connector occurs before handling the two mounting bolts that lead to generator removal. Installation requires you to attach the generator to the vehicle using two mounting bolts while tightening the upper bolt to 25 n.m and the lower bolt to 54 n.m. Proceed with attaching the generator connector wire before tightening the nut while replacing the rubber cap. Reattach the wire clamp to the wire clip on the rectifier end frame and install the Drive Belt, checking for wear and damage; it is possible to keep using belts with small ribbed-side cracks but you must replace the belt if any parts are missing. The belt tensioner should descend at 98 n or 22 lb of pressing force. After tightening the 15 n.m (11 lb ft) bolt on the negative (-) battery cable, complete the process.
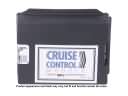
- Q: How to replace the steering wheel while ensuring proper alignment and safety on Chevrolet Prizm?A:To replace the Steering Wheel, first you need to de-energize the sir system and have the front wheels in the straight ahead capacity with the Steering Column locked so improper alignment and sir coil assembly redoes not happen. Take off the inflatable restraint Steering Wheel module and disconnect the horn electrical connector, and the cruise control electrical connector if equipped. Take out the Steering Wheel retaining nut and apply matchmarks to the Steering Wheel and main shaft. To pull the Steering Wheel gently, proceed to use the j 1859-a Steering Wheel puller (J 1859-A) in order not to hit the Steering Column shaft with a hammer and then damage its rigidity. For installation, match the marks and that's it for the Steering Wheel and tightening is secured with retaining nut: tightening to 34 nm (25 ft. Lbs.). Plug the horn electrical connector and the cruise control electrical connector back if available, plug the inflatable restraint Steering Wheel module, check if the Steering Wheel is centered and lastly enable sir system.
- Q: How to replace the body emblem, nameplate, or exterior trim molding on Chevrolet Prizm?A:Get ready by collecting the Body Molding Removal Tool part number J 41409 along with other essential tools. Apply masking tape along the body border of the emblem to defend the paint and enable better placement when you put it in place. Heat the part slowly between 104°F to 140°F with additional heating but avoid overheating the component. Cut away the adhesive material of the vehicle part with the Body Molding Removal Tool (J 41409) before removing the molding parts. Wipe the mounting space with a 50/50 mix of isopropyl alcohol and water then make it completely dry before starting the work. Place adhesive tape on the edges of the component for body installation in temperatures between 20-30°C (68-86°F). Adjust the temperature as needed. Set the component to match the temperature zone where it will be installed. Stick the surface component onto the body part by pressing down firmly on all edges of the item.


