ChevyParts
My Garage
My Account
Cart
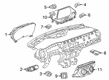
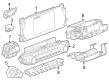
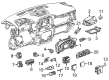
OEM Chevrolet Speedometer
Speedometer Gauge- Select Vehicle by Model
- Select Vehicle by VIN
Select Vehicle by Model
orMake
Model
Year
Select Vehicle by VIN
For the most accurate results, select vehicle by your VIN (Vehicle Identification Number).
736 Speedometers found


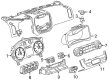
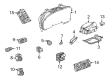
Chevrolet Instrument Cluster Part Number: 20808606
$332.46 MSRP: $496.96You Save: $164.50 (34%)Ships in 1-3 Business DaysProduct Specifications- Other Name: Cluster, Instrument Panel Gage; Cluster Assembly
- Replaces: 25914288, 25943998

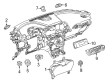
Chevrolet Instrument Cluster Part Number: 84398584
$207.97 MSRP: $310.86You Save: $102.89 (34%)Ships in 1-3 Business DaysProduct Specifications- Other Name: Cluster, Instrument Panel Gage; Cluster
- Replaced by: 84624950


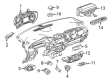
Chevrolet Instrument Cluster Part Number: 84930765
$151.60 MSRP: $226.60You Save: $75.00 (34%)Ships in 1-3 Business DaysProduct Specifications- Other Name: Cluster, Instrument Panel Gage
- Replaces: 84785451
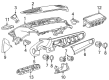
Chevrolet Instrument Cluster Part Number: 84748649
$252.32 MSRP: $377.23You Save: $124.91 (34%)Ships in 1-3 Business DaysProduct Specifications- Other Name: Cluster, Instrument Panel Gage
- Replaces: 84699221

Chevrolet Instrument Cluster Part Number: 84242635
$298.17 MSRP: $445.70You Save: $147.53 (34%)Ships in 1-3 Business DaysProduct Specifications- Other Name: Cluster, Instrument Panel Gage; Cluster
- Replaces: 23385710, 23343117, 84053257

Chevrolet Instrument Cluster Part Number: 84938172
$431.09 MSRP: $644.52You Save: $213.43 (34%)Ships in 1-3 Business DaysProduct Specifications- Other Name: Cluster, Instrument Panel Gage; Cluster Assembly
- Replaced by: 84995182
Chevrolet Cluster Part Number: 84211120
$518.61 MSRP: $778.87You Save: $260.26 (34%)Ships in 1-3 Business DaysProduct Specifications- Other Name: Cluster, Instrument Panel Gage; Instrument Cluster
Chevrolet Instrument Cluster Part Number: 84581705
$501.15 MSRP: $752.63You Save: $251.48 (34%)Ships in 1-3 Business DaysProduct Specifications- Other Name: Cluster, Instrument Panel Gage; Cluster Assembly
- Replaces: 84525539

Chevrolet Cluster Assembly Part Number: 84875516
$134.74 MSRP: $201.40You Save: $66.66 (34%)Ships in 1-3 Business DaysProduct Specifications- Other Name: Cluster, Instrument Panel Gage; Instrument Cluster
Chevrolet Cluster Assembly Part Number: 84847073
$309.14 MSRP: $462.10You Save: $152.96 (34%)Ships in 1-3 Business DaysProduct Specifications- Other Name: Cluster, Instrument Panel Gage; Instrument Cluster
- Replaces: 84734998

Chevrolet Instrument Cluster Part Number: 85641298
$106.58 MSRP: $158.60You Save: $52.02 (33%)Ships in 1-2 Business DaysProduct Specifications- Other Name: Cluster, Instrument Panel Gage; Cluster Assembly

Chevrolet Instrument Cluster Part Number: 23436003
$131.40 MSRP: $196.42You Save: $65.02 (34%)Ships in 1-3 Business DaysProduct Specifications- Other Name: Cluster, Instrument Panel Gage; Cluster Assembly
- Replaces: 22926638
Chevrolet Instrument Cluster Part Number: 84560525
$309.04 MSRP: $462.04You Save: $153.00 (34%)Ships in 1-3 Business DaysProduct Specifications- Other Name: Cluster, Instrument Panel Gage; Cluster
- Replaces: 84338167, 84257744
Chevrolet Instrument Cluster Part Number: 84474088
$210.08 MSRP: $314.06You Save: $103.98 (34%)Ships in 1-3 Business DaysProduct Specifications- Other Name: Cluster, Instrument Panel Gage; Cluster
- Replaces: 84324674, 84033921

Chevrolet Instrument Cluster Part Number: 20882020
$571.38 MSRP: $857.93You Save: $286.55 (34%)Ships in 1-3 Business DaysProduct Specifications- Other Name: Cluster, Instrument Panel Gage; Cluster Assembly
- Replaces: 20756707

Chevrolet Instrument Cluster Part Number: 84960250
$171.50 MSRP: $256.35You Save: $84.85 (34%)Ships in 1-3 Business DaysProduct Specifications- Other Name: Cluster, Instrument Panel Gage
- Replaces: 84911459

Chevrolet Instrument Cluster Part Number: 84934298
$111.54 MSRP: $166.73You Save: $55.19 (34%)Ships in 1-3 Business DaysProduct Specifications- Other Name: Cluster, Instrument Panel Gage
Chevrolet Instrument Cluster Part Number: 84785799
$148.57 MSRP: $222.08You Save: $73.51 (34%)Ships in 1-3 Business DaysProduct Specifications- Other Name: Cluster, Instrument Panel Gage; Cluster Assembly
- Replaces: 84683423, 84616435, 84582692, 84630994
Chevrolet Instrument Cluster Part Number: 85154334
$158.91 MSRP: $237.53You Save: $78.62 (34%)Ships in 1-3 Business DaysProduct Specifications- Other Name: Cluster, Instrument Panel Gage
Chevrolet Instrument Cluster Part Number: 84930789
$272.89 MSRP: $407.89You Save: $135.00 (34%)Product Specifications- Other Name: Cluster, Instrument Panel Gage
- Replaces: 84785460
| Page 1 of 37 |Next >
1-20 of 736 Results
Chevrolet Speedometer
Choose OEM Speedometer, you're making the optimal decision for superior quality and perfect performance. You can feel confident because each component goes through stringent quality checks. Every part is carefully built to comply with Chevrolet's factory specifications. You'll enjoy a smooth, worry-free installation that fits just right. At ChevyPartsGiant.com, you'll find it easy to get top-quality OEM Chevrolet Speedometer. You can shop at highly competitive prices and protect your budget. All our genuine Chevrolet parts include a dependable manufacturer's warranty. You'll also appreciate our straightforward return policy and swift delivery services for extra convenience.
Chevrolet Speedometer Parts and Q&A
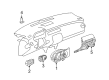
- Q: How to replace the speedometer on Chevrolet Aveo?A:A person must disconnect the vehicle's negative Battery Cable before starting the Speedometer replacement task. Begin by removing the Instrument Cluster and afterward remove both the Instrument Cluster lens and the face plate. You should take out the Speedometer from the Instrument Cluster through screw removal. During installation the Speedometer should be fastened to the Instrument Cluster through screws and the Instrument Cluster lens and face plate must be replaced onto position. You must reinstall the Instrument Cluster before reconnecting the negative Battery Cable.
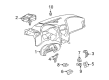
- Q: How should you replace a speedometer or odometer assembly and ensure accurate mileage registration on Chevrolet Tracker?A:Replacements for speedometers and odometers should have their new odometers reset to show the same distance recorded by the old odometer units unless zero is set initially while a label shows both readings and the replacement date is added to the driver's door frame. Start removal of the Instrument Cluster and separate the Instrument Cluster lens and bezel assembly from the Instrument Cluster by unfastening its six black plastic tabs while taking care not to pull out the Speedometer needle because the shaft lacks any detent or flat spot for proper placement. After removing the Instrument Cluster you must remove its Speedometer together with its four screws. To install the Speedometer use four screws to secure it into the Instrument Cluster, after which the Instrument Cluster lens and bezel assembly needs to be replaced onto the Instrument Cluster along with confirmation of proper plastic tab retention before reattaching the Instrument Cluster.


Related Chevrolet Parts
 Chevrolet Camshaft Position Sensor
 Chevrolet Ignition Switch
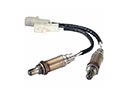 Chevrolet Oxygen Sensor
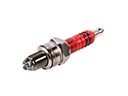 Chevrolet Spark Plug
 Chevrolet Engine Control Module
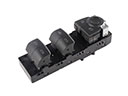 Chevrolet Power Window Switch
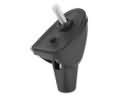 Chevrolet Antenna Base
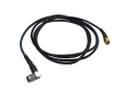 Chevrolet Antenna Cable
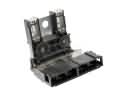 Chevrolet Battery Fuse
 Chevrolet Crankcase Breather Hose
 Chevrolet Ignition Coil Boot
 Chevrolet Seat Heater Pad
Browse Chevrolet Speedometer by Models
S10 Colorado Tahoe Cruze Malibu Camaro Equinox Impala SS SSR Avalanche Silverado 1500 Silverado 2500 HD Caprice Cobalt Suburban Traverse Blazer HHR Sonic Tracker Volt El Camino Spark Trax Trailblazer Astro Cavalier Corvette Aveo Beretta Bolt EUV Bolt EV C1500 C2500 C3500 Celebrity Corsica Express 1500 Express 2500 Express 3500 G10 G20 G30 K1500 K2500 K3500 Lumina Metro Monte Carlo P30 Prizm S10 Blazer Silverado 2500 Venture Lumina APV Silverado 3500 Suburban 1500 Trailblazer EXT Avalanche 1500 Avalanche 2500 Aveo5 C1500 Suburban C2500 Suburban Captiva Sport Cruze Limited K1500 Suburban K2500 Suburban Malibu Limited R10 R10 Suburban R1500 Suburban R20 R20 Suburban R2500 R2500 Suburban R30 R3500 Silverado 1500 HD Silverado 1500 LD Silverado 1500 LTD Silverado 3500 HD Spark EV Spectrum Suburban 2500 Suburban 3500 HD V10 V10 Suburban V1500 Suburban V20 V20 Suburban V2500 Suburban V30 V3500