ChevyParts
My Garage
My Account
Cart
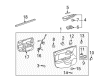
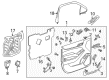
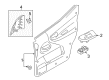
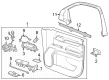
OEM Chevrolet Power Window Switch
Electric Window Switch- Select Vehicle by Model
- Select Vehicle by VIN
Select Vehicle by Model
orMake
Model
Year
Select Vehicle by VIN
For the most accurate results, select vehicle by your VIN (Vehicle Identification Number).
358 Power Window Switches found


Chevrolet Window Switch, Driver Side Part Number: 20807220
$40.96 MSRP: $64.11You Save: $23.15 (37%)Ships in 1-2 Business DaysProduct Specifications- Other Name: Switch, Door Window
- Position: Driver Side
- Replaces: 15823976

Chevrolet Window Switch, Black Carbon, Front Passenger Side Part Number: 23488406
$29.57 MSRP: $44.00You Save: $14.43 (33%)Product Specifications- Other Name: Switch Assembly-Front Side Door Window *Black Carbon; Switch, Door And End Gate Electrical
- Position: Front Passenger Side
- Replaces: 23180790

Chevrolet Window Switch, Driver Side Part Number: 19317239
$172.79 MSRP: $309.94You Save: $137.15 (45%)Ships in 1-3 Business DaysProduct Specifications- Other Name: Switch, Door Window
- Position: Driver Side


Chevrolet Window Switch Part Number: 88894539
$75.65 MSRP: $207.94You Save: $132.29 (64%)Ships in 1-2 Business DaysProduct Specifications- Other Name: Switch Kit, Side Window; Door Window Switch; Switch Kit, Door Window
- Replaces: 10291791


Chevrolet Window Switch Part Number: 10340138
Product Specifications- Other Name: Switch, Door Window
- Position: Rear

Chevrolet Window Switch, Driver Side Part Number: 85628662
$34.25 MSRP: $50.98You Save: $16.73 (33%)Product Specifications- Other Name: Switch, Door Window; Switch, Door And End Gate Electrical
- Position: Driver Side

Chevrolet Window Switch, Camel; Oak, Rear Part Number: 15757505
Product Specifications- Other Name: Switch Assembly-Rear Side Door Window *Oak; Switch, Door And End Gate Electrical
- Position: Rear


Chevrolet Window Switch, Rear Part Number: 10363355
Product Specifications- Other Name: Switch Assembly-Rear Side Door Window; Switch, Back/Rear Door Window
- Position: Rear

Chevrolet Window Switch Part Number: 20835556
Product Specifications- Other Name: Switch Assembly-Door Lock & Side Window; Handle, Inside Cover; Switch, Door And End Gate Electrical
- Replaces: 25783954

Chevrolet Switch Assembly, Gray, Passenger Side Part Number: 25866980
Product Specifications- Other Name: Switch Assembly-Door Lock & Side Window *Gray L; Switch, Door And End Gate Electrical
- Position: Passenger Side
- Replaces: 15905415, 25811591

Chevrolet Window Switch Part Number: 15204671
Product Specifications- Other Name: Switch Assembly-Door Lock & Side Window *Cashmere E; Switch, Door And End Gate Electrical
Chevrolet Switch Assembly, Passenger Side Part Number: 10364175
Product Specifications- Other Name: Switch Assembly-Door Lock & Side Window *Pewter R; Switch, Door And End Gate Electrical
- Position: Passenger Side
- Replaces: 15096225, 15136134, 15204683, 15180070
Chevrolet Switch Assembly, Driver Side Part Number: 15204668
Product Specifications- Other Name: Switch Assembly-Door Lock & Side Window *Cashmere E; Switch, Door And End Gate Electrical
- Position: Driver Side
Chevrolet Window Switch Part Number: 15212589
Product Specifications- Other Name: Switch, Door Lock & Side Window; Switch, Door And End Gate Electrical
Chevrolet Switch Assembly, Driver Side Part Number: 15204694
Product Specifications- Other Name: Switch Assembly-Door Lock & Side Window *Pewter I; Switch, Door And End Gate Electrical
- Position: Driver Side
Chevrolet Switch Assembly, Driver Side Part Number: 15204660
Product Specifications- Other Name: Switch Assembly-Door Lock & Side Window *Cashmere E; Switch, Door And End Gate Electrical
- Position: Driver Side
Chevrolet Switch Assembly, Driver Side Part Number: 15114245
Product Specifications- Other Name: Switch Assembly-Door Lock & Side Window *Ebony; Switch, Door And End Gate Electrical
- Position: Driver Side
Chevrolet Window Switch Part Number: 15212592
Product Specifications- Other Name: Switch Assembly-Door Lock & Side Window *Light Cashmere; Switch, Door And End Gate Electrical
Chevrolet Window Switch, Driver Side Part Number: 15204667
Product Specifications- Other Name: Switch Assembly-Door Lock & Side Window *Pewter R; Switch Assembly; Switch, Door And End Gate Electrical
- Position: Driver Side
- Replaces: 15096224, 15085602, 15180052
Chevrolet Window Switch, Passenger Side Part Number: 19317369
$56.40 MSRP: $100.72You Save: $44.32 (44%)Product Specifications- Other Name: Switch, Door Window
- Position: Passenger Side
| Page 1 of 18 |Next >
1-20 of 358 Results
Chevrolet Power Window Switch
Want to cut long-term maintenance and repair costs? Choose OEM Power Window Switch. Those parts deliver top durability you can trust. On our site, you'll find a huge catalog of genuine Chevrolet parts. Prices are unbeatable, so you can keep more in your pocket. Every OEM Chevrolet Power Window Switch includes a manufacturer's warranty. You can also get an easy return policy that keeps buying risk free. Fast delivery, get your car on the road quickly. It's simple to search, compare, and order. Stop guessing about quality or fit. Order today and save with parts that last.
Chevrolet Power Window Switch Parts Questions & Experts Answers
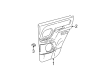
- Q: How to replace the power window switch on Chevrolet Camaro?A:A rag should cover the trim panel for protection against marring before initiating the switch prying-up process. To start the process you need to lift the rear side of the driver switch and the forward side of the passenger switch. The driver's side switch requires sliding back while the passenger side switch needs moving forward to detach from the door trim panel. The electrical connector needs disconnection from the window switches before extracting the power window switch from its panel. Wholesome installation requires both a panel insertion of the switch assembly and the power window switch installation within the panel. Connect the electrical connector to the switches and guide the front side of the driver's switch and the rear part of the passenger switch into the door trim panel. Press the rear side of the driver's side switch with the front side of the passenger switch into the panel until they become secure.
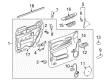
- Q: How to replace the front LH Power Window Switch on Chevrolet Colorado?A:You must start the replacement process of the left side front side door window switch by unfastening the two screws which anchor the switch plate assembly to the door trim panel. To remove the switch plate please lift its front side until the clip disconnects before pulling the plate out from the door trim panel hole. Take out the switch plate assembly from the vehicle after disconnecting electrical connectors (3, 4) from switches (2, 5). Apply this procedure either by removing the switches from the plate or by preserving them for the switch plate transfer. The installation process requires you to mount switches (2, 5) onto the switch plate before joining electrical connectors (3, 4) to switches (2, 5). Affix the switch plate assembly to the door trim panel after hooking up the 2 screws but keep tightness to 2 Nm (18 lb in).
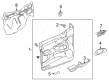
- Q: How to service the left front power window switch on Chevrolet Malibu?A:The first step to service the left front power window switch begins with using a flat-bladed implement to activate the power accessory switch plate retainers by pushing in and lifting up. This enables removal of the switch plate from the door trim panel. Unplug the electrical connectors which power the power window switch then free the retainers before pushing the window switch out of the accessory switch plate. After installing the power window switch onto the accessory switch plate, gradually press down until all retaining tabs find full engagement. Connect and attach the electrical connectors to the power window switch and reposition the accessory switch plate onto the door trim panel by pressing it until all retainers become secure.


Related Chevrolet Parts
 Chevrolet TPMS Sensor
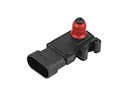 Chevrolet MAP Sensor
 Chevrolet Brake Light Switch
 Chevrolet Door Jamb Switch
 Chevrolet Turn Signal Flasher
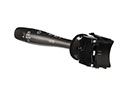 Chevrolet Turn Signal Switch
 Chevrolet Air Bag Clockspring
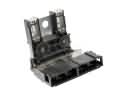 Chevrolet Battery Fuse
 Chevrolet Crankcase Breather Hose
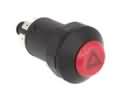 Chevrolet Hazard Warning Switch
 Chevrolet Vehicle Speed Sensor
 Chevrolet Washer Pump
Browse Chevrolet Power Window Switch by Models
S10 Colorado C10 Tahoe Cruze Malibu Camaro Equinox Impala SS Avalanche Silverado 1500 Silverado 2500 HD Caprice Classic Cobalt Suburban Traverse Blazer HHR Sonic Tracker Volt K10 Spark Trax Trailblazer Astro Cavalier Corvette C20 Aveo Beretta Bolt EUV Bolt EV C1500 C2500 C30 C3500 City Express Corsica Express 1500 Express 2500 Express 3500 G10 G20 G30 K1500 K20 K2500 K30 K3500 K5 Blazer Lumina Monte Carlo Prizm S10 Blazer Silverado 2500 Uplander Venture Lumina APV Silverado 3500 Suburban 1500 Trailblazer EXT Avalanche 1500 Avalanche 2500 Aveo5 C10 Suburban C1500 Suburban C20 Suburban C2500 Suburban Captiva Sport Citation II Cruze Limited Impala Limited K10 Suburban K1500 Suburban K20 Suburban K2500 Suburban Malibu Limited R10 R10 Suburban R1500 Suburban R20 R20 Suburban R2500 R2500 Suburban R30 R3500 Silverado 1500 Classic Silverado 1500 HD Silverado 1500 HD Classic Silverado 1500 LD Silverado 1500 LTD Silverado 2500 HD Classic Silverado 3500 Classic Silverado 3500 HD Spark EV Suburban 2500 Suburban 3500 HD V10 V10 Suburban V1500 Suburban V20 V20 Suburban V2500 Suburban V30 V3500