ChevyParts
My Garage
My Account
Cart
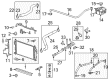
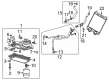
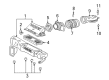
OEM Chevrolet Oxygen Sensor
Oxygen O2 Sensor- Select Vehicle by Model
- Select Vehicle by VIN
Select Vehicle by Model
orMake
Model
Year
Select Vehicle by VIN
For the most accurate results, select vehicle by your VIN (Vehicle Identification Number).
205 Oxygen Sensors found


Chevrolet Oxygen Sensor Part Number: 12616203
$97.69 MSRP: $198.42You Save: $100.73 (51%)Ships in 1-2 Business DaysProduct Specifications- Other Name: Sensor Assembly-Heated Oxygen (Position 2); Rear Oxygen Sensor; Sensor, Computer Control Sensors


Chevrolet Oxygen Sensor Part Number: 12596701
$42.01 MSRP: $131.10You Save: $89.09 (68%)Ships in 1-2 Business DaysProduct Specifications- Other Name: Sensor Assembly-Heated Oxygen (Position 1); Front Oxygen Sensor; Sensor, Computer Control Sensors


Chevrolet Oxygen Sensor, Passenger Side Part Number: 12608663
$70.37 MSRP: $142.92You Save: $72.55 (51%)Ships in 1-2 Business DaysProduct Specifications- Other Name: Sensor Assembly-Heated Oxygen (Position 2); Rear Oxygen Sensor; Sensor, Computer Control Sensors
- Position: Passenger Side


Chevrolet Oxygen Sensor Part Number: 12618009
$84.49 MSRP: $171.60You Save: $87.11 (51%)Ships in 1-2 Business DaysProduct Specifications- Other Name: Sensor, Computer Control Sensors; Rear Oxygen Sensor


Chevrolet Oxygen Sensor Part Number: 12643708
$38.86 MSRP: $78.92You Save: $40.06 (51%)Product Specifications- Other Name: Sensor, Computer Control Sensors; Lower Oxygen Sensor


Chevrolet Oxygen Sensor Part Number: 12578576
$84.49 MSRP: $171.60You Save: $87.11 (51%)Ships in 1-2 Business DaysProduct Specifications- Other Name: Sensor, Computer Control Sensors; Rear Oxygen Sensor


Chevrolet Oxygen Sensor Part Number: 19178918
$70.38 MSRP: $142.96You Save: $72.58 (51%)Ships in 1-2 Business DaysProduct Specifications- Other Name: Sensor, Computer Control Sensors
- Replaces: 25163079, 25312200


Chevrolet Oxygen Sensor Part Number: 19209807
$87.79 MSRP: $178.30You Save: $90.51 (51%)Ships in 1-2 Business DaysProduct Specifications- Other Name: Sensor, Computer Control Sensors; Rear Oxygen Sensor; Front Oxygen Sensor
- Replaces: 12570149, 12574924, 12572772


Chevrolet Oxygen Sensor Part Number: 19178930
$66.41 MSRP: $134.88You Save: $68.47 (51%)Ships in 1-2 Business DaysProduct Specifications- Other Name: Sensor, Computer Control Sensors; Front Oxygen Sensor
- Replaces: 25312184, 25165313, 25171579


Chevrolet Oxygen Sensor Part Number: 12573721
$63.75 MSRP: $129.48You Save: $65.73 (51%)Ships in 1-2 Business DaysProduct Specifications- Other Name: Sensor, Computer Control Sensors; Front Oxygen Sensor


Chevrolet Oxygen Sensor Part Number: 12666612
$45.73 MSRP: $92.87You Save: $47.14 (51%)Ships in 1-2 Business DaysProduct Specifications- Other Name: Sensor Assembly-Heated Oxygen (Pre-Catalyst Bank 1 Se; Sensor, Computer Control Sensors


Chevrolet Oxygen Sensor Part Number: 12577588
$39.80 MSRP: $124.16You Save: $84.36 (68%)Ships in 1-2 Business DaysProduct Specifications- Other Name: Sensor, Computer Control Sensors; Front Oxygen Sensor
- Replaces: 24577273


Chevrolet Oxygen Sensor Part Number: 12578624
$84.49 MSRP: $171.60You Save: $87.11 (51%)Ships in 1-2 Business DaysProduct Specifications- Other Name: Sensor, Computer Control Sensors; Rear Oxygen Sensor; Front Oxygen Sensor
- Replaces: 24577303

Chevrolet Oxygen Sensor Part Number: 12597947
$84.49 MSRP: $171.60You Save: $87.11 (51%)Ships in 1-2 Business DaysProduct Specifications- Other Name: Sensor, Computer Control Sensors; Rear Oxygen Sensor
Chevrolet Oxygen Sensor, Driver Side Part Number: 19355308
$71.31 MSRP: $144.84You Save: $73.53 (51%)Ships in 1-2 Business DaysProduct Specifications- Other Name: Sensor, Computer Control Sensors
- Position: Driver Side
- Replaces: 19178928, 25161131, 25312197

Chevrolet Oxygen Sensor Part Number: 19178936
$39.06 MSRP: $73.36You Save: $34.30 (47%)Ships in 1-2 Business DaysProduct Specifications- Other Name: Sensor, Computer Control Sensors
- Replaces: 25320812

Chevrolet Oxygen Sensor Part Number: 12661898
$63.01 MSRP: $127.99You Save: $64.98 (51%)Ships in 1-3 Business DaysProduct Specifications- Other Name: Sensor, Computer Control Sensors; Rear Oxygen Sensor; Lower Oxygen Sensor
- Replaces: 12643903

Chevrolet Oxygen Sensor Part Number: 12670254
$40.41 MSRP: $72.16You Save: $31.75 (44%)Product Specifications- Other Name: Sensor Assembly-Heated Oxygen (Post-Catalyst Bank 2; Lower Oxygen Sensor; Sensor, Computer Control Sensors


Chevrolet Oxygen Sensor Part Number: 12608693
$38.44 MSRP: $119.90You Save: $81.46 (68%)Ships in 1-2 Business DaysProduct Specifications- Other Name: Sensor Assembly-Heated Oxygen (Position 2); Rear Oxygen Sensor; Sensor, Computer Control Sensors

Chevrolet Oxygen Sensor, Passenger Side Part Number: 12589549
$69.46 MSRP: $124.05You Save: $54.59 (45%)Product Specifications- Other Name: Sensor Assembly-Heated Oxygen (Position 2); Sensor, Computer Control Sensors
- Position: Passenger Side
- Replaces: 12570794
| Page 1 of 11 |Next >
1-20 of 205 Results
Chevrolet Oxygen Sensor
Want to cut long-term maintenance and repair costs? Choose OEM Oxygen Sensor. Those parts deliver top durability you can trust. On our site, you'll find a huge catalog of genuine Chevrolet parts. Prices are unbeatable, so you can keep more in your pocket. Every OEM Chevrolet Oxygen Sensor includes a manufacturer's warranty. You can also get an easy return policy that keeps buying risk free. Fast delivery, get your car on the road quickly. It's simple to search, compare, and order. Stop guessing about quality or fit. Order today and save with parts that last.
Chevrolet Oxygen Sensor Parts Questions & Experts Answers
- Q: How to properly service and repair the Oxygen Sensor on Chevrolet Colorado?A:To repair the heated Oxygen Sensor 1 you need to first clear any codes using a scan tool and if available do the ho2s heater resistance learn reset to reinforce possible ho2s failure. Remove the cpa retainer and disconnect the engine wiring harness electrical connector from the heated Oxygen Sensor (HO2S) electrical connector. Next, disconnect the ho2s sensor electric connector on the camshaft cover. Utilizing heated Oxygen Sensor wrench (J 39194-B) depulsing ho2s catalyst from the Exhaust Manifold. While installing the new ho2s, it is necessary to apply the anti-seize compound (P/N 5613695) to the threads to make easier the subsequent thread removal from the holes. Thread the ho2s through the Exhaust Manifold manually and then use the heated Oxygen Sensor wrench (J 39194-B) to tighten to 42 nfs (31 lb ft). Finely reconnect the ho2s sensor electrical connection to the camshaft cover, reconnect the engine wiring harness electrical connector to the ho2s connecter, and replace the cpa retainer.
- Q: How to replace the Heated Oxygen Sensor (HO2S) Bank 2 Sensor 1 on Chevrolet S10?A:To replace Heated Oxygen Sensor (HO2S), Bank 2 Sensor 1, first, lift vehicle. Now, unplug the connector for the HO2S, and then unplug the HO2S using the Oxygen Sensor Wrench (J 39194-B). Prior to installation if needed, paint the threads of a new or service replacement sensor with anti-seize compound GM P/N 5613695, which is a liquid graphite and glass beads mixture to make extraction easier at a later time. Replace the HO2S by using the Oxygen Sensor Wrench (J 39194-B), and screw in the HO2S with 42 N.m (31 lb ft). Finally, position the HO2S harness connector and also drop down the vehicle.
- Q: How to replace the Heated Oxygen Sensor (HO2S) for Bank 2 Sensor 1 on Chevrolet Tahoe?A:Starting a replacement process of the Bank 2 Sensor 1 Heated Oxygen Sensor (HO2S) requires the vehicle elevation followed by necessary support. First disconnect the HO2S electrical connector by removing its connector position assurance retainer and engine wiring harness electrical connector. Afterwards separate the wiring harness clip and HO2S from its clip. After taking the HO2S clip out of the engine wiring harness clip position it is possible to remove the HO2S. When installing the previous sensor users should apply special anti-seize compound GM P/N 12377953 or an equivalent product that contains liquid graphite and glass beads to improve its thread functionality. Secure the HO2S by tightening it to 42 Nm (31 lb ft). Lower the vehicle simultaneously while installing the HO2S clip to the engine wiring harness clip and connecting the engine wiring harness electrical connector to the HO2S electrical connector and attaching the CPA retainer.


Related Chevrolet Parts
 Chevrolet Distributor
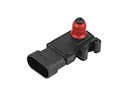 Chevrolet MAP Sensor
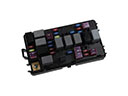 Chevrolet Fuse
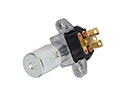 Chevrolet Dimmer Switch
 Chevrolet Engine Control Module
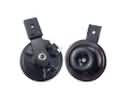 Chevrolet Horn
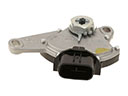 Chevrolet Neutral Safety Switch
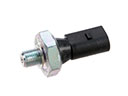 Chevrolet Oil Pressure Switch
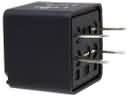 Chevrolet Relay
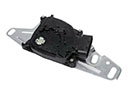 Chevrolet Automatic Transmission Shift Position Sensor Switch
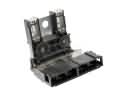 Chevrolet Battery Fuse
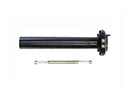 Chevrolet Ignition Coil Boot
Browse Chevrolet Oxygen Sensor by Models
Nova S10 Colorado Tahoe Cruze Malibu Camaro Equinox Impala SS SSR Avalanche Silverado 1500 Silverado 2500 HD Caprice Classic Cobalt Suburban Traverse Blazer HHR Sonic Tracker Volt Spark Trax Trailblazer Astro Cavalier Corvette Aveo Beretta C1500 C2500 C3500 City Express Corsica Express 1500 Express 2500 Express 3500 G10 G20 G30 K1500 K2500 K3500 Lumina Metro Monte Carlo P30 Prizm S10 Blazer Silverado 2500 Sprint Uplander Venture Lumina APV Silverado 3500 Suburban 1500 Trailblazer EXT Avalanche 1500 Avalanche 2500 Aveo5 C1500 Suburban C2500 Suburban Captiva Sport Cruze Limited Impala Limited K1500 Suburban K2500 Suburban Malibu Limited Silverado 1500 Classic Silverado 1500 HD Silverado 1500 HD Classic Silverado 1500 LD Silverado 1500 LTD Silverado 2500 HD Classic Silverado 3500 Classic Silverado 3500 HD Spark EV Spectrum Suburban 2500 Suburban 3500 HD