ChevyParts
My Garage
My Account
Cart
OEM Chevrolet Suburban 1500 Idler Arm
Steering Idler Arm- Select Vehicle by Model
- Select Vehicle by VIN
Select Vehicle by Model
orMake
Model
Year
Select Vehicle by VIN
For the most accurate results, select vehicle by your VIN (Vehicle Identification Number).
5 Idler Arms found


Chevrolet Suburban 1500 Idler Arm Part Number: 19153392
$164.19 MSRP: $281.96You Save: $117.77 (42%)

Chevrolet Suburban 1500 Idler Arm Part Number: 19149615
$90.68 MSRP: $154.38You Save: $63.70 (42%)Ships in 1-2 Business Days

Chevrolet Suburban 1500 Pitman Arm Part Number: 12479051
$45.98 MSRP: $112.19You Save: $66.21 (60%)Ships in 1-2 Business Days

Chevrolet Suburban 1500 Pitman Arm Part Number: 12471379
$90.68 MSRP: $154.38You Save: $63.70 (42%)Ships in 1-2 Business Days
Chevrolet Suburban 1500 Pitman Arm Part Number: 19434290
$45.98 MSRP: $112.19You Save: $66.21 (60%)Ships in 1-2 Business Days
Chevrolet Suburban 1500 Idler Arm
Want to cut long-term maintenance and repair costs? Choose OEM Idler Arm. Those parts deliver top durability you can trust. On our site, you'll find a huge catalog of genuine Chevrolet Suburban 1500 parts. Prices are unbeatable, so you can keep more in your pocket. Every OEM Chevrolet Suburban 1500 Idler Arm includes a manufacturer's warranty. You can also get an easy return policy that keeps buying risk free. Fast delivery, get your car on the road quickly. It's simple to search, compare, and order. Stop guessing about quality or fit. Order today and save with parts that last.
Chevrolet Suburban 1500 Idler Arm Parts Questions & Experts Answers
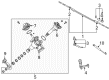
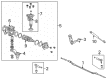
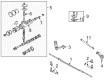
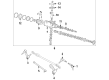
- Q: How to service and repair the idler arm on Chevrolet Suburban 1500?A:First, lift the vehicle and put jack stands underneath it to work on the idler arm. Lift out the differential carrier shield, then go on to remove the idler arm ball stud nut (10), without reusing it. First, disconnect the idler arm (1) from the relay rod (9) using the J 24319-01. After that, uninstall the idler arm (2) from the car by taking out the nuts (1) and bolts (3). Install the idler arm (2) onto the frame and put in the frame bolts (3), then screw in the nuts (1) and tighten them to 99 Nm (73 ft. lbs.). Screw on the relay rod (9) to the idler arm ball stud (1), so the seal is positioned appropriately and tighten them with J 29193 or J 29194 to reach 54 Nm (40 ft. lbs.) which will seat the tapers properly. Get rid of the twist-lock nut and add the idler arm ball stud prevailing torque nut (10) to the idler arm ball stud (1), making sure it is tightened to 62 Nm (46 ft. lbs.). After that, reinstall the carrier shield, bring the vehicle down and adjust the way the wheels are angled at the front.

Related Chevrolet Suburban 1500 Parts
 Chevrolet Suburban 1500 Center Link
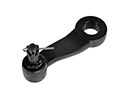 Chevrolet Suburban 1500 Pitman Arm
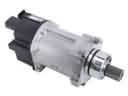 Chevrolet Suburban 1500 Power Steering Assist Motor
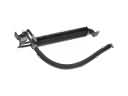 Chevrolet Suburban 1500 Power Steering Cooler
 Chevrolet Suburban 1500 Power Steering Hose
 Chevrolet Suburban 1500 Power Steering Pump
 Chevrolet Suburban 1500 Power Steering Reservoir
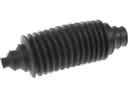 Chevrolet Suburban 1500 Rack and Pinion Boot
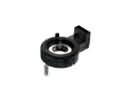 Chevrolet Suburban 1500 Steering Angle Sensor
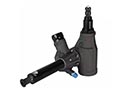 Chevrolet Suburban 1500 Steering Gearbox
 Chevrolet Suburban 1500 Tie Rod
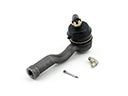 Chevrolet Suburban 1500 Tie Rod End